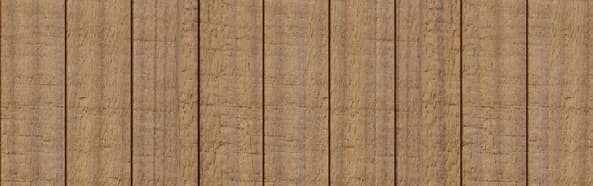
Understanding Thermally Modified Radiata for Window Details
Thermally modified Radiata is selected for a clear, consistent grain, making it suitable for modern, continuous installations. Its improved stability, resulting from the thermal modification process, means it has a lower moisture response compared to unmodified wood. This characteristic is beneficial for exterior applications where consistent performance around openings is crucial. The material is versatile, available in various profiles, including Nickel Gap for siding and S4S E4E for trim and moulding, which can be coordinated for a cohesive look around windows.
When planning window details, the 'Clear appearance' and 'Detail flexibility' of thermally modified Radiata are key advantages. The clean surface allows for precise cuts and finishes, while the ability to custom mill profiles means that trim, slats, and field profiles can be perfectly matched. This flexibility is important for creating tight, weather-resistant joints and a visually appealing transition from cladding to window.
The Role of Flashing in Window Assemblies
Flashing is the first line of defense against water intrusion around windows. Before any cladding is installed, proper flashing must be in place to direct water away from the window opening and the wall assembly. This typically includes sill flashing, jamb flashing, and head flashing, often integrated with a weather-resistive barrier.
When installing thermally modified Radiata, ensure that the cladding does not interfere with the intended function of the flashing. The cladding should overlap the flashing in a shingle-lap fashion, allowing gravity to shed water outwards. Incorrect flashing or cladding installation can trap moisture, leading to potential issues even with stable materials like thermally modified Radiata.
Choosing Trim Returns and Jamb Details
The way cladding terminates at the window jambs and heads significantly impacts both appearance and weather performance. Common approaches include butt joints against a trim board, mitered returns, or using a channel system.
For thermally modified Radiata, especially with a 'Nickel Gap' profile, a clean butt joint against a flat trim board (often an S4S E4E profile of the same material) can provide a contemporary look. If using trim, ensure it is adequately sized to create a drip edge at the sill and to allow for proper sealing. Mitered returns can offer a seamless appearance, but require precise cuts and careful sealing to prevent water penetration at the mitered joint. Consider the 'Detail flexibility' of thermally modified Radiata to achieve these precise finishes.
Ensuring Proper Drainage Paths
Effective drainage is paramount around windows. Water must be able to escape any cavity behind the cladding and be directed away from the window frame. This involves creating a clear path for water to drain down and out, typically at the sill.
Cladding should never be installed tight against the window frame or sill. A small gap, often referred to as a weep gap, is necessary at the bottom of the window to allow trapped moisture to escape. This gap should be protected by flashing and can be concealed by a drip edge on the sill trim. For a rainscreen assembly, the ventilation gap behind the cladding itself facilitates drainage and drying of the wall cavity.
Worked Example: Detailing a Window with Nickel Gap Cladding
We will assume a rainscreen assembly with furring strips.
1. **Flashing Installation:** Before any wood installation, a continuous weather-resistive barrier is applied to the wall sheathing. Sill flashing extends beyond the rough opening, integrated with the barrier. Jamb flashing overlaps the sill flashing, and head flashing overlaps the jamb flashing, all shingle-lapped to shed water.
2. **Window Installation:** The window unit is installed and sealed according to manufacturer instructions, ensuring a watertight seal to the flashing.
3. **Trim Installation:** The 1x8 S4S E4E trim boards are cut and installed around the window. The sill trim piece is cut to extend past the jambs, creating a drip edge. Jamb trim pieces butt into the sill trim. Head trim overlaps the jamb trim. All trim is installed with a slight slope on horizontal surfaces (like the top of the sill trim) to promote drainage.
As the cladding approaches the window, pieces are cut to butt cleanly against the vertical jamb trim. These gaps allow for expansion/contraction and drainage. Where the cladding meets the side jambs, it should not obstruct the flashing or create an area for water to pool.
Care is taken not to seal the weep gaps at the bottom of the sill or at the base of the cladding, which are essential for drainage. The 'Clear appearance' of the Radiata allows for precise cuts, making these transitions clean and professional.
Before you order
- Confirm flashing details and sequence with your contractor or installer.
- Select appropriate thermally modified Radiata profiles for both cladding and trim (e.g., Nickel Gap for cladding, S4S E4E for trim).
- Determine the desired trim return style (butt joint, mitered, channel).
- Plan for drainage gaps at the sill and head of the window opening.
- Specify sealant type and application locations, ensuring weep paths remain open.
- Verify compatibility of all materials (cladding, trim, fasteners, sealants) with thermally modified Radiata.
- Consider creating a small mock-up for one window detail to confirm appearance and constructability before full installation.
Confirm installation details, approved uses and warranty terms in the current instructions for the exact product and profile. Your installer should verify the substrate, structure and applicable project requirements.
Questions to help you decide
What is the best way to prevent water intrusion around windows with thermally modified Radiata cladding?
The most effective way is to ensure proper flashing installation beneath the cladding, integrated with a weather-resistive barrier, before any wood is installed. The cladding should then be installed in a shingle-lap fashion over the flashing, with appropriate drainage gaps and sealed joints where necessary, but never in a way that traps water.
Can I use thermally modified Radiata for both the cladding and the window trim?
Yes, thermally modified Radiata is available in profiles suitable for both cladding (such as Nickel Gap) and trim or moulding (S4S E4E). Using the same material for both can create a cohesive look and offers consistent performance characteristics, leveraging its 'Clear appearance' and 'Detail flexibility'.
Are there specific considerations for horizontal versus vertical cladding around windows?
While the principles of flashing and drainage remain the same, horizontal cladding will naturally shed water along its courses, requiring careful attention to how these courses terminate at the vertical window jambs. Vertical cladding, on the other hand, needs careful detailing at the head and sill to ensure water running down the boards is effectively diverted away from the window opening and not trapped behind a horizontal trim piece.
Ready to Plan Your Thermally Modified Radiata Project?
Request a material quote with your project dimensions, exact profile, and ZIP code to confirm current availability and service options for thermally modified Radiata. Explore our range of siding, ceilings, soffits, and decking materials today.
Request a material quote →