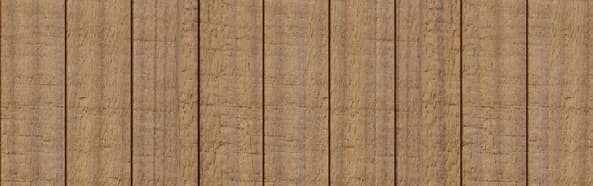
Understanding Thermally Modified Clear Radiata
Thermally Modified Clear Radiata is a wood product chosen for its clean, consistent grain and enhanced stability. The thermal modification process improves the wood's resistance to moisture changes, making it suitable for a range of applications where a stable, contemporary surface is desired. Its understated grain pattern makes it a versatile choice for continuous architectural lines.
Common applications for Thermally Modified Clear Radiata include exterior cladding, interior ceilings, decking, and various trim and molding elements. This versatility means it can be coordinated across different parts of a project for a cohesive look. Larger S4S E4E profiles like 1x8, 1x12, or 2x6 are suitable for trim and molding.
The clear appearance of Thermally Modified Clear Radiata contributes to its appeal for modern installations, offering a restrained surface. Its improved stability compared to unmodified wood is a key benefit, especially in environments where moisture fluctuations are a concern. The material also offers flexibility for custom milling, allowing for coordination of slats, trim, and field profiles to achieve specific design details.
Material Takeoff: Estimating Your Radiata Quantity
The first step in budgeting is an accurate material takeoff. This involves carefully measuring the areas where Thermally Modified Clear Radiata will be installed and calculating the required quantity. Always account for waste from cuts, defects, and installation errors. A common practice is to add 10-15% to your net area calculation for waste, though complex designs or angled cuts may require more.
For cladding or ceiling applications using a profile like Nickel Gap, you'll need to calculate the total square footage of the surface. For decking, determine the total square footage and then factor in the board width and spacing. For trim or molding, measure the linear feet required.
The nominal size is 1 inch by 6 inches, though the actual installed width will be slightly less due to the profile. To cover this, you would need 240 sq ft / (5.5 inches / 12 inches/foot) = 523.64 linear feet of material. Adding a 15% waste factor, you would need approximately 602 linear feet. Since material is typically sold in standard lengths, you would round up to the nearest full board lengths to achieve this total.
Beyond the Boards: Accessories and Fasteners
Your budget must include all necessary accessories. For exterior applications, this might mean specialized fasteners, rainscreen components, flashing, and sealants. For decking, consider deck screws, hidden fastening systems, and joist tape. Trim and molding may require specific adhesives or finishing nails.
For the accent wall example, consider the fasteners. If using a face-fastened approach, you'll need screws or nails appropriate for exterior wood applications. If studs are 16 inches on center, a 20-foot wall has approximately 15 stud lines. Always check manufacturer recommendations for fastener type, length, and spacing to ensure proper installation and performance.
Other accessories might include a vapor barrier or house wrap behind the cladding, furring strips for a rainscreen system, or specialized trim pieces for corners and edges. These items can add significant cost and should be quantified based on your project's specific design and local building practices. For decking, consider pedestals or sleepers if installing over a waterproof membrane, or specialized clips for hidden fastening systems.
Labor Costs: Professional Installation or DIY?
Labor is often the largest component of a project budget. If you plan to hire a professional contractor, obtain detailed quotes that break down labor costs, including preparation, installation, and cleanup. These quotes should specify whether they include material procurement and disposal.
Factors influencing labor costs include the complexity of the installation (e.g., intricate patterns, multiple cuts, difficult access), the experience level of the crew, and local wage rates. For our accent wall, a professional installer might charge based on square footage or a fixed bid for the entire job. It's crucial to get at least three competitive bids to compare services and pricing.
If you're undertaking a DIY project, remember to factor in the cost of tool rentals (saws, drills, levels), safety equipment, and your own time. While DIY can save on direct labor costs, it requires skill, time commitment, and a thorough understanding of proper installation techniques to ensure a durable and aesthetically pleasing result. Incorrect installation can lead to material waste and potential performance issues down the line.
Finishing and Maintenance Materials
While Thermally Modified Clear Radiata offers improved stability, you might choose to apply a finish for aesthetic reasons or additional protection against UV exposure. If you opt for a finish, factor in the cost of the stain, sealer, or paint, as well as application tools like brushes, rollers, or sprayers. Some finishes may require multiple coats, increasing both material and labor time.
Remember that any applied finish will require periodic reapplication to maintain its appearance and protective qualities. Include the cost of these future maintenance materials in your long-term budget planning. If left unfinished, Thermally Modified Clear Radiata will naturally weather to a silver-gray patina over time. Decide whether this natural aging aligns with your aesthetic goals before committing to a finish.
For our accent wall, if a UV-protective oil finish is desired, research the coverage rate of the chosen product. Don't forget rags, painter's tape, and drop cloths for a clean application.
Contingency and Unforeseen Costs
No project budget is complete without a contingency fund. Unexpected issues can arise, such as damaged material, installation errors, changes in design, or unforeseen site conditions. A common recommendation is to allocate 10-20% of your total project cost as a contingency.
Build this part of the estimate from the current supplier quote. Record the exact product, quoted unit, quantity, compatible accessories and delivery costs separately so assumptions do not become advertised prices.
Before you order
- Have you accurately measured all project areas for Thermally Modified Clear Radiata?
- Have you added a waste factor (10-15%) to your material quantities?
- Have you identified all necessary fasteners, clips, and installation accessories?
- Have you obtained multiple quotes from qualified contractors for labor, if applicable?
- Have you budgeted for any desired finishes (stains, sealers) and their reapplication?
- Have you allocated a contingency fund (10-20% of total cost) for unexpected expenses?
- Have you considered tool rental costs for DIY projects?
- Have you factored in delivery costs for materials?
- Have you planned for disposal of waste materials?
Confirm installation details, approved uses and warranty terms in the current instructions for the exact product and profile. Your installer should verify the substrate, structure and applicable project requirements.
Questions to help you decide
What is the typical waste factor for Thermally Modified Clear Radiata?
A typical waste factor for Thermally Modified Clear Radiata projects ranges from 10-15%. However, for complex designs, intricate cuts, or projects with many angles, it may be prudent to increase this to 20% to account for additional material loss during cutting and installation.
Does Thermally Modified Clear Radiata require a finish?
Thermally Modified Clear Radiata does not require a finish for durability, as the thermal modification process enhances its stability. However, if you desire to maintain its initial color or protect it from UV graying, applying a suitable exterior finish is recommended. If left unfinished, the wood will naturally weather to a silver-gray patina over time.
How do I account for different profiles in my budget?
Different profiles of Thermally Modified Clear Radiata, such as Nickel Gap or S4S E4E, will have varying coverage rates and potentially different pricing per linear foot or square foot. It's crucial to use the effective coverage width for each specific profile when calculating your material quantities. Confirm the exact profile and its dimensions when requesting a quote.
Request a Material Quote for Your Thermally Modified Radiata Project
Ready to bring your vision to life? Contact us with your project dimensions, desired Thermally Modified Clear Radiata profile, and your ZIP code. We'll help you confirm current availability and service options, and provide a detailed material quote to get your project planning started. Visit our contact page to begin.
Request a material quote →