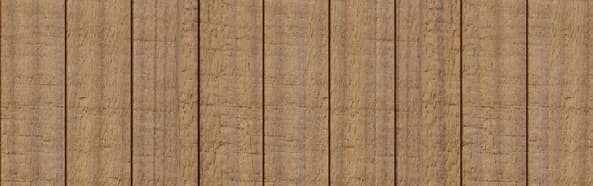
Why Choose a Vertical Layout?
A vertical cladding orientation can visually extend the height of a structure, making a single-story building appear taller or emphasizing the grandeur of a multi-story facade. It draws the eye upward, creating a dynamic and modern aesthetic. For interior applications, vertical lines can make a room feel more expansive and sophisticated.
Thermally Modified Clear Radiata, with its restrained surface and continuous grain, is well-suited for vertical applications where a clean, uninterrupted line is desired. The thermal modification process enhances its stability, which is beneficial for maintaining consistent lines in a vertical installation.
This approach can also offer practical advantages in certain rainscreen systems, promoting efficient water drainage down the face of the cladding, though the primary function of a rainscreen is to manage water behind the cladding.
Substructure Requirements for Vertical Cladding
Unlike horizontal cladding, which often relies on horizontal furring strips directly over sheathing, vertical cladding requires a different substructure to ensure proper fastening and airflow. For a vertical layout, you will typically need a system of horizontal furring strips or battens installed first, followed by vertical furring strips.
The initial horizontal furring creates an air gap behind the cladding, essential for drainage and ventilation in rainscreen assemblies. These horizontal strips are fastened directly to the structural sheathing or studs. Over these, vertical furring strips are then installed, providing the continuous backing needed to fasten the vertical cladding boards.
The spacing of the vertical furring strips must align with the fastening requirements of your chosen Thermally Modified Clear Radiata profile, ensuring that each board is adequately supported and secured. Generally, these vertical supports should be spaced to accommodate the specific width of the cladding and any required intermediate fasteners.
Choosing the Right Profile for Vertical Installation
Thermally Modified Clear Radiata is available in several profiles suitable for cladding. This profile is designed for siding and ceiling applications.
The "S4S E4E" (Surfaced Four Sides, Eased Four Edges) profile, available in various nominal sizes like 1 × 8, 1 × 12, or 2 × 6, can also be used for vertical trim or custom slat systems where a specific reveal or joint detail is planned. The choice depends on the desired visual effect and the specific detailing for joints and corners.
Consider how the chosen profile will manage water. While Thermally Modified Radiata is stable, proper detailing at joints and terminations is crucial for long-term performance, especially in exposed vertical applications. The profile's design should contribute to the overall rainscreen strategy.
Installation Details: Starting, Finishing, and Corners
Starting a vertical cladding installation typically involves establishing a level and plumb base line. The first board must be perfectly vertical, as it sets the alignment for the entire wall. Use a plumb bob or laser level to ensure accuracy. Fastening methods should follow manufacturer recommendations, often involving face fastening or concealed clips depending on the profile.
At the top and bottom of the wall, careful detailing is necessary for water management. The bottom edge of vertical cladding should have adequate clearance from grade or other horizontal surfaces to prevent moisture wicking and allow for drainage. A drip edge or flashing can direct water away from the wall assembly.
For corners, you can choose between mitered corners for a seamless look, or using trim boards to create a framed appearance. Mitered corners require precise cuts and careful alignment, while trim boards offer a more robust edge and can simplify installation. Ensure all cut ends are properly sealed if a finish is applied.
Worked Example: Vertical Cladding for a Feature Wall
This profile has a typical installed face width of approximately 5.5 inches.
First, determine the number of cladding boards needed: 10 feet (120 inches) / 5.5 inches per board = approximately 21.8 boards. You would purchase 22 boards, each 8 feet long. To account for cuts and waste, it is prudent to add a waste factor, typically 5-10%. For 22 boards, consider ordering 24 boards (22 * 1.09 = 24).
Over these, vertical furring strips (e.g., 1x3s) would be installed at a maximum of 24 inches on center horizontally to support the 5.5-inch wide cladding boards. This ensures at least two fastening points per board across its width.
The total area is 80 square feet. Again, rounding up and adding waste suggests purchasing 24 boards.
This example assumes standard board lengths and minimal complex cuts. Always verify actual board dimensions and factoring in specific project complexities like windows or doors will impact waste calculations.
Maintenance and Longevity in Vertical Applications
Thermally Modified Clear Radiata offers improved stability and durability compared to unmodified wood, making it suitable for exterior applications. However, like all wood products, it will undergo natural weathering over time, especially when exposed to UV light and moisture. This will typically result in a silver-gray patina.
If you wish to maintain the original appearance or a specific color, a UV-inhibiting finish or stain can be applied. For vertical installations, finishes may experience less wear from foot traffic or direct splashing compared to horizontal surfaces, but regular inspection and reapplication according to the finish manufacturer's instructions are still necessary.
Ensure that the design allows for adequate ventilation behind the cladding and efficient drainage of water from the face of the wall. This helps prevent moisture accumulation, which can affect the long-term performance of the wood and the overall wall assembly.
Before you order
- Confirm local building codes for vertical cladding and rainscreen requirements.
- Verify the structural capacity of the wall to support the cladding and substructure.
- Select a Thermally Modified Clear Radiata profile suitable for vertical installation and desired aesthetic.
- Plan the horizontal and vertical furring strip layout to ensure adequate support and airflow.
- Detail all start and finish points, including base clearance, drip edges, and top flashing.
- Decide on corner treatment (mitered vs. trim boards).
- Calculate material quantities, including cladding boards, furring strips, fasteners, and a waste factor.
- Consider the long-term appearance: natural weathering versus applied finishes.
- Plan for access for future maintenance or finishing.
- Review specific fastening instructions for your chosen Thermally Modified Clear Radiata profile.
Confirm installation details, approved uses and warranty terms in the current instructions for the exact product and profile. Your installer should verify the substrate, structure and applicable project requirements.
Questions to help you decide
Can Thermally Modified Radiata be installed directly onto studs for a vertical layout?
No, for a durable and well-performing vertical cladding system, Thermally Modified Radiata should not be installed directly onto studs. A substructure of horizontal and then vertical furring strips is recommended. This creates an essential air gap behind the cladding, which allows for drainage and ventilation, crucial components of a rainscreen system that helps prevent moisture accumulation and extends the life of the cladding.
What kind of fasteners are best for vertical Thermally Modified Radiata cladding?
The best fasteners depend on the specific Thermally Modified Radiata profile chosen. For face-fastened profiles like Nickel Gap, corrosion-resistant screws or nails, often stainless steel, are typically recommended. For profiles designed for concealed fastening, specific clips or hidden fasteners will be required. Always refer to the manufacturer's installation guidelines for the exact fastening requirements to ensure proper performance and warranty compliance.
How do I ensure good drainage at the bottom of a vertical cladding wall?
Good drainage at the base of a vertical cladding wall is critical. Installing a properly sloped drip edge or flashing at the base of the wall assembly will direct water away from the foundation and prevent it from wicking up into the cladding or wall structure. Ensure the air gap behind the cladding is open at the bottom to allow moisture to exit.
Ready to Plan Your Vertical Thermally Modified Radiata Project?
Request a material quote today with your project dimensions, exact profile, and ZIP code. We can help confirm current availability and service options for your design.
Request a material quote →