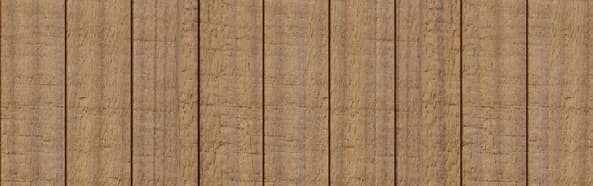
Understanding Thermally Modified Clear Radiata
Thermally Modified Clear Radiata is specifically chosen for its clean, consistent grain, which provides a restrained surface suitable for modern architectural lines. The thermal modification process enhances the wood's stability by reducing its response to moisture fluctuations compared to unmodified material. This makes it a suitable choice for various applications, including siding, ceilings, soffits, and custom slat systems.
The material is sourced from responsibly managed plantations, offering a contemporary appearance with improved dimensional stability. It is available in profiles such as Nickel Gap x Square Back for siding and ceilings, and S4S E4E for decking, trim, and moulding, allowing for design flexibility across different project details.
Initial Wall Inspection and Damage Assessment
Before considering any new siding, a comprehensive inspection of your existing wall is crucial. Look for signs of water damage, such as staining, rot, or mildew, particularly around windows, doors, and rooflines. Check for loose or damaged existing siding, compromised flashing, or areas where moisture may have penetrated. Any detected damage must be addressed and repaired before new material is installed to prevent future issues.
Assess the structural integrity of the wall. Ensure the framing is sound and free from rot or insect damage. If the existing wall has an exterior finish, determine if it needs to be fully removed or if the new siding can be installed over it, considering the implications for wall thickness, window/door trim, and overall aesthetic. Document all findings, as this will inform your material and installation choices.
Preparing the Substrate for Installation
The quality of your substrate directly impacts the performance and appearance of your new Thermally Modified Radiata siding. For exterior applications, a properly installed weather-resistive barrier (WRB) is essential to protect the wall assembly from moisture intrusion. Ensure the WRB is continuous, properly lapped, and sealed around openings.
For a rainscreen assembly, which is often recommended for exterior wood siding, consider the need for furring strips to create an air gap behind the siding. This gap promotes drainage and ventilation, helping to extend the life of the siding and the wall assembly. The furring strips should be installed plumb and level, providing a consistent plane for the new siding. For interior applications, ensure the substrate is clean, dry, and flat.
Choosing the Right Profile and Layout
Thermally Modified Clear Radiata is available in several profiles. Other S4S E4E profiles are suitable for trim and moulding, allowing for coordinated architectural details.
Consider the desired aesthetic and the architectural style of your project. A horizontal layout can make a structure appear wider, while a vertical layout can emphasize height. Plan the placement of joints and ensure that the layout accounts for openings like windows and doors, minimizing waste and ensuring a professional finish. Sketching out the layout can help visualize the final appearance and identify potential challenges.
Worked Example: Retrofitting an Exterior Wall Section
Assume the existing stucco is in poor condition and needs removal, revealing the sheathing.
First, remove the stucco and inspect the underlying sheathing and framing for any damage. Repair as needed. Install a new weather-resistive barrier, ensuring proper overlaps and flashing at the top and bottom, and around any penetrations. Next, install vertical furring strips (e.g., 3/4-inch thick) at 16 or 24 inches on center, secured into the wall studs. These strips create the rainscreen gap.
For an 8-foot (96-inch) tall wall, you would need 96 inches / 5.5 inches per board = approximately 17.45 boards vertically. This means 18 full boards are needed for the height. For the 10-foot (120-inch) width, if using 10-foot long boards, you would need 18 boards. This example assumes a simple, uninterrupted wall section. Real projects will require careful measurement around windows, doors, and corners.
Before you order
- Have you thoroughly inspected the existing wall for damage (water, rot, insects)?
- Are all necessary repairs to the substrate (framing, sheathing) completed?
- Is a weather-resistive barrier properly installed and sealed for exterior applications?
- Have you considered a rainscreen assembly for exterior walls to ensure ventilation and drainage?
- Which Thermally Modified Radiata profile best suits your aesthetic and application?
- Have you planned the siding layout (horizontal/vertical) to optimize material use and visual appeal?
- Have you accounted for trim, corners, windows, and doors in your material take-off?
- Do you have a clear understanding of the fastening requirements for the chosen profile and substrate?
Confirm installation details, approved uses and warranty terms in the current instructions for the exact product and profile. Your installer should verify the substrate, structure and applicable project requirements.
Questions to help you decide
Can Thermally Modified Radiata be installed directly over existing siding?
Generally, it is recommended to remove old siding to properly inspect and prepare the substrate, install a new weather-resistive barrier, and ensure a flat, stable surface. Installing over existing siding can complicate flashing, trim details, and may not allow for a proper rainscreen assembly, potentially trapping moisture.
What kind of fasteners should I use for Thermally Modified Radiata siding?
The type of fasteners depends on the specific profile, application (interior/exterior), and local building codes. Stainless steel fasteners are often recommended for exterior applications to prevent corrosion and staining of the wood. Consult manufacturer guidelines for specific fastener recommendations and installation techniques for your chosen profile.
How does thermal modification benefit Radiata pine in a retrofit?
Thermal modification improves the dimensional stability of Radiata pine, making it less prone to swelling and shrinking in response to changes in humidity. This enhanced stability helps maintain the integrity of the siding installation over time, reducing the likelihood of gaps, warping, or fastener pulling. It also contributes to a cleaner, more consistent appearance.
Ready to Transform Your Wall with Thermally Modified Radiata?
Request a material quote today. Provide your project dimensions, desired profile, and ZIP code to confirm current availability and service options for Thermally Modified Clear Radiata siding. Explore our selection of <a href="/siding-and-cladding">siding and cladding</a>, <a href="/thermally-modified-wood">thermally modified wood</a>, and <a href="/brands/norx">NORX products</a>. You might also consider <a href="/products/maximo-accoya">Maximo Accoya</a> for other exterior applications.
Request a material quote →