What is a Rainscreen Assembly?
A rainscreen assembly is an exterior wall system designed to protect a building from water penetration by creating a gap between the cladding and the structural wall. This gap, known as the drainage cavity, allows any moisture that bypasses the cladding to drain away and promotes airflow to dry out the wall components. This system is particularly beneficial in climates with significant rainfall or humidity, as it helps prevent moisture accumulation that can lead to mold, rot, and other structural issues over time.
The primary components of a rainscreen assembly typically include a weather-resistive barrier (WRB) applied directly to the sheathing, furring strips or a similar method to create the drainage cavity, and the exterior cladding material. Each component plays a vital role in the overall performance of the wall.
The Role of Thermally Modified Clear Radiata in Rainscreen Systems
Thermally Modified Clear Radiata is a suitable choice for rainscreen cladding due to its inherent properties. Through thermal modification, Pinus radiata wood is heated to high temperatures in an oxygen-free environment, which alters its cellular structure. This process results in improved stability and lower moisture response compared to unmodified wood.
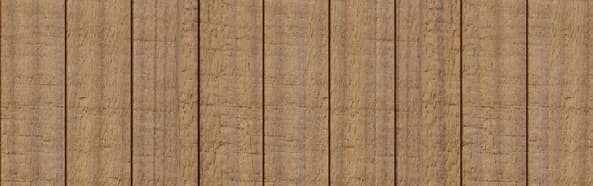
The clear appearance and consistent grain of Thermally Modified Clear Radiata make it a popular choice for modern architectural lines on exterior walls. Its enhanced dimensional stability means it is less prone to expansion and contraction with changes in humidity, which is an advantage for maintaining the integrity of the cladding within a rainscreen system.
The material is also available in S4S E4E (5/4x6, 2x6 nominal sizes) which can be used for detailing or custom slat systems, allowing for design flexibility within the rainscreen framework. For more details on available profiles, visit the Thermally Modified Radiata product page.
Essential Rainscreen Components: Weather Barrier and Drainage Cavity
The weather-resistive barrier (WRB) is the first line of defense against moisture. It is applied over the exterior sheathing and acts as a secondary waterproof layer, preventing water that penetrates the cladding and drainage cavity from reaching the building's interior. Choosing a WRB that is vapor-permeable is often recommended, as it allows moisture vapor from inside the wall to escape, preventing condensation buildup.
The drainage cavity is created by installing furring strips or a dimpled mat product over the WRB before the cladding is attached. This cavity, typically 3/4 inch to 1.5 inches deep, is crucial. It provides a clear path for water to drain down and out of the wall assembly at the base. It also allows air circulation, which helps dry any incidental moisture and contributes to the overall thermal performance of the wall.
The depth of the drainage cavity is important; a deeper cavity generally offers better drainage and ventilation. Ensure that the design includes proper insect screening at the top and bottom of the cavity to prevent pests from entering while still allowing airflow and drainage.
Worked Example: Designing a Rainscreen Wall with Thermally Modified Clear Radiata
The goal is a robust rainscreen assembly.
1. **Substrate and Sheathing:** The wall begins with standard exterior sheathing (e.g., OSB or plywood) attached to the wall studs.
2. **Weather-Resistive Barrier (WRB):** A continuous layer of a vapor-permeable WRB is applied over the sheathing, shingle-lapped to shed water. All seams are taped according to manufacturer instructions.
3. **Vertical Furring Strips:** To create the drainage cavity for horizontal cladding, vertical furring strips are installed over the WRB. For a 3/4-inch cavity, use 1x3 (nominal) thermally modified wood strips, fastened through the WRB into the studs. These strips should be spaced to align with the cladding's fastening points, typically 16 inches or 24 inches on center. Ensure a gap at the top and bottom for ventilation and drainage.
4. **Insect Screening:** Install insect screening (e.g., stainless steel mesh) at the bottom of the furring strips, behind the starter trim, and at the top, behind the soffit or coping, to prevent pests from entering the cavity.
The Nickel Gap profile naturally creates a consistent shadow line and allows for some differential movement between boards. Fasteners should be corrosion-resistant and appropriate for exterior wood applications. For a 10-foot wide wall, you would need cladding boards spanning this length, or join boards with appropriate detailing over a furring strip.
6. **Flashing and Trim:** Integrate flashing details around windows, doors, and at the base and top of the wall to direct water away from the assembly. Use trim pieces, potentially custom-milled from Thermally Modified Clear Radiata in S4S E4E profile, to finish corners and openings, ensuring these elements do not obstruct drainage or ventilation within the cavity. The base of the wall should have a starter trim that allows for drainage from the cavity.
Considerations for Coastal and Winter Climates
In coastal environments, the elevated humidity, salt spray, and potential for wind-driven rain make robust rainscreen design even more critical. The drainage cavity must be effectively ventilated to cope with persistent moisture, and all fasteners and flashing materials should be highly corrosion-resistant. Thermally Modified Clear Radiata's improved stability is beneficial in these fluctuating conditions.
For winter climates, managing moisture within the wall assembly is also paramount. While rainscreens are often associated with rain, they also help manage meltwater and condensation. Ensuring the WRB is properly installed and sealed, and that the drainage cavity remains clear of obstructions (like ice dams), contributes to the long-term performance of the facade in freezing conditions. Adequate ventilation also helps prevent frost buildup within the cavity.
Complementary Products for Your Rainscreen Project
Beyond the Thermally Modified Clear Radiata cladding itself, several other products can complement your rainscreen assembly:
**Siding and Cladding Accessories:** Explore various siding and cladding options at our Siding and Cladding page to ensure you have all necessary trim, corner boards, and starter strips.
**Other Thermally Modified Wood Options:** Discover other thermally modified wood species for different aesthetics or project requirements on our Thermally Modified Wood page.
**NORX Fasteners:** For reliable installation, consider NORX brand fasteners, designed for exterior applications and compatible with thermally modified wood. (Note: Always verify specific fastener compatibility with your chosen cladding and substrate.)
**Maximo Accoya Products:** For projects requiring exceptionally high durability and dimensional stability, consider Maximo Accoya products, which can also be integrated into rainscreen systems. Visit the Maximo Accoya page for more information.
Before you order
- Confirm local building codes and requirements for rainscreen assemblies.
- Select a weather-resistive barrier (WRB) appropriate for your climate and wall assembly.
- Determine the desired depth of the drainage cavity (e.g., 3/4 inch to 1.5 inches).
- Choose appropriate furring strip material and dimensions (e.g., thermally modified wood 1x3 nominal).
- Plan for continuous insect screening at the top and bottom of the drainage cavity.
- Specify corrosion-resistant fasteners suitable for exterior wood and local climate.
- Detail all flashing around openings and at the base/top of the wall to ensure proper drainage.
- Consider the aesthetic impact of furring strips if using an open-joint cladding system (not applicable for Nickel Gap).
- Plan for any custom milling needs for trim or detailing using Thermally Modified Clear Radiata S4S E4E.
- Review installation instructions for both the WRB and the cladding manufacturer.
Confirm installation details, approved uses and warranty terms in the current instructions for the exact product and profile. Your installer should verify the substrate, structure and applicable project requirements.
Questions to help you decide
Why is a drainage cavity important in a rainscreen?
The drainage cavity provides a pathway for any water that penetrates the exterior cladding to drain away from the wall structure. It also promotes airflow, which helps to dry out moisture within the wall assembly, reducing the risk of mold, rot, and other moisture-related damage.
Can Thermally Modified Clear Radiata be installed directly to sheathing?
While Thermally Modified Clear Radiata has improved stability, installing it directly to sheathing without a drainage cavity is not recommended for most exterior cladding applications. A rainscreen assembly with a drainage cavity and weather-resistive barrier provides superior moisture management and ventilation, contributing to the longevity of the cladding and the entire wall system.
What type of fasteners should be used with Thermally Modified Clear Radiata in a rainscreen?
It is crucial to use corrosion-resistant fasteners, such as stainless steel, when installing Thermally Modified Clear Radiata cladding in a rainscreen assembly. This prevents staining of the wood and ensures the long-term integrity of the fastening system, especially in environments exposed to moisture or salt air. Always consult the cladding manufacturer's recommendations for specific fastener types and sizes.
Ready to Plan Your Rainscreen Project?
Request a material quote with your project dimensions, exact Thermally Modified Clear Radiata profile, and ZIP code to confirm current availability and service options for your rainscreen assembly. Our team can help you specify the right materials for a durable and aesthetically pleasing facade.
Request a material quote →