Why Build a Material Mock-Up?
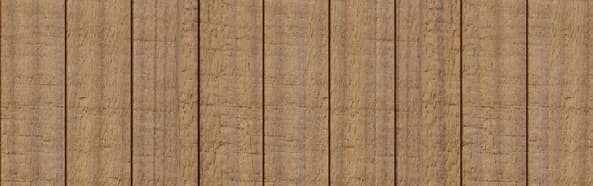
A mock-up is more than just a large sample; it's a small-scale construction that replicates key aspects of your project. For thermally modified Radiata cladding, this means seeing how the clear, consistent grain of the wood appears in different lighting conditions, how shadow lines from specific profiles interact, and how the material integrates with adjacent elements.
This process helps in visualizing the overall aesthetic, assessing the practicality of chosen installation methods for complex areas, and confirming material compatibility and detailing before significant material orders and installation begin. It's particularly valuable for custom milling options, where coordinating slats, trim, and field profiles is essential for a cohesive design.
Key Areas to Include in Your Mock-Up
To maximize the utility of your mock-up, focus on areas that present design or installation complexities. These typically include:
Corners: Evaluate how inside and outside corners are finished. Consider mitered joints, butt joints with trim, or corner boards. The mock-up can help you decide if the chosen method achieves the desired crispness or continuity.
Window and Door Openings: Replicate a section of a window or door frame to see how the cladding terminates against it. This helps in assessing trim details, flashing integration, and the overall visual transition.
Material Transitions: If your design incorporates other materials like stone, stucco, or metal, include a section where the thermally modified Radiata meets these materials. This is crucial for verifying aesthetic harmony and practical junction details.
Profile Integration: If you are using multiple profiles, such as a Nickel Gap for siding and S4S E4E for trim, the mock-up allows you to see how these different profiles integrate and contribute to the overall wall texture and shadow play.
Finish Application: Apply your intended finish to the mock-up. This allows you to observe how the finish interacts with the wood's natural tone and grain, and how it performs under natural light conditions. Thermally modified Radiata has a natural, clean, consistent grain that can be enhanced or subtly altered by different finishes.
Planning Your Mock-Up: Dimensions and Location
The size of your mock-up should be large enough to represent the key features you want to test, typically at least 4 feet by 4 feet, or larger if needed to encompass a full window opening or complex corner. Consider constructing it on a portable frame so it can be moved to different locations and viewed at various times of day.
Position the mock-up in a similar orientation and lighting conditions as the actual project elevation. For example, if your project wall faces west, place the mock-up where it will receive similar afternoon sun. This helps to accurately assess the appearance of the thermally modified Radiata, which is selected for a clear visual field and can offer a contemporary surface for continuous architectural lines.
Worked Example: Corner and Window Detail Mock-Up
The wall includes an outside corner and a small window opening.
For a mock-up, you would construct a small wall section, approximately 6 feet wide by 4 feet high, including an outside corner and a framed opening for a window (e.g., 2 feet by 3 feet).
Materials needed:
- Approximately 12 linear feet of Thermally Modified Clear Radiata S4S E4E 1x8 for window trim (enough for all four sides of a 2x3 foot window, plus miter cuts).
- Substrate material (e.g., plywood) to simulate the wall sheathing.
- Framing lumber to create the mock-up wall and window opening.
- Fasteners appropriate for thermally modified wood.
- Desired finish for the cladding and trim.
Steps:
1. Build a basic framed wall section with a window opening and an outside corner.
2. Install the Nickel Gap cladding, paying close attention to how the profile aligns at the corner. Decide if you will miter the corner, use a butt joint with a corner board, or another detail.
3. Install the S4S E4E trim around the window opening, ensuring proper clearances and alignment with the cladding.
4. Apply your chosen finish to both the cladding and the trim. Observe how the finish cures and appears over a few days.
This mock-up allows you to visually confirm the shadow lines of the Nickel Gap profile, the interaction between the cladding and the S4S trim, and the overall aesthetic of the finished material, which is known for its understated grain that works well on walls.
Complementary Products for Your Mock-Up
While focusing on Thermally Modified Radiata, consider the other components that will interact with it. For your mock-up, you might also include sections of:
Rainscreen Components: If your project incorporates a rainscreen system, integrate a portion of the furring strips and weather-resistive barrier into your mock-up to understand the full wall assembly.
Fasteners: Use the actual fasteners you intend for the project. Observe how they integrate with the wood and if they are discreet or visible as part of the design.
Sealants and Flashing: For critical areas like window sills and head flashing, include these elements to ensure proper water management and aesthetic integration.
For more information on the range of products available, explore our selections of siding and cladding, thermally modified wood, and the NORX and Maximo brands. You may also consider Maximo Accoya for projects requiring different performance characteristics.
Before you order
- Have you included all critical junctions (corners, windows, doors, material transitions)?
- Is the mock-up large enough to represent your design accurately?
- Is the mock-up positioned in representative lighting and orientation?
- Have you applied the intended finish to all mock-up surfaces?
- Have you considered the integration of complementary products like rainscreen components or flashing?
- Are all chosen profiles and their interactions visible and satisfactory?
- Does the mock-up confirm the desired aesthetic for the overall elevation?
Confirm installation details, approved uses and warranty terms in the current instructions for the exact product and profile. Your installer should verify the substrate, structure and applicable project requirements.
Questions to help you decide
What is Thermally Modified Clear Radiata?
Thermally Modified Clear Radiata is Pinus radiata wood, selected for a clean visual field, that has undergone a thermal modification process. This process improves its stability and makes it suitable for various applications, including cladding, ceilings, decking, trim, and custom slat systems. It features a natural, clean, and consistent grain, offering a contemporary surface.
How large should my mock-up be?
The size of your mock-up should be determined by the complexity of the details you wish to evaluate. A minimum size of 4 feet by 4 feet is often sufficient for basic corner or trim details. For areas incorporating a full window or door opening, a larger mock-up, such as 6 feet by 4 feet, may be necessary to accurately assess all elements.
Can I use the mock-up materials in my final project?
While it may seem efficient, it is generally recommended to treat mock-up materials as samples and not integrate them directly into the final project. Mock-up materials may undergo additional handling, cuts, or exposure that could affect their suitability for permanent installation. It's best to use fresh, undamaged materials for the actual construction.
Ready to Plan Your Thermally Modified Radiata Project?
Request a material quote with your project dimensions, exact profile, and ZIP code to confirm current availability and service options for Thermally Modified Clear Radiata. Building a mock-up is a valuable step in visualizing your vision.
Request a material quote →