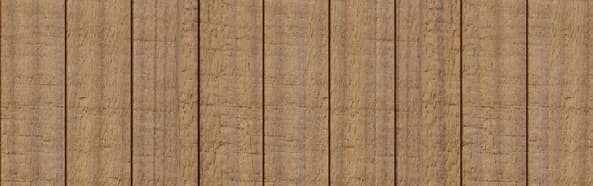
Understanding Thermally Modified Clear Radiata for Horizontal Applications
Thermally Modified Clear Radiata is selected for its clean, consistent grain, making it suitable for modern, continuous installations. The thermal modification process enhances the wood's stability by reducing its moisture response, which is a key benefit for exterior cladding where dimensional stability is crucial. This material is often chosen for its understated appearance, allowing it to complement various architectural styles when arranged horizontally.
The clean lines and improved stability of Thermally Modified Clear Radiata contribute to a refined finish when arranged in a horizontal pattern, emphasizing the material's inherent aesthetic qualities. It is important to note that while this material offers improved stability, proper design and installation are still necessary to manage any wood movement.
Coordinating Courses with Windows and Openings
A critical aspect of horizontal cladding design is how the board courses interact with windows and other wall openings. The goal is to achieve a balanced and intentional appearance, avoiding awkward cuts or narrow strips of material around these features. Consider the following approaches:
**Aligning Courses:** Ideally, the top or bottom edge of a cladding course should align with the head or sill of a window. This creates a clean visual break and reduces the need for complex trim work. Plan the vertical spacing of your courses to facilitate these alignments.
**Starting Point:** Decide on a primary reference point for your courses, such as the bottom of the wall, the top of the foundation, or a significant architectural datum. Working from this point upwards or downwards will help maintain consistency. Sometimes, starting at a prominent window sill or head can dictate the rhythm of the entire elevation.
**Window Trim Integration:** Plan how the horizontal cladding boards will meet the window trim. Will the cladding butt directly against the trim, or will there be a reveal? This decision affects the perceived scale and detailing of the facade. For a seamless look, aim for consistent reveals around all openings.
Fastening Details for Horizontal Cladding
Proper fastening is essential for the long-term performance and appearance of horizontal Thermally Modified Clear Radiata cladding. The choice of fastener and fastening method depends on the specific profile and desired aesthetic.
**Exposed Fasteners:** For profiles like S4S E4E, exposed fasteners are often used. These should be corrosion-resistant and installed in a consistent pattern to contribute to the visual design. Pre-drilling may be necessary to prevent splitting, especially near board ends.
**Hidden Fasteners:** For profiles such as Nickel Gap, hidden fastening systems are often preferred to maintain a clean surface. These systems typically involve fasteners driven through the tongue or groove, or specialized clips that attach to the back of the board. Always follow the manufacturer's recommendations for hidden fastening systems to ensure proper engagement and allow for wood movement.
Regardless of the method, ensure fasteners penetrate adequately into the structural framing or furring strips. Avoid fastening through the thinnest parts of a profile where it might compromise the board's integrity or lead to splitting.
Worked Example: Horizontal Layout Around a Window
Consider a wall section that is 10 feet wide and 8 feet tall, featuring a window that is 4 feet wide and 3 feet tall, centered horizontally and vertically on the wall.
**Step 1: Determine Course Count and Vertical Placement:** An 8-foot (96-inch) wall height, divided by an exposed face of 5.125 inches, would theoretically yield 18.73 courses. Since we need full courses, we can adjust the spacing slightly or plan for a cut board at the top or bottom.
Let's aim for 18 full courses. This means each course will cover 96 inches / 18 courses = 5.33 inches. This slight adjustment from the nominal exposed face is acceptable, provided it's consistent. This also means we will need 18 boards vertically.
**Step 2: Locate the Window Vertically:** The window is 3 feet (36 inches) tall and centered vertically on an 8-foot (96-inch) wall. This means the top of the window is (96 - 36) / 2 + 36 = 66 inches from the bottom, and the bottom of the window is (96 - 36) / 2 = 30 inches from the bottom.
**Step 3: Coordinate Courses with Window Edges:**
The bottom of the window is at 30 inches. If each course is 5.33 inches, the 5th course from the bottom will end at 5 * 5.33 = 26.65 inches, and the 6th course will end at 6 * 5.33 = 31.98 inches. We can align the bottom edge of the 6th course with the bottom of the window, or slightly adjust the course height to make the 6th course's top edge align perfectly.
The top of the window is at 66 inches. Counting from the bottom, the 12th course ends at 12 * 5.33 = 63.96 inches, and the 13th course ends at 13 * 5.33 = 69.29 inches. We can align the top edge of the 12th course with the top of the window, or make a slight adjustment.
**Step 4: Plan Horizontal Cuts:** The window is 4 feet (48 inches) wide and centered on a 10-foot (120-inch) wall. This means there are (120 - 48) / 2 = 36 inches of cladding on each side of the window. The cladding boards are typically supplied in longer lengths, requiring field cuts.
**Step 5: Trim and Flashing Details:** Ensure window trim allows for proper integration of the cladding. Flashing should be installed to direct water away from the window opening and behind the cladding, maintaining the integrity of the wall assembly.
This example illustrates the iterative process of balancing aesthetic alignment with practical installation, ensuring that courses meet features cleanly and efficiently.
Considering Movement Joints and Expansion
Even with the improved stability of Thermally Modified Clear Radiata, wood will still experience some movement due to changes in humidity and temperature. For horizontal cladding, it's important to plan for this movement.
**End-to-End Joints:** When running long stretches of horizontal cladding, boards will need to be joined end-to-end. These joints should ideally occur over a framing member or furring strip for proper support. Staggering these joints across different courses helps distribute stress and maintain a more cohesive appearance. Leave a small gap at butt joints to allow for expansion.
**Corners and Transitions:** At inside and outside corners, and where cladding meets other materials (e.g., stone, stucco), consider how the horizontal boards will terminate. Using trim pieces, corner boards, or specific detailing can help manage expansion and contraction while providing a finished look. These transitions are also opportunities to incorporate movement joints.
Visual Impact and Design Considerations
A horizontal layout with Thermally Modified Clear Radiata emphasizes the width of a structure and can make a building appear longer or lower. The continuous lines draw the eye across the facade, highlighting the clean, consistent grain of the material.
**Shadow Lines:** The profile chosen, such as Nickel Gap, will create distinct shadow lines that change with the angle of the sun. These shadows add depth and texture to the facade, enhancing the visual interest of the horizontal pattern. Deeper shadow lines can emphasize each course more distinctly.
**Scale and Proportion:** The width of the cladding boards and the overall height of the facade should be considered in relation to each other. A wider board like the 1x6 (nominal) can create a bolder presence, while narrower boards might offer a finer texture. Ensure the horizontal rhythm complements the scale of the building.
**Finish Choices:** While Thermally Modified Clear Radiata has a natural, clean appearance, applying a finish can alter its color and provide additional protection. A clear finish will allow the wood's natural tones to show through, while a semi-transparent stain can introduce a new color while still revealing the grain. This choice will impact how the horizontal lines are perceived.
Before you order
- Have I determined the desired exposed face height for each cladding course?
- How will the horizontal courses align with the tops and bottoms of all windows and doors?
- What is the starting point for the cladding courses on the wall (e.g., foundation, window sill)?
- Have I planned for consistent reveals around all openings?
- What fastening method will be used (exposed or hidden), and does it align with the chosen profile?
- Are all fasteners specified as corrosion-resistant and appropriate for exterior use?
- How will end-to-end joints be supported and staggered across courses?
- Are provisions made for movement joints at corners and material transitions?
- Does the chosen board width and shadow line effect complement the overall architectural scale?
- What finish will be applied, and how will it impact the visual perception of the horizontal lines?
Confirm installation details, approved uses and warranty terms in the current instructions for the exact product and profile. Your installer should verify the substrate, structure and applicable project requirements.
Questions to help you decide
Can Thermally Modified Clear Radiata be installed directly over sheathing?
For exterior applications, Thermally Modified Clear Radiata cladding, especially in a horizontal orientation, should typically be installed as part of a rainscreen system. This involves a moisture barrier over the sheathing, followed by furring strips to create a ventilation and drainage gap behind the cladding. This system helps manage moisture and contributes to the longevity of the wall assembly.
How do I calculate the quantity of Thermally Modified Clear Radiata needed for a horizontal layout?
To calculate the quantity, first determine the total square footage of the area to be clad, subtracting any large openings like windows and doors. Then, divide this net square footage by the coverage area of a single board (board length multiplied by the exposed face width). Always add an allowance for waste due to cuts, miscuts, and potential board defects, typically 10-15%. For precise estimates, consider a detailed cut plan, especially around windows, to optimize material use.
What kind of trim should be used with horizontal Thermally Modified Clear Radiata cladding?
Trim can be made from Thermally Modified Clear Radiata itself, using profiles like S4S E4E (1 × 8, 1 × 12, 2 × 6 nominal sizes) for a consistent material aesthetic. Alternatively, complementary materials such as metal, fiber cement, or other wood species can be used to create contrast or a specific design detail. Ensure that any trim material is suitable for exterior exposure and compatible with the cladding's movement characteristics.
Ready to Plan Your Thermally Modified Radiata Project?
Request a material quote today.
Request a material quote →