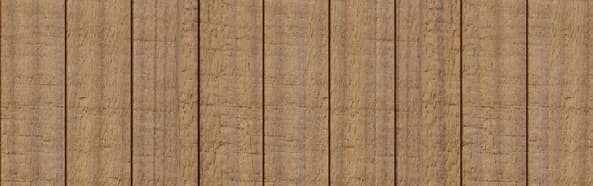
Understanding Thermally Modified Radiata for Door Details
Thermally Modified Clear Radiata is selected for its clean visual field and improved stability due to the thermal modification process. This makes it a suitable choice for cladding, trim, and molding around openings where a consistent appearance is desired. Its lower moisture response compared to unmodified material helps manage expansion and contraction, which is critical in areas subject to varying weather conditions.
The material's detail flexibility also allows for custom milling, enabling coordination between cladding profiles, trim, and other field profiles to achieve a cohesive design around door jambs and heads.
Essential Clearances and Material Movement
Proper clearance between Thermally Modified Radiata cladding and door components is vital. Wood materials will experience some movement due to changes in temperature and humidity, even after thermal modification. Insufficient clearance can lead to buckling, binding, or damage to both the cladding and the door frame.
This gap allows for material movement and also provides space for sealants or backer rods where appropriate. At the base of the door, where the cladding meets the threshold, a larger clearance may be necessary to prevent moisture wicking and allow for drainage, often specified in building codes for exterior finishes.
Flashing and Water Management Around Doors
Effective water management is paramount around exterior doors. All door openings should be properly flashed to divert water away from the wall assembly and the interior. This includes head flashing above the door, jamb flashing along the sides, and sill flashing below the threshold.
When installing Thermally Modified Radiata cladding, ensure that the flashing layers are integrated correctly with the weather-resistive barrier (WRB) and the cladding. The cladding should overlap the flashing in a shingle-lap fashion, directing water outwards. For example, head flashing should extend beyond the door trim and be integrated behind the cladding above the opening, while jamb flashing should be installed before the cladding, with the cladding overlapping it.
Jamb and Trim Transitions
The transition from the Thermally Modified Radiata cladding to the door jamb or trim can be handled in several ways. One common method is to use a trim board (often "S4S E4E" Thermally Modified Radiata) to frame the door opening. This trim can be flush with the cladding, proud of it, or recessed, depending on the desired aesthetic.
When planning trim, consider the thickness of your chosen cladding profile. For a "Nickel Gap × Square Back" siding, the trim profile should either match its thickness or be slightly thicker to create a reveal. Ensure all trim pieces are securely fastened and that any exposed end grain is properly sealed to minimize moisture absorption.
Worked Example: Detailing a Door Opening
Consider a hypothetical exterior door opening measuring 36 inches wide by 80 inches high. The siding boards are 5.5 inches wide (actual).
1. **Door Frame Preparation:** Ensure the door frame is installed plumb and square, with all necessary flashing (head, jamb, sill) in place and integrated with the WRB.
2. **Siding Layout:** Plan the siding layout to minimize cuts around the door. Ideally, full boards would terminate cleanly at the door trim. This would require cutting siding boards to fit, or adjusting the overall layout to center the door within the siding pattern.
3. **Trim Installation:** Install the vertical 1x6 S4S E4E trim boards first, extending from the sill flashing to the top of the head flashing. For a 80-inch door, trim boards would be cut to approximately 82-84 inches, depending on head flashing and sill details. These trim pieces should be fastened to the wall framing, not just the sheathing.
4. **Head Trim:** Install the horizontal 1x6 S4S E4E head trim above the door, spanning the width between the vertical trim pieces. This piece should sit on top of the vertical trim, creating a clean corner. Ensure it is also securely fastened.
Ensure the top edge of the siding above the door overlaps the head flashing correctly, and the siding below the door maintains adequate clearance from the threshold.
This helps prevent water intrusion.
Before you order
- Have I reviewed the manufacturer's installation guidelines for the specific door and flashing system?
- Are all required clearances (cladding to jamb, cladding to threshold) accounted for in the design?
- Is the flashing integrated correctly with the weather-resistive barrier and cladding layers?
- What Thermally Modified Radiata profiles will be used for cladding, trim, and other details?
- How will the siding layout be planned to minimize unsightly cuts around the door opening?
- Are all exposed end grains of Thermally Modified Radiata trim and cladding adequately sealed?
- What type of sealant will be used, and is it compatible with the Thermally Modified Radiata and other materials?
- Have potential movement joints been considered for larger trim pieces or complex transitions?
Confirm installation details, approved uses and warranty terms in the current instructions for the exact product and profile. Your installer should verify the substrate, structure and applicable project requirements.
Questions to help you decide
Can Thermally Modified Radiata be used for both exterior trim and cladding?
Yes, Thermally Modified Clear Radiata is suitable for both applications. Its improved stability and clear appearance make it a versatile choice for a cohesive design around door openings, using profiles such as "Nickel Gap × Square Back" for cladding and "S4S E4E" for trim and molding.
What is the importance of clearance around exterior doors?
Clearance is crucial to accommodate the natural expansion and contraction of wood materials due to changes in temperature and humidity. Without adequate gaps, the cladding or trim could buckle, bind, or damage the door frame, compromising both the appearance and the weather-tightness of the assembly. It also provides space for necessary sealants.
How does Thermally Modified Radiata resist water around doors?
While Thermally Modified Radiata has improved dimensional stability and lower moisture response, it is not inherently waterproof. Its resistance to water around doors relies heavily on proper flashing, a well-integrated weather-resistive barrier, and correct installation techniques that ensure water is shed away from the wall assembly. Sealing of gaps also contributes to preventing water intrusion.
Ready to Plan Your Thermally Modified Radiata Project?
For specific material quantities and profile options for your project, request a material quote. Provide your project dimensions, exact profile preferences, and ZIP code to confirm current availability and service options for Thermally Modified Radiata.
Request a material quote →