Understanding Thermally Modified Radiata for Cutting
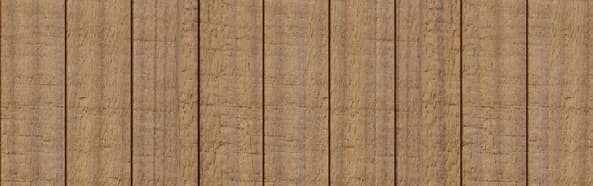
Thermally Modified Clear Radiata is selected for a clean visual field and then undergoes a thermal modification process. This process enhances its stability by reducing the wood's moisture response compared to unmodified material. The resulting wood has an understated grain that works well for continuous architectural lines in cladding, ceilings, soffits, and custom slat systems.
The thermal modification changes the wood's cellular structure, making it less prone to expansion and contraction due to humidity fluctuations. This improved stability means that while cuts should still be treated, the material itself offers a more consistent substrate to work with.
When planning your cuts, consider the 'clear appearance' of the material, which emphasizes a restrained surface. Any inconsistencies in cut quality or end treatment will be more noticeable on such a clean finish. Source: S1
Essential Tools for Clean Cuts
Achieving clean, precise cuts on Thermally Modified Radiata begins with the right tools. A high-quality saw with a sharp, fine-toothed blade designed for hardwoods or composite materials is recommended. This helps prevent splintering and ensures a smooth edge that is easier to finish.
For straight cuts, a miter saw or table saw with a stable fence system will provide the best results. For more intricate cuts or curves, a jig saw with a fine-tooth blade can be used, though extra care is needed to maintain a clean edge. Always ensure blades are sharp; dull blades can tear the wood fibers, leading to an unsightly finish and potential issues with end treatment adhesion.
The Importance of End Grain Sealing
The end grain of any wood is more porous than the face grain, making it more susceptible to moisture absorption. While Thermally Modified Radiata has improved stability due to thermal modification, sealing cut ends remains a critical step in preserving the material's integrity and appearance, especially in exterior applications.
End grain sealer helps to slow down the rate of moisture exchange at the cut surfaces, reducing the risk of checking, splitting, or discoloration over time. This is particularly important for cladding where the ends are exposed to weather or significant humidity changes. A quality end grain sealer should be applied immediately after cutting, following the manufacturer's instructions for application and drying time.
Worked Example: Cladding a Feature Wall with Nickel Gap Profile
The boards are typically supplied in random lengths. For this example, we will assume 16-foot lengths are available, allowing for some flexibility and minimizing waste.
The Nickel Gap profile is designed for siding and ceilings, creating a distinctive shadow line. For an 8-foot high wall, each board will need to be cut to length. If running horizontally, you would cut the 16-foot boards into two 8-foot sections, resulting in one factory end and one field cut end per section. If running vertically, you would need to cut 10-foot sections, which would require careful planning to minimize waste from the 16-foot stock. Let's assume a horizontal installation for this example.
For a horizontal installation on an 8-foot high wall using 1x6 (nominal 5.5-inch actual width), you would need approximately 18 boards (8 feet / 5.5 inches = 17.45 boards, rounded up). Each 16-foot board yields two 8-foot sections. Therefore, you would need 9 boards of 16-foot length to cover the height.
For the 10-foot width, if using full 10-foot lengths, you would need 18 boards x 10 feet = 180 linear feet. However, if using the 8-foot sections from the 16-foot boards, you'd have more cuts.
A more practical approach for horizontal cladding on a 10-foot wide wall with an 8-foot height, using 16-foot stock, involves cutting the 16-foot boards into 10-foot and 6-foot sections (or 8-foot sections and managing offcuts). For a 10-foot wide wall, you would need to join boards. Each 10-foot run will require a field cut at one end and potentially a factory end at the other, or two field cuts if cutting from a longer piece.
For each 10-foot board section, apply end grain sealer to all newly cut ends. This ensures that the vulnerable end grain is protected from moisture. For example, if you are cutting 10-foot sections from 16-foot boards, each 10-foot piece will have one factory end and one field-cut end. The field-cut end must be sealed. If you are joining multiple boards along the 10-foot length, both ends of the shorter pieces will be field cuts and require sealing. This meticulous sealing process contributes to the long-term performance and appearance of the cladding.
The number of cuts to seal will depend on your layout. If you need to join boards within a course, for example, using a 6-foot piece and a 4-foot piece for a 10-foot run, then each course would have 2 field cuts plus the ends of the shorter pieces, adding up to more sealed ends. Always plan your cuts to minimize waste while ensuring all exposed ends are treated.
Finishing Field Cuts for Appearance
Beyond sealing, the visual integration of field cuts is crucial for maintaining the 'clear appearance' of Thermally Modified Radiata. If the boards are to be finished with a stain or paint, the cut ends should be prepared to accept the finish uniformly.
Light sanding of the cut ends can help smooth any minor imperfections and ensure better adhesion of stains or paints. If the material is intended to weather naturally, the end grain sealer will still protect it, but the cut surface may appear slightly different in texture compared to the mill-finished faces. This difference typically lessens as the material weathers.
For applications where the ends will be highly visible, such as exposed slat systems or trim, consider if a custom milling detail or a specific edge treatment can be applied to further refine the cut appearance. Source: S1
Before you order
- Confirm the final orientation (horizontal/vertical) of your Thermally Modified Radiata.
- Measure your project dimensions accurately to plan board lengths and minimize waste.
- Identify all locations where boards will be cut on-site (field cuts).
- Select appropriate, sharp tools for clean cuts (miter saw, table saw, fine-tooth blades).
- Acquire a suitable end grain sealer specific for thermally modified wood.
- Plan for immediate application of end grain sealer to all field cuts.
- Consider any aesthetic treatments (sanding, staining) for highly visible field cuts.
- Factor in the need for extra material to account for cutting and potential mistakes.
Confirm installation details, approved uses and warranty terms in the current instructions for the exact product and profile. Your installer should verify the substrate, structure and applicable project requirements.
Questions to help you decide
Why is end grain sealing so important for Thermally Modified Radiata?
Even though Thermally Modified Radiata has improved stability, its end grain remains more porous than its face grain. Sealing the end grain significantly reduces moisture absorption at these vulnerable points, helping to prevent issues like checking, splitting, and discoloration, especially in exterior applications where moisture exposure is common.
Can I use any wood sealer on Thermally Modified Radiata cut ends?
It is recommended to use an end grain sealer specifically designed for thermally modified wood or exterior wood applications. These sealers are formulated to penetrate and protect the wood effectively, offering better long-term performance than generic wood sealers. Always check product compatibility.
What profiles of Thermally Modified Radiata are available?
Custom milling can also be coordinated for slats, trim, and field profiles. Source: S1
Ready to Plan Your Thermally Modified Radiata Project?
Request a material quote with your project dimensions, desired profile, and ZIP code to confirm current availability and service options. We can help you estimate the quantities needed and advise on end treatment best practices for your specific application.
Request a material quote →