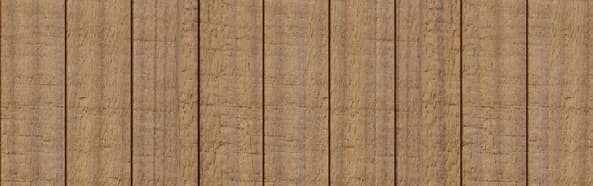
Understanding Corner Types for Cladding
Exterior wall corners generally fall into a few primary categories, each with distinct installation requirements and aesthetic outcomes. The choice often depends on the desired architectural style, the complexity of the installation, and considerations for weather protection.
Common corner types include mitered corners, butt joints with trim, and open corners. Mitered corners offer a seamless, continuous appearance, where the cladding boards meet at a 45-degree angle. Butt joints involve cladding boards meeting at a 90-degree angle, typically covered or finished with a separate trim piece. Open corners, less common in standard cladding, might be used in specific rainscreen designs or architectural features.
Mitered Corners: A Seamless Look
Mitered corners provide the most continuous visual flow for Thermally Modified Radiata cladding. When executed precisely, the grain appears to wrap around the corner, creating a refined, contemporary aesthetic. This method is particularly effective with the clear, consistent grain of Thermally Modified Clear Radiata, as it minimizes visual interruptions.
Achieving a successful mitered corner requires accurate cuts and careful alignment during installation. The thermal modification process enhances the stability of Radiata, reducing its tendency to warp or cup compared to unmodified wood, which can be beneficial for maintaining tight mitered joints over time. However, mitered corners can be more susceptible to opening if there is significant wood movement or if the installation is not meticulous. Proper fastening and a suitable weather-resistant barrier behind the cladding are crucial.
For a clean miter, consider the "Nickel Gap × Square Back" profile for siding applications, as its precise milling can facilitate tight joints. For trim pieces, "S4S E4E" profiles in various nominal sizes can also be mitered.
Butt Joints with Trim: Practical and Protective
Using trim pieces to cover butt joints is a practical and robust method for finishing corners. This approach simplifies installation compared to precise mitering and offers enhanced protection against water intrusion at the corner. The trim acts as a dedicated element, often contrasting or complementing the main cladding.
For Thermally Modified Radiata, you can utilize matching "S4S E4E" profiles in nominal sizes like 1 × 8, 1 × 12, or 2 × 6 for trim and moulding. This allows for a coordinated appearance, where the trim shares the same material and finish characteristics as the main cladding. The trim pieces are installed over the ends of the cladding boards, covering the raw end grain and creating a distinct visual break at the corner.
This method is often preferred for its durability and ease of maintenance. The trim can be detailed to create a shadow line or a more prominent architectural feature, depending on the desired effect. Ensure proper flashing and sealing behind the trim to prevent moisture penetration.
Worked Example: Detailing a Corner for a 10-foot Wall
Consider a hypothetical exterior wall corner where two 10-foot walls meet. We'll explore the material needs for both mitered and butt-jointed corners using Thermally Modified Radiata cladding.
For simplicity in this example, we'll use the nominal 6-inch width for board count estimation.
**Scenario 1: Mitered Corner**
For a mitered corner, the cladding boards themselves form the corner. Each board on the adjacent wall will be cut at a 45-degree angle. To cover a 10-foot (120-inch) wall with 6-inch wide boards, you would need approximately 20 boards (120 inches / 6 inches per board). Both walls meeting at the corner would require boards mitered at one end. When ordering, it's prudent to account for waste due to cuts and potential errors, adding 10-15% overage.
**Scenario 2: Butt Joint with Trim**
For a butt joint with trim, the cladding boards on one wall would extend to the corner, while the boards on the adjacent wall would butt into them. A trim piece would then cover this joint. Let's assume we use a 1 × 6 "S4S E4E" profile for the corner trim. For a 10-foot wall height, you would need two 10-foot lengths of this trim for an outside corner (one for each side of the corner).
The cladding boards on the wall that runs into the trim would be cut square. The boards on the wall that terminates at the corner would also be cut square, but they would need to be trimmed to account for the thickness of the corner trim. If the 1 × 6 trim has an actual thickness of approximately 3/4 inch, then the boards on the terminating wall would be shortened by this amount from each corner. This approach simplifies the cladding cuts compared to mitering and provides a robust corner detail.
Considerations for Durability and Maintenance
Regardless of the chosen corner detail, proper installation practices are paramount for the long-term performance of Thermally Modified Radiata cladding. This includes ensuring adequate ventilation behind the cladding, using appropriate fasteners, and applying any specified finishes or sealants.
Thermally Modified Radiata is known for its improved stability and reduced moisture response. However, wood is still a natural material that will respond to environmental conditions. Mitered corners, while aesthetically pleasing, can be more susceptible to opening over time if not well-maintained or if exposed to extreme moisture fluctuations. Butt joints with trim offer a more forgiving detail that can better accommodate minor movement.
Regular inspection of all corner details can help identify any areas requiring attention. Maintaining any applied finishes according to manufacturer recommendations will also contribute to the longevity of the cladding and the integrity of the corner assemblies.
Before you order
- Desired aesthetic: Seamless (mitered) or defined (trim)?
- Installation complexity: Are precise miter cuts feasible for your project?
- Weather protection: Does the corner detail provide adequate moisture management?
- Material availability: Are matching trim profiles available for Thermally Modified Radiata?
- Long-term performance: How will the chosen detail accommodate wood movement?
- Maintenance plan: What ongoing care will be required for the chosen corner type?
- Budget: Does the chosen detail align with your material and labor budget?
Confirm installation details, approved uses and warranty terms in the current instructions for the exact product and profile. Your installer should verify the substrate, structure and applicable project requirements.
Questions to help you decide
Can Thermally Modified Radiata be used for both cladding and trim?
Yes, Thermally Modified Clear Radiata is suitable for both cladding and trim applications.
Are special fasteners required for corner details with Thermally Modified Radiata?
While the type of fastener depends on the specific assembly and local building codes, it's generally recommended to use corrosion-resistant fasteners suitable for exterior wood applications. For Thermally Modified Radiata, which has improved stability, appropriate fasteners will help secure the boards and trim, minimizing movement at the corners. Always consult manufacturer guidelines for fastener recommendations.
How do I prevent water intrusion at cladding corners?
Preventing water intrusion at corners involves a multi-layered approach. This includes a properly installed weather-resistant barrier (WRB) behind the cladding, appropriate flashing details, and careful sealing of joints where necessary. For butt joints with trim, ensure the trim is installed over the cladding in a way that sheds water. For mitered corners, precise cuts and a robust WRB are essential. Ventilation behind the cladding also helps manage moisture.
Request a Material Quote for Your Project
Planning your next project with Thermally Modified Radiata? Request a material quote today. Provide your project dimensions, exact profile preferences, and ZIP code to confirm current availability and service options for your area. We're here to help you select the right materials for durable and beautiful corner details.
Request a material quote →