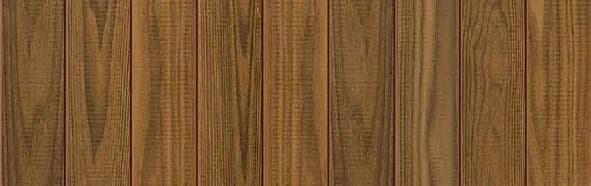
Why Choose a Vertical Layout?
A vertical layout can dramatically alter the perception of a building's height and scale. It draws the eye upwards, which can make a one-story structure appear taller or emphasize the verticality of a multi-story building. This orientation can also create a modern, streamlined appearance, especially when paired with contemporary architectural styles. Unlike horizontal applications that typically feature more pronounced shadow lines, vertical installations can offer a more continuous surface, depending on the chosen profile.
From a practical standpoint, vertical cladding can facilitate better water drainage, as gravity directly assists in shedding water down the face of the boards. However, this benefit is contingent on proper detailing at the top and bottom of the wall, as well as around openings, to prevent water ingress behind the cladding.
Understanding Thermally Modified Ash Profiles for Vertical Cladding
Thermally Modified Ash is available in several profiles suitable for cladding. For vertical applications, common profiles include S4S E4E End Match in nominal sizes like 1 × 6 Plus and 5/4 × 6. These profiles are designed for siding and ceiling applications. The 'S4S E4E' designation means 'surfaced four sides, eased four edges,' providing a consistent, smooth surface with slightly rounded edges. 'End Match' profiles feature tongue-and-groove ends, which can simplify installation and help maintain alignment over longer runs.
The choice of profile will influence the visual effect of your vertical layout. Wider boards can create a bolder, more substantial look, while narrower boards might offer a finer texture. The depth of the eased edges can also affect the shadow lines, contributing to the overall aesthetic. Consider how light will interact with the chosen profile throughout the day and across seasons.
For specific project requirements, other profiles such as 1 × 10, 2 × 2, 2 × 4, and 2 × 6 S4S E4E are listed for trim and molding, or decking and structural details. While potentially adaptable, their primary applications differ, and their suitability for vertical cladding would depend on specific design and installation details.
Substructure Requirements for Vertical Cladding
A robust and properly designed substructure is critical for any cladding system, especially for vertical layouts where gravity acts differently on the fasteners and boards. For vertical cladding, horizontal furring strips or battens are typically installed over a weather-resistive barrier (WRB) and sheathing. These horizontal elements provide the necessary fastening surface for the vertical ash boards and create a ventilation cavity behind the cladding, which is essential for a rainscreen assembly.
The size and spacing of the horizontal furring strips should be determined by local building codes and the weight and dimensions of the cladding boards. Generally, furring strips should be spaced to align with the fastening points of the cladding, often at 16 or 24 inches on center. Adequate depth for the furring is also needed to ensure proper air circulation and drainage within the rainscreen cavity. This cavity helps to manage moisture, promote drying, and can contribute to the thermal performance of the wall assembly. Consult with a structural engineer or a qualified builder to confirm the appropriate substructure for your specific project.
Starting and Finishing Details: Base, Top, and Corners
Proper detailing at the base, top, and corners of a vertically clad wall is crucial for both aesthetics and long-term performance. At the base, a starter strip or flashing is essential to provide a level starting point for the first course of boards and to prevent moisture from wicking up into the cladding. This detail must also allow for drainage from the rainscreen cavity.
At the top of the wall, the cladding should terminate under an overhang, soffit, or cap flashing that directs water away from the wall assembly. This prevents water from entering the top of the rainscreen cavity. Continuous ventilation at both the base and top of the cavity is important for air circulation.
For corners, several options exist: mitered corners for a seamless look, corner boards for a more traditional finish, or metal trim for a contemporary edge. Each option has specific installation requirements and visual impacts. When designing around windows and doors, flashing must be meticulously integrated to prevent water intrusion. The vertical boards should not run continuously across openings; instead, they should terminate cleanly against the window or door trim, with appropriate head and sill flashing.
Worked Example: Vertical Cladding for a Garden Shed
Consider a hypothetical 10-foot wide by 8-foot tall garden shed wall that requires vertical Thermally Modified Ash cladding. We will use 1 × 6 Plus nominal size (actual approximately 0.75 inches thick by 5.5 inches wide) S4S E4E End Match boards. For this example, we assume a standard rainscreen assembly with horizontal furring strips spaced 24 inches on center.
First, calculate the linear feet of cladding needed. The wall is 10 feet wide. Each board is approximately 5.5 inches wide (0.458 feet). To cover 10 feet, you'll need 10 feet / 0.458 feet/board = 21.83 boards. Always round up to ensure full coverage, so 22 boards are needed across the width. Since the wall is 8 feet tall, each board will be cut to 8 feet in length. Therefore, the total linear footage required is 22 boards * 8 feet/board = 176 linear feet.
When ordering, it's prudent to add a waste factor, typically 10-15%, for cuts, potential damage, or future repairs. For 176 linear feet, adding 15% waste brings the total to 176 * 1.15 = 202.4 linear feet. You would then order the closest available lengths that sum to this total, minimizing cuts and waste where possible. For instance, if boards are available in 10-foot lengths, you might order 21 pieces (210 linear feet) to account for the 8-foot cuts and waste.
For the substructure, horizontal furring strips (e.g., 1x3 lumber) would be installed over the WRB. For an 8-foot tall wall, you might have furring at the bottom, 24 inches up, 48 inches up, 72 inches up, and at the top, totaling 5 horizontal runs. For a 10-foot wide wall, this would be 5 * 10 feet = 50 linear feet of furring. Again, add a waste factor for cuts.
This example provides a basic material takeoff. Always confirm actual board dimensions, available lengths, and specific waste factors with your supplier and installer. Remember to account for all trim pieces, starter strips, and flashing materials separately.
Before you order
- Confirm local building codes and rainscreen requirements for vertical cladding.
- Select Thermally Modified Ash profile (e.g., 1 × 6 Plus S4S E4E End Match) and confirm actual dimensions.
- Determine substructure material, spacing, and depth for horizontal furring strips.
- Plan all start and finish details: base flashing, top cap/soffit connection, and corner treatments.
- Detail around all openings (windows, doors) for flashing and trim integration.
- Calculate linear footage of cladding needed, including a waste factor for cuts.
- Calculate linear footage of furring strips and any necessary trim boards.
- Consider the visual impact of board width and shadow lines on the overall aesthetic.
- Verify fastening methods and compatible fasteners for vertical installation.
- Plan for ventilation at the top and bottom of the rainscreen cavity.
Confirm installation details, approved uses and warranty terms in the current instructions for the exact product and profile. Your installer should verify the substrate, structure and applicable project requirements.
Questions to help you decide
Can Thermally Modified Ash be installed directly to studs in a vertical orientation?
No, it is generally not recommended to install Thermally Modified Ash cladding directly to studs, especially in exterior applications. A rainscreen assembly, which includes a weather-resistive barrier and furring strips to create a ventilation cavity, is crucial for managing moisture, promoting drying, and ensuring the long-term performance of the cladding. The furring strips also provide a consistent fastening surface.
What is the recommended clearance for vertical Thermally Modified Ash cladding at the ground?
This clearance helps prevent moisture from splashing back onto the cladding and reduces the risk of moisture wicking up from the ground, which can lead to staining or degradation of the wood over time. Proper flashing at the base is also essential to manage water runoff.
Are there specific fastening requirements for vertical Thermally Modified Ash?
Fastening Thermally Modified Ash in a vertical orientation typically involves securing the boards to the horizontal furring strips. The type and spacing of fasteners depend on the chosen profile, board dimensions, and local wind load requirements. Generally, corrosion-resistant fasteners, such as stainless steel screws or nails, are recommended. Face fastening is common, but concealed fastening systems may be available for specific profiles. Always follow manufacturer guidelines and local building codes for fastener type, size, and spacing to ensure proper attachment and allow for natural wood movement.
Ready to Plan Your Vertical Thermally Modified Ash Project?
Request a material quote today. Provide your project dimensions, desired profile, and ZIP code to confirm current availability and service options. For further information on Thermally Modified Ash, explore our product page, siding and cladding options, other thermally modified wood products, the NORX brand, and Maximo Accoya.
Request a material quote →