Why a Mock-Up is Essential for Thermally Modified Ash
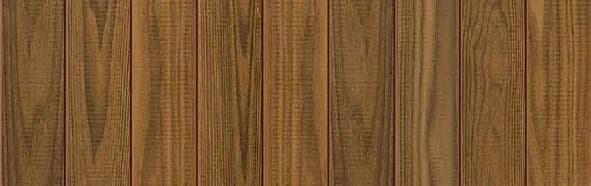
Thermally modified ash, with its natural deep brown hue and prominent hardwood grain, presents a unique aesthetic that can look different under various lighting conditions and alongside other materials. Photographs and small samples offer a starting point, but they cannot fully capture the visual impact of the material in situ, especially concerning shadow lines, trim integration, and corner details.
A physical mockup allows you to assess the material's appearance on a larger scale, observe how light plays across the surface throughout the day, and confirm the chosen profile creates the desired shadow effects. It also provides an opportunity to evaluate the craftsmanship of joints and transitions, ensuring they meet your expectations for the finished elevation.
What to Include in Your Mock-Up
A useful mockup should represent a key architectural detail of your project. Consider a section that incorporates a corner, a window or door opening, or a transition to another material. This allows you to test multiple critical junctions simultaneously.
Your mockup should include actual pieces of the thermally modified ash in the specific profile you intend to use. For example, if you plan to use a 1 × 6 Plus S4S E4E End Match profile for siding, ensure your mockup uses this exact material. Include any planned trim pieces, corner boards, flashing, and even a section of the intended substructure, such as furring strips for a rainscreen assembly. This comprehensive approach helps evaluate not just the material, but also the installation method and how different components interact.
If you are considering a finish or sealant, apply it to a portion of the mockup to observe its effect on the wood's appearance and how it might age over time. This helps you make an informed decision about long-term maintenance and aesthetic goals.
Planning Your Mock-Up Location and Size
Place your mockup in a location on the job site that mirrors the actual conditions of the planned installation. This means considering sun exposure, prevailing winds, and proximity to other architectural elements or landscaping. Observing the mockup under these real-world conditions provides the most accurate assessment.
The size of the mockup should be large enough to be representative, typically at least 4 feet by 4 feet, or a segment that includes a significant portion of a window or corner. This scale allows for a better understanding of the material's overall appearance and the visual impact of repetitive elements.
Consider constructing a simple frame or support structure for your mockup that allows it to stand vertically, mimicking a wall. This helps in visualizing the material as it would appear on the building's facade.
Evaluating the Mock-Up: Key Considerations
Once your mockup is in place, take time to observe it over several days, or even weeks, if your project timeline allows. Pay attention to how the thermally modified ash appears at different times of day and under varying weather conditions. Does the color shift? Are the shadows from the profile as expected?
Inspect the joins, corners, and transitions. Are they clean and precise? Does the material align correctly with windows, doors, or other architectural features? This is the time to identify any inconsistencies or areas where the installation method might need refinement.
Consider the integration with other materials. If your design includes stone, stucco, or metal, ensure the mockup includes samples of these adjacent materials to confirm a harmonious aesthetic. This holistic view helps prevent costly adjustments later in the project.
Worked Example: A Window Corner Mock-Up
Let's consider a hypothetical project: cladding a new addition with thermally modified ash, specifically around a prominent window on a corner of the building. The chosen profile is the 1 × 6 Plus S4S E4E End Match for a horizontal installation.
For this mockup, you would need:
1. **Thermally Modified Ash Boards:** Approximately 10 linear feet of the 1 × 6 Plus S4S E4E End Match profile to create a section at least 4 feet high and wrapping around a 2-foot corner. This would allow for several horizontal courses.
2. **Window Trim:** A section of the actual window trim and casing planned for the project, perhaps 2 feet by 2 feet, to represent the window opening.
3. **Substructure:** A small section of furring strips and sheathing (e.g., a 4x4 foot section) to replicate the wall assembly and ensure proper ventilation behind the cladding.
4. **Corner Board/Detail:** If a corner board or specific mitered corner detail is planned, include this in the mockup.
You may also want to test a small, representative section of a rainscreen assembly to confirm the overall wall system.
By assembling these components on a temporary frame and placing it at the intended corner of the addition, you can visually confirm the material's color and grain, evaluate the shadow lines created by the horizontal profile, and ensure the window trim integrates seamlessly with the ash cladding. This provides a tangible reference point for all stakeholders before the full installation begins.
Before you order
- Identify the most complex or visually critical section of your project for the mockup (e.g., corner, window, material transition).
- Gather actual pieces of all planned materials: thermally modified ash (exact profile), trim, flashing, and adjacent materials.
- Construct a representative section of the substructure (e.g., furring strips) to simulate the full wall assembly.
- Assemble the mockup on a temporary frame that allows it to stand vertically.
- Place the mockup in a location on the job site with similar sun exposure and environmental conditions.
- Observe the mockup over several days, noting how light, shadows, and weather affect the appearance.
- Evaluate the precision of all joints, corners, and transitions.
- Confirm the aesthetic integration with any adjacent materials.
- If applicable, apply a test finish or sealant to a portion of the mockup.
- Document observations with photos and notes, discussing findings with your contractor or design team.
Confirm installation details, approved uses and warranty terms in the current instructions for the exact product and profile. Your installer should verify the substrate, structure and applicable project requirements.
Questions to help you decide
How large should a thermally modified ash mockup be?
A mockup should be large enough to be representative of the final installation, typically at least 4 feet by 4 feet. The goal is to see the material in context and understand how repetitive elements or specific details will appear on a larger scale. For a window detail, it should encompass enough of the surrounding cladding to show the full integration.
Can I use small samples instead of a full mockup?
Small samples are excellent for initial color and texture evaluation, but they cannot fully replicate the visual impact of the material on a larger surface, especially concerning shadow lines, natural variations in the wood, and how it interacts with light. A full mockup provides a much more accurate representation of the finished elevation.
What if my project has multiple cladding materials or profiles?
If your project involves different cladding materials, colors, or profiles, your mockup should incorporate all of these elements at a key transition point. For example, if thermally modified ash is paired with stucco, include a section of both materials and the transition detail in your mockup to ensure visual harmony and proper detailing.
Plan Your Thermally Modified Ash Project
Ready to specify thermally modified ash for your next project? Request a material quote by providing your project dimensions, desired profile (such as 1 × 6 Plus S4S E4E End Match), and ZIP code. We can also confirm current availability and service options to help you get started.
Request a material quote →