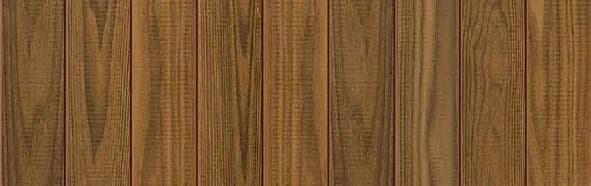
Understanding Thermally Modified Ash for Exterior Use
Thermally Modified Ash is a hardwood known for its pronounced grain and denser feel, offering a distinct aesthetic for exterior cladding. The thermal modification process enhances its stability by improving its response to changes in humidity. This makes it a suitable choice for applications like cladding, where material movement due to moisture fluctuations needs to be minimized.
The material's natural deep brown hue provides a rich, elegant appearance that can be maintained with finishes or allowed to weather naturally. When selecting Thermally Modified Ash, consider its intended application across walls and cladding, and confirm the specific profile and installation system required for horizontal layouts. Profiles such as S4S E4E End Match in nominal sizes like 1 × 6 Plus or 5/4 × 6 are common for siding applications.
Benefits of using Thermally Modified Ash include its hardwood presence, better moisture response, and broad application range, making it versatile for various exterior design schemes. Its inherent stability supports consistent horizontal lines across an elevation.
Establishing Course Lines and Visual Rhythms
The first step in designing a horizontal layout is to establish the primary course lines. This involves determining the desired reveal width for each board and how these widths will stack vertically. Consistency in reveal width is key to a harmonious horizontal design. For Thermally Modified Ash, available profiles will dictate the exact board height, but the overlap or spacing between boards can be adjusted to create different visual effects.
Consider the overall height of the wall and how many courses will fit. Aim to minimize the need for narrow rip cuts at the top or bottom of the wall, as these can disrupt the visual flow. It's often beneficial to start the layout from a prominent feature, such as the top of a window or the base of the wall, and work outwards, adjusting course heights slightly to ensure full boards are used where possible.
The rhythm of the horizontal lines can be subtle or pronounced. A tighter reveal between courses creates a more monolithic appearance, while a wider reveal emphasizes each individual board, highlighting the grain and texture of the Thermally Modified Ash.
Integrating Cladding Around Windows and Openings
Windows and other wall openings require careful planning to maintain the horizontal integrity of the cladding. Ideally, horizontal courses should align with window sills and heads to create clean, uninterrupted lines. This may involve adjusting the overall course layout or selecting specific trim profiles to bridge any gaps.
When cladding meets a window frame, proper flashing and weatherproofing details are paramount. The cladding should terminate cleanly against the window trim or frame, with adequate space for expansion and contraction. Avoid situations where narrow strips of cladding are forced into tight spaces around windows, as this can look disjointed and compromise weather resistance.
For a refined look, consider using Thermally Modified Ash trim or moulding around windows. Profiles like 1 × 10, 2 × 2, 2 × 4, or 2 × 6 can be used for this purpose, providing a cohesive material palette. This helps frame the window opening while maintaining the visual continuity of the horizontal lines.
Fastening Details for Horizontal Thermally Modified Ash
The choice and placement of fasteners are critical for the long-term performance and appearance of horizontal Thermally Modified Ash cladding. Approved fastening systems typically involve face fastening or concealed fastening, depending on the profile and desired aesthetic. Face fastening, while visible, offers strong mechanical attachment.
For face-fastened applications, ensure fasteners are corrosion-resistant and appropriate for exterior use. They should be installed consistently along each board, typically at each structural support, to prevent warping or cupping. Pre-drilling may be necessary to prevent splitting, especially with denser hardwoods like Ash.
Concealed fastening systems, often used with specific profiles designed for interlocking or hidden clips, offer a cleaner, uninterrupted surface. These systems typically rely on a specific installation sequence and require precise alignment. Always refer to the manufacturer's installation guidelines for the chosen Thermally Modified Ash profile and fastening system to ensure proper water management and structural integrity.
Hypothetical Example: Cladding a Wall Section with Thermally Modified Ash
Consider a hypothetical wall section, 10 feet wide by 8 feet high, with a single window opening measuring 4 feet wide by 3 feet high, centered horizontally and 3 feet from the base of the wall. We plan to use Thermally Modified Ash S4S E4E End Match, nominal 1 × 6 Plus profile, which has an actual coverage width of approximately 5.25 inches with a standard reveal.
First, calculate the number of courses for the 8-foot (96-inch) height. Dividing 96 inches by 5.25 inches per course yields approximately 18.28 courses. To avoid a very narrow final course, we can adjust the reveal slightly or plan for a trim piece. Let's aim for 18 courses, meaning each course would have an average effective height of 96 inches / 18 = 5.33 inches. This slight adjustment allows for a consistent reveal across the wall.
Next, integrate the window. The window sill is 3 feet (36 inches) from the base. With 5.33-inch courses, the 7th course up (7 * 5.33 = 37.31 inches) would align closely with the sill. The window head is 3 feet (36 inches) above the sill, placing it at 72 inches from the base, which aligns with the 13th course (13 * 5.33 = 69.29 inches). This alignment minimizes cuts around the window. For the 10-foot (120-inch) width, each course will require two 5-foot boards or one 8-foot and one 2-foot board, considering the 1 × 6 Plus profile typically comes in various lengths. End-matched profiles simplify joining boards within a course, but staggering end joints between courses is essential for structural integrity and visual appeal. This example assumes structural backing is in place to support the cladding at the required intervals.
For material takeoff: 18 courses * 10 feet wide = 180 linear feet. With nominal 1x6 Plus material, this is approximately 94.5 square feet of coverage. Allowing for 10-15% waste for cuts, especially around the window, would lead to purchasing about 200-207 linear feet of material. This calculation provides an area-equivalent coverage, but the actual purchase quantity will depend on available board lengths and a detailed cut plan to optimize material use and minimize waste.
Limitations and Considerations for Horizontal Cladding
While Thermally Modified Ash is stable, all wood materials will exhibit some movement. Horizontal cladding designs must account for this by allowing appropriate expansion and contraction gaps, especially at corners and around openings. Consult product specifications for recommended gaps.
Water management is another critical consideration. Horizontal courses can potentially trap water if not installed correctly. A rainscreen assembly, which creates a ventilation gap behind the cladding, is often recommended to promote drainage and drying. Ensure that the chosen profile effectively sheds water and that all horizontal surfaces are sloped slightly outwards if exposed to direct rain.
The long-term appearance of Thermally Modified Ash will evolve. While it starts with a deep brown hue, it will naturally silver over time if left unfinished and exposed to UV light. This weathering process should be considered during the design phase to align with the desired aesthetic outcome. If maintaining the initial color is important, a suitable exterior finish will be required, along with a maintenance schedule.
Before you order
- Confirm desired reveal width for horizontal courses.
- Calculate total number of courses for wall height, minimizing narrow rip cuts.
- Plan alignment of courses with window sills and heads.
- Select appropriate trim profiles for window and opening integration.
- Determine fastening method (face or concealed) and verify compatibility with profile.
- Account for material expansion and contraction gaps.
- Consider rainscreen assembly for drainage and ventilation.
- Plan for natural weathering or select an appropriate finish for color retention.
- Verify structural backing for fastener attachment points.
- Estimate material quantities, including waste factor for cuts around openings.
Confirm installation details, approved uses and warranty terms in the current instructions for the exact product and profile. Your installer should verify the substrate, structure and applicable project requirements.
Questions to help you decide
Can Thermally Modified Ash be installed directly over sheathing for a horizontal layout?
While it can be installed over sheathing, a rainscreen assembly is often recommended for exterior cladding, especially for horizontal layouts. This creates a space for drainage and ventilation behind the cladding, which helps manage moisture, improve performance, and potentially extend the lifespan of the assembly. Consult local building codes and manufacturer guidelines for specific requirements.
How do I ensure consistent spacing between horizontal cladding boards?
Consistent spacing is achieved through careful layout planning and the use of spacers or shims during installation. Many cladding profiles have built-in features that aid in consistent spacing. For Thermally Modified Ash, precise measurement and marking of ledger lines or using temporary blocks can help maintain uniform reveals across the entire elevation. Always dry-fit a few boards to confirm the desired spacing before final fastening.
What happens if I don't account for expansion and contraction in my horizontal layout?
Failing to account for expansion and contraction can lead to several issues, including warping, cupping, buckling, or splitting of the cladding boards. While Thermally Modified Ash has improved stability, all wood materials will move. Proper gaps at ends, corners, and around openings allow the material to move without creating stress, preserving the integrity and appearance of the horizontal layout.
Plan Your Thermally Modified Ash Horizontal Cladding Project
Ready to design a distinctive facade with Thermally Modified Ash? Request a material quote today. Provide your project dimensions, desired profile (e.g., S4S E4E End Match 1 × 6 Plus), and ZIP code to confirm current availability and service options. Our team can help you select the right materials for your horizontal layout needs.
Request a material quote →