Understanding Thermally Modified Ash and Cut Ends
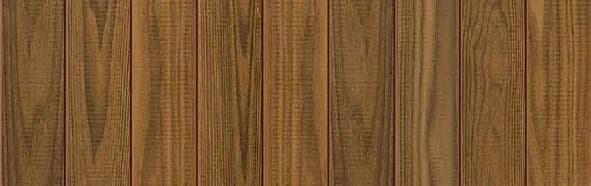
Thermally modified ash begins as North American or European ash (Fraxinus spp.) and undergoes a high-heat treatment process. This process alters the wood's cellular structure, resulting in improved dimensional stability and a consistent deep brown hue throughout the material. This modification makes the wood less prone to expansion and contraction due to moisture fluctuations, a significant benefit for exterior applications.
When a piece of thermally modified ash is cut, the newly exposed end grain reveals the inner structure of the wood. While the thermal modification penetrates the entire thickness, the cutting process itself can create a rougher surface that is more susceptible to moisture absorption compared to the smooth, factory-finished faces and edges. Proper treatment of these field cuts is crucial to maintain the wood's enhanced stability and protect its appearance over time.
The profiles available for thermally modified ash, such as S4S E4E (Surfaced Four Sides, Eased Four Edges) with or without end matching, are designed for specific applications like siding, ceilings, decking, and trim. Regardless of the profile, any cut made during installation requires attention to ensure the material performs as intended. This applies to both aesthetic details and the long-term durability of the assembly.
Thermally modified ash is generally recommended for cladding, ceilings, feature walls, and selected decking applications where the profile and installation system are confirmed. The hardwood presence and improved moisture response are key benefits that support its use in these demanding environments. Protecting field cuts is a direct extension of ensuring these benefits are realized across the entire project.
Why End Treatment Matters for Durability
The end grain of any wood product, including thermally modified ash, naturally absorbs and releases moisture more rapidly than the face or edge grain. This is due to the capillary action along the wood fibers. When thermally modified ash is cut, this vulnerability is exposed. If left untreated, these cut ends can become entry points for moisture, potentially leading to localized swelling, checking, or discoloration, even in a material known for its stability.
For exterior applications, where thermally modified ash is frequently used, exposure to rain, humidity, and temperature changes is constant. An untreated end grain can compromise the overall performance of the cladding or decking. Proper sealing or coating of cut ends helps to equalize the rate of moisture absorption and desorption across the entire board, thereby reducing stress on the wood and enhancing its dimensional stability. This practice helps to preserve the deep brown hue and overall aesthetic for longer.
Beyond moisture management, treating cut ends can also offer a degree of protection against environmental factors. While thermally modified ash is inherently more resistant to certain biological agents than untreated wood, a sealed end grain provides an additional barrier. This simple step during installation can prevent minor issues from escalating into more significant concerns down the line, safeguarding your investment in a high-performance material.
Methods for Treating Exposed Cut Ends
There are several approaches to treating exposed cut ends of thermally modified ash, each with its own considerations for application and aesthetic outcome. The choice often depends on the desired finish, the level of exposure, and the overall maintenance plan for the project.
One common method is to apply a suitable end-grain sealant or wax. These products are designed to penetrate the wood fibers and create a water-repellent barrier. They are particularly effective for decking and cladding applications where cut ends might be directly exposed to weather. It is important to select a sealant that is compatible with thermally modified wood and any other finishes applied to the material. This approach aims to reduce the rate of moisture exchange through the end grain.
For projects where a consistent color is desired across all surfaces, including cut ends, applying the same finish used on the faces of the boards can be an option. This might involve a penetrating oil or a stain that matches the natural deep brown hue of the thermally modified ash or a chosen aesthetic. This method not only provides moisture protection but also ensures visual uniformity. However, careful application is needed to prevent over-absorption at the end grain, which could lead to a darker appearance in that area.
In some cases, especially for covered applications like soffits or interior feature walls, a less intensive treatment might be acceptable if the cut ends are not exposed to direct moisture or significant humidity fluctuations. However, even in these scenarios, a light sanding and a clear sealer can help to maintain a clean finish and reduce the potential for minor swelling or fiber lift. Always assess the specific environmental conditions of the installation before deciding on the level of end-grain treatment.
Planning Field Cuts: Best Practices
Careful planning of field cuts can minimize waste and optimize the appearance of your thermally modified ash project. Before making any cuts, it is advisable to lay out your boards and mark all cut lines precisely. Using a sharp, fine-toothed saw blade designed for hardwoods will help achieve clean cuts, reducing splintering and ensuring a smooth surface for end treatment.
When designing a layout, consider how cut ends will be hidden or intentionally exposed. For horizontal cladding, staggering butt joints can create a more visually appealing pattern. For vertical applications, planning cuts to occur at corners or where they will be covered by trim can reduce the number of visible treated ends. Always account for proper ventilation and drainage around any cut ends, especially in rainscreen assemblies, to prevent moisture accumulation.
A practical strategy is to make a slightly oversized cut initially, then perform a final, precise trim cut. This two-stage approach allows for adjustments and helps ensure the cleanest possible edge. For end-matched profiles, ensure that field cuts do not compromise the integrity of the interlocking system, if applicable. If an end match is cut off, the board should be treated as a square-end board and fastened appropriately at the new end.
Consider the overall length of your boards and how they will fit into the design. While thermally modified ash comes in various nominal sizes, including 1x6 Plus and 5/4x6 for siding and ceilings, and 2x4 and 2x6 for decking, optimizing your cuts to use full lengths where possible will reduce the number of field cuts required. This not only saves time but also minimizes the need for end treatment. Always refer to the specific profile dimensions and manufacturer recommendations for cutting and installation.
Worked Example: Calculating Cuts for a Cladding Panel
Let's consider a hypothetical wall panel measuring 10 feet wide by 8 feet high that needs to be clad with 1x6 Plus thermally modified ash boards, installed horizontally. The nominal width of a 1x6 Plus board is approximately 5.5 inches (actual width, after surfacing).
First, calculate how many horizontal courses are needed: 8 feet (96 inches) / 5.625 inches per course = 17.06 courses. Since you cannot have a fraction of a course, you will need 18 courses. The top course will be cut down to fit the remaining height.
Next, consider the length. Each course is 10 feet long. If we are using boards typically supplied in random lengths, we will need to make field cuts. For simplicity, let's assume boards are available in 10-foot lengths, but we also need to account for a window opening in the middle of the panel that is 4 feet wide by 4 feet high, centered horizontally and vertically.
The window starts 3 feet from the bottom and 3 feet from the side. This means boards will need to be cut to fit around the window. For the courses that intersect the window (from course 7 to course 14, assuming course 1 is at the bottom), each 10-foot board will need two cuts: one to create the piece to the left of the window (3 feet long) and one for the piece to the right (3 feet long). This will create two exposed ends per board at the window opening, plus the two ends of the board itself.
For the 8 courses intersecting the window, you will have 8 x 2 = 16 additional field cuts at the window edges. These 16 cut ends, along with the 36 ends from the full 18 courses (18 boards x 2 ends per board, assuming no butt joints within the 10-foot length), will require end treatment. The total number of cut ends to be treated would be 16 (for window edges) + 36 (for panel ends) = 52 cut ends. This example highlights the importance of counting every cut end, not just the full board ends, in your material and treatment planning.
Before you order
- Identify all locations where thermally modified ash boards will be cut during installation.
- Determine the exposure level of each cut end (e.g., direct weather, sheltered, interior).
- Select an appropriate end-grain sealant or finish compatible with thermally modified wood and your desired aesthetic.
- Ensure you have the correct cutting tools (sharp, fine-toothed saw blade) for clean cuts.
- Plan your board layout to minimize visible field cuts where possible.
- Allocate sufficient time and materials for applying end treatment to all necessary cuts.
- Confirm compatibility of end treatment with any other stains or oils used on the project.
- Consider creating a small mock-up to test the appearance and application of your chosen end treatment on a sample cut.
Confirm installation details, approved uses and warranty terms in the current instructions for the exact product and profile. Your installer should verify the substrate, structure and applicable project requirements.
Questions to help you decide
Does thermally modified ash require end sealing for interior applications?
For interior applications, where moisture exposure is minimal, end sealing may not be strictly necessary for durability. However, applying a clear sealer or the same finish used on the board faces can help achieve a consistent aesthetic and prevent minor fiber lift at the cut edges. It's primarily a decision based on desired finish and visual uniformity rather than moisture protection.
Can I use any wood glue or sealant on thermally modified ash cut ends?
It is important to use sealants or adhesives specifically recommended for exterior wood or thermally modified wood. Not all products are compatible with the altered cellular structure of thermally modified ash, and some may not offer adequate long-term protection against moisture. Always check product specifications for compatibility and performance with thermally modified materials. Look for products designed for enhanced wood stability.
How do I ensure a consistent color at cut ends if applying a finish?
To achieve consistent color, apply the chosen finish lightly and evenly to the cut end. End grain tends to absorb more finish than face grain, which can lead to a darker appearance. You might need to apply a thinner coat or wipe off excess more quickly on the end grain. Testing on a scrap piece is highly recommended to perfect your technique and ensure the desired outcome. Some may opt for a dedicated end-grain sealer before applying a color finish.
Ready to Plan Your Thermally Modified Ash Project?
Request a material quote with your project dimensions, desired profile, and ZIP code. Confirm current availability and service options for your area to get started on your next design.
Request a material quote →