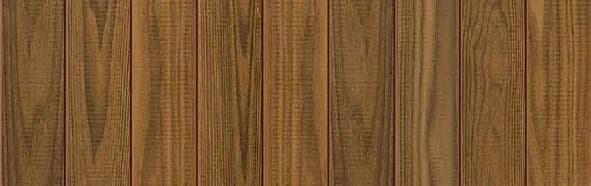
Understanding Thermally Modified Ash for Exterior Use
Thermally modified ash is a hardwood that undergoes a high-heat modification process. This process enhances the wood's stability, making it more resistant to changes in humidity compared to untreated ash. This improved dimensional stability is particularly beneficial for exterior cladding applications, where wood is exposed to varying weather conditions. Its natural deep brown hue and pronounced grain offer a distinct aesthetic.
Available profiles for thermally modified ash include S4S E4E (smooth four sides, eased four edges) in various nominal sizes, such as 1 × 6 Plus and 5/4 × 6 for siding, ceilings, and decking. Larger dimensions like 2 × 4 and 2 × 6 are also offered for decking and structural details. Importantly, trim and molding profiles in sizes like 1 × 10, 2 × 2, 2 × 4, and 2 × 6 are available, which can be critical for corner detailing.
The inherent stability of thermally modified ash means it is well-suited for applications where precise corner alignment and minimal movement are desired. However, like all wood products, it will still experience some movement, and corner details should accommodate this.
Mitered Corner Joints: A Clean, Seamless Look
A mitered corner creates a crisp, continuous appearance by joining two cladding boards cut at a 45-degree angle. When properly executed, the wood grain appears to wrap around the corner, offering a high-end, seamless aesthetic. This approach is often favored for modern or minimalist designs where a clean line is paramount.
However, mitered joints require precise cutting and careful installation. Any slight misalignment or movement over time can become noticeable. It's crucial that the cladding boards are accurately cut and securely fastened to maintain the integrity of the miter. Given the dimensional stability of thermally modified ash, it performs better in mitered applications than many untreated woods, but careful planning for fastening and potential movement is still essential. Some installers may opt for a small, concealed relief cut or chamfer on the inside edge of the miter to allow for minor expansion without visible damage.
A mitered corner also exposes end grain, which, while improved by thermal modification, may still benefit from a compatible sealant or finish application to further protect against moisture intrusion, especially in exposed conditions.
Butt Joints: Simple and Practical
A butt joint corner involves bringing the end of one cladding board flush against the face of an adjacent board. This is a simpler and often more forgiving installation method than a mitered joint. It can be achieved by extending one board past the corner and butting the next board into its end, or by alternating the overlap on successive courses of cladding.
While less visually seamless than a mitered corner, a butt joint can offer a robust and practical solution. It typically requires less precision in cutting and can be more forgiving of minor movements. This approach can create a subtle shadow line at the corner, which some designs may incorporate intentionally.
For a butt joint, ensuring proper fastening of both boards into the substructure is key. The board butting into the face of the other should be securely fastened to prevent it from pulling away.
Trim Board Corners: Defining the Edge
Using trim boards to finish corners is a traditional and highly effective method. This involves installing flat trim pieces over the corner, covering the ends of the cladding boards. Trim boards can be installed vertically, horizontally, or as a combination, depending on the desired aesthetic and cladding orientation.
Thermally modified ash is available in trim and molding profiles (e.g., 1 × 10, 2 × 2, 2 × 4, 2 × 6) that can be used to match or complement the main cladding. This method provides excellent protection for the cladding board ends, reducing exposure to weather and impact. It also allows for a less precise cut on the cladding boards themselves, as the trim will cover the cut ends.
Trim board corners offer a distinct architectural detail, adding visual weight and definition to the building's edges. They can be particularly useful for creating a more traditional or craftsman-style appearance. When installing trim, ensure it is properly flashed and sealed to prevent water ingress behind the trim. Consider using a slightly thicker trim board (e.g., a 5/4 × 6 trim with 1 × 6 cladding) to create a subtle reveal and shadow line.
Worked Example: Corner Detail for a 12-foot Wall
Consider a hypothetical project where thermally modified ash cladding (1 × 6 Plus S4S E4E End Match profile) is being installed horizontally on a 12-foot long wall, with a total height of 9 feet. We will illustrate the material calculation for a trim board corner.
For a trim board corner, two pieces of trim are typically used to cover the corner. Let's assume we want to use 2 × 4 S4S E4E thermally modified ash trim. For a 9-foot wall height, we would need two pieces of trim, each 9 feet long. Since standard lengths are often sold in 2-foot increments, we would likely purchase two 10-foot lengths of 2 × 4 trim.
The cladding boards themselves would be cut to terminate at the corner, with their ends covered by the trim. The trim boards would then be fastened over these ends, providing a finished and protected edge. This approach minimizes precision cuts on the cladding and offers robust corner protection.
Decision Checklist for Corner Finishing
When planning your thermally modified ash cladding project, consider the following points to select the best corner detail:
**Aesthetic Goal:** Do you prefer a seamless, continuous look (mitered), a defined edge (trim board), or a simple, functional finish (butt joint)?
**Installation Skill Level:** Mitered corners demand high precision; butt joints and trim board applications are generally more forgiving.
**Budget and Material Waste:** Mitered joints can sometimes lead to more waste if cuts are not perfect. Trim boards add material cost but simplify cladding cuts.
**Exposure and Protection:** Trim boards offer the most physical protection to cladding ends. Mitered and butt joints may require more diligent sealing.
**Maintenance:** Consider how easily each corner type can be cleaned, repaired, or resealed over time.
**Compatibility with Rainscreen:** Ensure your chosen corner detail integrates well with your overall rainscreen assembly, allowing for proper drainage and ventilation.
Before you order
- Determine the desired aesthetic: seamless, defined, or simple.
- Assess installation skill and precision required for each corner type.
- Evaluate material waste and cost implications for mitered vs. trim board options.
- Consider the level of protection against weather and impact each corner offers.
- Plan for long-term maintenance, cleaning, and resealing needs.
- Verify compatibility with the overall rainscreen system and drainage requirements.
Confirm installation details, approved uses and warranty terms in the current instructions for the exact product and profile. Your installer should verify the substrate, structure and applicable project requirements.
Questions to help you decide
Can thermally modified ash mitered corners be used in all climates?
While thermally modified ash has improved stability, mitered corners inherently expose end grain and can be more susceptible to moisture ingress if not meticulously installed and sealed. In very wet or fluctuating climates, extra attention to sealing and potentially a small, concealed relief gap for movement is advisable. Trim board corners generally offer more robust protection in such conditions.
Are there specific fasteners recommended for corner details?
Fastener selection depends on the specific corner detail and substructure. For all thermally modified ash applications, corrosion-resistant fasteners (e.g., stainless steel) are recommended. For mitered corners, fasteners should be placed to secure both pieces of the miter. For trim boards, ensure fasteners penetrate both the trim and the underlying framing, providing ample holding power.
Do I need special tools for cutting thermally modified ash corners?
For precise mitered cuts, a high-quality miter saw with a sharp, fine-toothed blade is essential. For butt joints and trim boards, a standard circular saw or miter saw can be used. Always ensure blades are sharp to achieve clean cuts and minimize splintering in the hardwood.
Ready to Plan Your Thermally Modified Ash Project?
Request a material quote with your project dimensions, exact profile preferences, and ZIP code to confirm current availability and service options for thermally modified ash cladding and trim.
Request a material quote →