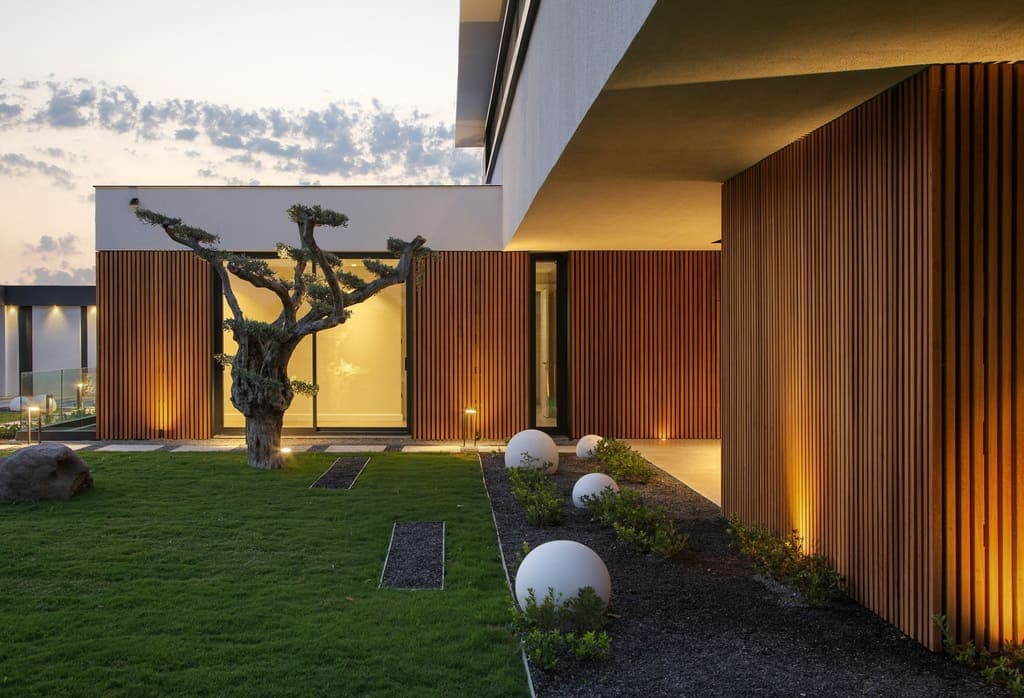
Understanding the Wall-Soffit Interface
The junction between a thermally modified wood wall and a soffit can be a straightforward corner or a more complex detail involving overhangs, recessed areas, or integrated lighting. Key considerations include how the wall cladding terminates, how the soffit material begins, and what structural elements or air gaps exist between them.
This interface is particularly important for managing rainwater runoff and ensuring proper ventilation for the roof assembly, especially in areas with significant thermal cycling or humidity. A well-designed transition prevents water from pooling and allows air to circulate, which can contribute to the longevity of both the cladding and the roof structure.
Coordinating Profiles and Materials
One of the primary decisions is how the profile of the thermally modified wood wall cladding will meet the soffit material. Common thermally modified wood profiles include tongue-and-groove, shiplap, and square-edge, each offering different shadow lines and installation methods.
For a seamless appearance, consider using the same thermally modified wood material for both the wall and the soffit, especially if the soffit is visible from below. For example, a 1x6 tongue-and-groove profile used on the wall could extend into the soffit, creating a continuous wood aesthetic. If different materials are chosen, such as thermally modified wood on the wall and a metal or fiber cement soffit, plan for a clean, defined transition point, possibly with a trim piece or a reveal.
When selecting profiles, consider how they will interact visually. A narrow, modern profile on the wall might pair well with a flat, minimalist soffit, while a more rustic, wider board profile could be complemented by a similar soffit treatment or a contrasting material that highlights the wood texture.
Ventilation Requirements at the Soffit
If the soffit is part of a ventilated attic or roof system, maintaining adequate airflow at the wall-to-soffit junction is crucial. This often means incorporating continuous soffit vents or individual vent blocks that allow air to enter the attic space while preventing insect and moisture intrusion.
When designing with thermally modified wood, ensure that the chosen cladding profile does not obstruct these vents. This may require careful cutting of boards, the use of a vented trim piece, or a gap detail that is protected by insect screening. Consult local building practices and roof system specifications to determine the required net free ventilation area.
For non-ventilated soffits, the primary concern shifts to moisture protection and aesthetic finish. Even here, a small drip edge or a slight angle can help shed water away from the wall and soffit junction.
Designing for Drainage and Water Management
Water management is paramount at the wall-to-soffit transition. Rainwater running down the wall must be directed away from the soffit and the building envelope. This often involves a drip edge, flashing, or a carefully designed reveal.
A common detail is to terminate the wall cladding slightly above the soffit, creating a small gap or a channel that allows water to drain freely. This gap can be covered by a Z-flashing or a trim board that extends slightly beyond the face of the soffit, creating a drip edge.
Consider the direction of prevailing winds and potential for wind-driven rain. Detailing that accounts for these conditions can prevent water from being forced upwards into the soffit or behind the wall cladding.
Worked Example: Integrating 1x6 Thermally Modified Wood Cladding with a Plank Soffit
Consider a hypothetical project where a facade is clad with 1x6 (nominal dimensions, actual ~3/4" x 5-1/2") Thermally Modified Wood, and the designer wishes to extend a similar wood aesthetic to the soffit. The wall is 10 feet tall, and the soffit extends 2 feet from the wall.
For the wall, 1x6 tongue-and-groove Thermally Modified Wood planks are selected for a clean, horizontal run. At the top of the wall, instead of terminating with a simple cap, the last course of planks is installed with its tongue facing upwards. A Z-flashing is then installed over the top edge of this last plank, extending slightly outward.
For the soffit, 1x6 Thermally Modified Wood planks are also chosen, but these are specified as square-edge profile for a flatter, more uniform soffit appearance. These soffit planks are installed perpendicular to the wall, running from the fascia back towards the building. The edge of the first soffit plank nearest the wall is tucked underneath the outward-extending leg of the Z-flashing. This creates a clean line, protects the top edge of the wall cladding, and directs any water running down the wall over the soffit, preventing it from entering the wall-soffit junction.
If ventilation is required for the attic space, continuous soffit vents (e.g., a strip vent) would be integrated into the soffit paneling, typically near the fascia or within the field of the soffit, ensuring they are not obstructed by the wall cladding or flashing. Insect screening would be installed behind any open gaps or vents.
This approach ensures material continuity, provides necessary water management, and allows for potential ventilation, all while maintaining the desired aesthetic of the thermally modified wood.
Fastening and Support for the Transition
Proper fastening is essential for both the wall cladding and the soffit panels, especially at the transition. Thermally modified wood should be fastened according to manufacturer guidelines, typically with corrosion-resistant fasteners.
At the wall-soffit junction, ensure that the framing or blocking provides adequate support for both elements. If a trim piece or flashing is used, it must also be securely fastened to prevent movement and maintain its protective function. Consider the expansion and contraction of the wood with changes in humidity and temperature, leaving appropriate clearances as recommended by the product specifications.
For soffits, a sturdy sub-frame is typically required, especially for longer spans or heavier wood panels. This sub-frame will provide the attachment points for the soffit material and can also support any integrated lighting or ventilation components.
Before you order
- Will the wall and soffit use the same thermally modified wood profile, or different materials?
- What is the desired aesthetic: seamless continuity or a distinct material break?
- Is soffit ventilation required for the roof system? If so, how will it be integrated without obstruction?
- How will rainwater be managed at the wall-soffit junction (e.g., drip edge, flashing, reveal)?
- What sub-framing or blocking is needed to support both the wall cladding and the soffit panels?
- Are there any specific local building codes or architectural guidelines that dictate this transition detail?
- Have clearances for wood movement been considered at the junction?
- What type of fasteners will be used for both the cladding and soffit, and at the transition?
Confirm installation details, approved uses and warranty terms in the current instructions for the exact product and profile. Your installer should verify the substrate, structure and applicable project requirements.
Questions to help you decide
Can I use thermally modified wood for both my wall and soffit?
Yes, using thermally modified wood for both applications can create a cohesive and continuous aesthetic. It is important to select profiles and installation methods that are appropriate for both vertical (wall) and horizontal (soffit) orientations, ensuring proper drainage and ventilation where needed. For example, a tongue-and-groove profile can often be used effectively in both applications.
How do I ensure proper ventilation if my soffit needs to be vented?
If your soffit is part of a ventilated roof system, you must incorporate continuous or individual soffit vents. When planning the wall-to-soffit transition, ensure that the wall cladding, flashing, or trim does not block these vents. This might involve specifying a vented trim piece, a screened gap, or positioning the vents strategically within the soffit panels. Always consult your roof system manufacturer's guidelines and local building codes for required net free ventilation area.
What is a 'drip edge' and why is it important at this transition?
A drip edge is a component, often made of metal or designed into a trim profile, that extends slightly beyond the surface below it to direct water away. At the wall-to-soffit transition, a drip edge is crucial for water management. It helps prevent rainwater running down the wall from wicking back underneath the soffit or entering the wall assembly, instead directing it to drip freely away from the structure. This protects both the wall cladding and the soffit from moisture damage.
Ready to Plan Your Thermally Modified Wood Project?
Request a material quote with your project dimensions, desired profile, and ZIP code to confirm current availability and service options for thermally modified wood, siding, and soffit materials.
Request a material quote →