Why Choose a Vertical Layout?
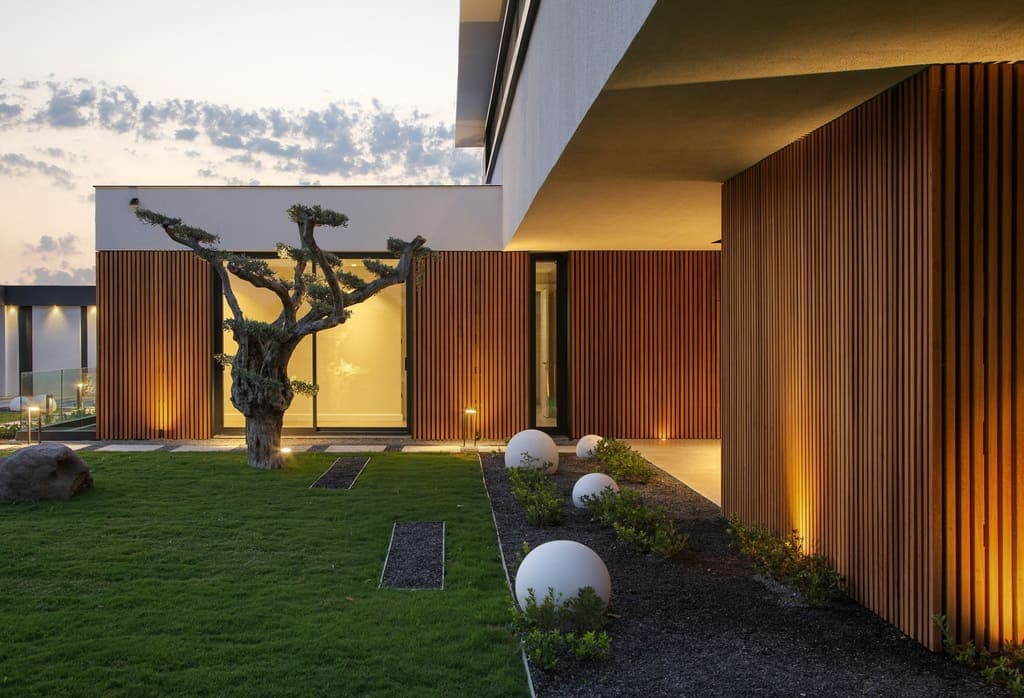
A vertical layout with thermally modified wood can dramatically alter the perception of a building's height and scale. It draws the eye upward, making a single-story structure feel taller or accentuating the verticality of a multi-story building. This orientation can also create a dynamic interplay of light and shadow, particularly with certain profiles, adding depth and texture that changes throughout the day. From a design perspective, vertical lines can evoke a sense of strength, stability, and modern elegance.
Beyond aesthetics, a vertical orientation can sometimes simplify the detailing around openings, as the planks run continuously up the wall. It also offers specific advantages for water management, as gravity naturally assists in shedding water down the face of the cladding more directly than horizontal applications, provided proper rainscreen principles are followed. This can be particularly beneficial in climates with significant rainfall.
Consider the overall architectural style of your project. Vertical cladding often complements contemporary designs, but it can also be used to add a modern twist to traditional forms or to create an accent wall that stands out. The choice of profile, from flat boards to tongue-and-groove or shiplap, will further influence the final visual effect.
Substructure Requirements for Vertical Cladding
When installing thermally modified wood cladding vertically, the substructure plays a critical role in providing adequate support and creating the necessary ventilation gap. Unlike horizontal cladding, which can be directly fastened to vertical studs or furring strips, vertical cladding requires a dual-layer furring system to create both fastening points and a continuous drainage plane.
The first layer of furring should be installed horizontally, directly over the weather-resistive barrier (WRB). These horizontal strips create the primary ventilation cavity. Spacing for these horizontal strips should be determined by the cladding profile and fastening requirements, typically aligning with structural framing or specific blocking. The second layer of furring is then installed vertically over the horizontal strips. These vertical furring strips provide the direct fastening surface for the thermally modified wood planks.
For a typical rainscreen assembly, the depth of the furring strips for both layers should allow for a minimum airspace behind the cladding, usually 3/4 inch to 1 inch, to ensure proper air circulation and drainage. This system helps prevent moisture accumulation, manage thermal expansion and contraction, and extend the lifespan of the cladding. Ensure all furring materials are rot-resistant and compatible with the intended fasteners.
Profile Selection for Vertical Applications
The choice of thermally modified wood profile significantly influences the appearance and performance of a vertical layout. Various profiles are available, each offering distinct shadow lines and installation characteristics.
Tongue-and-groove (T&G) profiles, such as the NORX T&G profile, offer a tight, interlocking fit, creating a relatively smooth surface with subtle V-grooves. These are often chosen for a clean, contemporary look. The interlocking nature can help with alignment during installation.
Shiplap profiles, like the NORX Shiplap profile, provide a distinct overlap that creates a more pronounced shadow line, adding depth and texture. The overlap also helps shed water effectively. Fastening for shiplap can often be done through the overlap, concealing some fasteners.
Square-edge or board-and-batten styles can also be adapted for vertical layouts. Board-and-batten involves wider boards installed with narrower strips (battens) covering the joints, creating a strong vertical rhythm and a rustic yet refined aesthetic. This requires careful detailing to ensure proper weather protection at the joints.
Consider how the chosen profile will manage water. While vertical orientation aids drainage, profiles with deep grooves or overlaps can further enhance this. Also, evaluate the desired shadow effect; deeper profiles will create more dramatic shadows, while flatter profiles will result in a more uniform appearance.
Explore options such as the <a href="/siding-and-cladding">Siding and Cladding</a> collection for a wider range of profiles suitable for vertical installation.
Starting and Finishing Details
Proper detailing at the base, top, and corners of a vertical cladding system is essential for both aesthetics and long-term performance. The base of the wall requires careful attention to ensure adequate clearance from grade and effective drainage.
At the base, a starter strip or flashing should be installed to support the first row of vertical planks and provide a drip edge, directing water away from the foundation. This clearance also allows for proper ventilation into the rainscreen cavity.
At the top of the wall, where the cladding meets the soffit or roofline, a continuous head flashing or trim piece is necessary to prevent water from entering the top of the rainscreen cavity. This detailing should integrate with the soffit material and ensure a clean, finished appearance. Ventilation openings should be incorporated at the top of the cavity to allow for air circulation.
For exterior corners, options include mitered joints for a seamless look, corner boards for a more traditional finish, or metal trim for a contemporary aesthetic. Interior corners typically involve butt joints against a trim piece or directly to the adjacent wall plane. Around windows and doors, ensure proper flashing details are in place beneath the cladding and that the cladding is trimmed neatly around the openings, often with J-channels or trim boards to create a finished edge and manage water runoff.
Worked Example: Vertical Cladding for an Accent Wall
Let's consider a hypothetical accent wall on a home's exterior, measuring 10 feet wide by 8 feet high, using NORX Thermally Modified Wood in a shiplap profile, 5.5 inches wide with a 0.5-inch overlap, and available in 10-foot lengths. The goal is a vertical layout.
First, calculate the area: 10 ft * 8 ft = 80 square feet.
Next, determine the number of full planks needed. Each plank is 5.5 inches (0.458 feet) wide. With a 0.5-inch overlap, the exposed face is 5.0 inches (0.417 feet).
Width of wall: 10 feet = 120 inches. Exposed width per plank: 5.0 inches. Number of planks needed across the width: 120 inches / 5.0 inches/plank = 24 planks.
Since the wall height is 8 feet and the planks come in 10-foot lengths, each 10-foot plank can be cut to yield one 8-foot piece, with 2 feet of offcut. These offcuts may not be reusable for this specific wall but could be used for smaller details or other projects. Therefore, we need 24 planks, each 10 feet long.
Substructure: For this 10-foot wide wall, we would install horizontal furring strips (e.g., 1x3s) at 16 inches on center, spanning the 10-foot width. Over these, vertical furring strips (e.g., 1x3s) would be installed at 16 inches on center, providing the fastening points for the vertical shiplap. This dual-layer system ensures continuous airflow and drainage.
Fastening: For shiplap, fasteners would typically be driven through the overlapping lip into the vertical furring strips, concealing the fasteners. Use corrosion-resistant fasteners appropriate for exterior applications.
This example simplifies some aspects; always account for waste, specific manufacturer recommendations, and local building codes. Consider also complementary products such as <a href="/brands/norx">NORX</a> for other thermally modified wood options or <a href="/products/maximo-accoya">Maximo Accoya</a> for high-performance alternatives.
Before you order
- Confirm local building codes and rainscreen requirements for vertical cladding.
- Verify the specific thermally modified wood profile is approved for vertical installation.
- Plan the substructure: horizontal furring for ventilation, then vertical furring for fastening.
- Determine required clearances from grade, soffits, and adjacent materials.
- Select appropriate flashing and trim details for base, top, corners, and openings.
- Calculate material quantities, including waste factor for cuts and detailing.
- Choose corrosion-resistant fasteners compatible with thermally modified wood and substructure.
- Consider the aesthetic impact of shadow lines and grain orientation with the chosen profile.
Confirm installation details, approved uses and warranty terms in the current instructions for the exact product and profile. Your installer should verify the substrate, structure and applicable project requirements.
Questions to help you decide
Can thermally modified wood be installed directly onto studs for a vertical layout?
No, for vertical cladding, a dual-layer furring system is generally recommended. The first layer of furring runs horizontally to create a ventilation gap, and the second layer runs vertically to provide solid fastening points for the vertical cladding. This design ensures proper drainage and airflow behind the cladding, which is crucial for its longevity and performance in a rainscreen assembly.
What kind of fasteners should be used for vertical thermally modified wood cladding?
Always use corrosion-resistant fasteners, such as stainless steel screws or nails, specifically designed for exterior wood applications. The type and length of the fastener will depend on the cladding profile (e.g., face-fastened vs. concealed fastened for shiplap or tongue-and-groove), the thickness of the cladding, and the depth of the furring strips. Consult manufacturer guidelines for specific recommendations.
How do I manage water at the base of a vertically clad wall?
At the base of a vertically clad wall, it is critical to ensure proper drainage and clearance. Install a continuous starter strip or flashing that directs water away from the foundation and provides a drip edge. This also allows for proper ventilation into the rainscreen cavity, preventing moisture buildup.
Ready to Design Your Vertical Thermally Modified Wood Project?
For your next project, request a material quote. Provide your project dimensions, desired profile, and ZIP code to confirm current availability and service options for thermally modified wood.
Request a material quote →