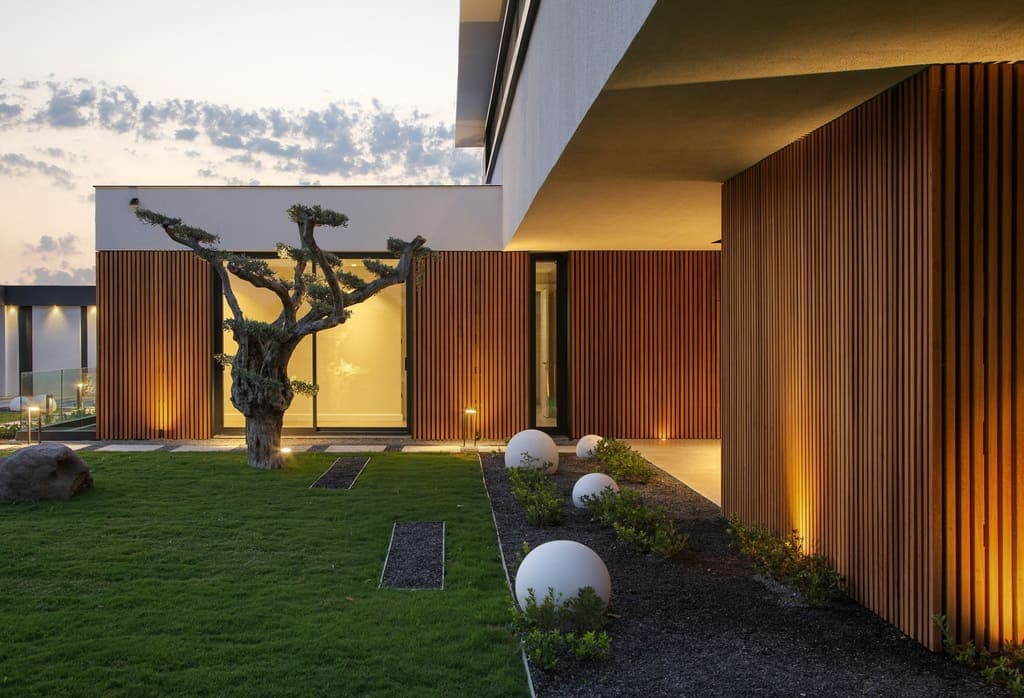
Why a Mock-Up is Critical for Thermally Modified Wood
Thermally modified wood, such as NORX or Maximo Accoya, offers unique aesthetic qualities and performance characteristics. Its appearance can vary significantly depending on the species, thermal treatment process, and any applied finishes. These nuances are often best appreciated in context, under actual lighting conditions, rather than solely from small samples or digital images. A mock-up allows you to evaluate the material's true character.
Beyond aesthetics, a mock-up serves as a practical testing ground for installation details. It can help you confirm fastener choices, assess the fit of trim pieces, and understand how the cladding will perform at critical junctions like corners, window surrounds, and transitions to other materials. This hands-on experience can inform adjustments to your installation plan, potentially preventing errors during the main project.
Planning Your Mock-Up: Key Considerations
To maximize the value of your mock-up, careful planning is essential. Start by identifying the most critical areas of your project where the cladding will meet other elements or where specific details need verification. Common areas include exterior corners, window or door surrounds, and transitions to foundation materials or soffits. Select a representative section that incorporates these complexities.
Consider the scale and location of your mock-up. It should be large enough to give a realistic impression but manageable to construct. Position it in an area that receives similar light exposure to the actual facade. If your project has multiple elevations with different sun exposures, you might consider smaller mock-ups for each significant condition. Document the mock-up with photos and notes at different times of day.
Selecting Materials for Your Mock-Up
Your mock-up should use the exact thermally modified wood profile, species, and finish you intend for the final project. For example, if you are considering NORX thermally modified spruce, ensure your mock-up uses that specific material. Include all other components that will be visible or critical to the installation, such as trim boards, corner details, fasteners, and any planned sealants or coatings. If a rainscreen system is part of your plan, consider incorporating a basic representation of the furring strips and air gap.
Do not substitute materials in the mock-up, as even slight variations can alter the overall effect and performance. You can find specific product details for <a href="/thermally-modified-wood">thermally modified wood</a>, <a href="/siding-and-cladding">siding and cladding</a>, and specific brands like <a href="/brands/norx">NORX</a> and <a href="/products/maximo-accoya">Maximo Accoya</a> on our website.
Building the Mock-Up: A Worked Example
Let's consider a hypothetical scenario: you are planning to clad a section of a contemporary home with 1x6 (nominal) thermally modified spruce siding, installed horizontally, around a window opening and an outside corner. The window is 36 inches wide by 48 inches high, and the corner extends for 24 inches on each side.
For this mock-up, you would need:
1. **Framing:** A simple plywood or OSB frame, approximately 60 inches wide by 72 inches high, to simulate a wall section. This provides a stable surface to attach the cladding.
2. **Window Opening:** Cut a 36x48 inch opening in the framing, centered. Frame this opening with 2x4 lumber to simulate a rough opening.
3. **Cladding:** Approximately 40 linear feet of the chosen 1x6 thermally modified spruce siding. This allows for horizontal runs above, below, and to the sides of the window, plus coverage of the corner.
4. **Trim:** Approximately 20 linear feet of 1x4 (nominal) trim board for the window casing and corner boards, if desired. This allows you to test how the cladding meets the trim.
This is crucial for understanding the full assembly.
Assemble these components exactly as you would on the actual project. Install the furring strips, then the cladding, cutting and fitting around the window and at the corner. Apply the trim. This process allows you to evaluate cut quality, fastener penetration, and the overall fit and finish. Observe it at different times of day to see how light and shadow play on the profile and corners.
Evaluating Your Mock-Up
Once constructed, take time to critically evaluate your mock-up. Consider the following:
**Aesthetic Appeal:** Does the chosen thermally modified wood profile, color, and finish meet your expectations in this larger context? How do the shadow lines appear? Does it complement any adjacent materials (e.g., paint, stone, metal) you might be using? Stand back and view it from various distances and angles.
**Installation Details:** Are the corner details clean and precise? How does the cladding terminate around the window opening? Are fasteners discreet and properly set? Are there any unexpected gaps or alignment challenges? This is your opportunity to refine your installation approach.
**Workability:** How easy was the material to cut and install? Did you encounter any challenges with specific tools or techniques? This feedback can help you prepare your crew or refine your DIY plan.
**Durability Considerations:** While a short-term mock-up won't fully test long-term durability, it can help you visualize how the material will age. If you plan to leave it unfinished, observe how it begins to weather. If a finish is applied, note its appearance and consistency.
Before you order
- Identify critical architectural details to include in the mock-up (e.g., corners, window surrounds, material transitions).
- Determine the optimal size and location for the mock-up to represent actual project conditions.
- Gather all exact materials: thermally modified wood profile, trim, fasteners, and any planned finishes.
- Construct the mock-up, paying close attention to installation details and techniques.
- Evaluate the mock-up's aesthetic appeal under various lighting conditions.
- Assess the functionality and appearance of all installation details, especially at junctions.
- Note any challenges or refinements needed for the full-scale project.
- Photograph the mock-up at different times of day and document observations.
Confirm installation details, approved uses and warranty terms in the current instructions for the exact product and profile. Your installer should verify the substrate, structure and applicable project requirements.
Questions to help you decide
How large should my thermally modified wood mock-up be?
Your mock-up should be large enough to represent a typical section of your facade, ideally incorporating at least one corner or a window/door opening. A common size might be 4x6 feet or larger, depending on the complexity of the details you wish to test. The goal is to see the material in context, not just as a small sample.
Can I reuse the materials from my mock-up for the final project?
It depends on the condition of the materials after disassembly. If the mock-up was carefully constructed and disassembled without damage to the cladding or trim, some pieces might be suitable for use in less visible areas or as cut pieces. However, it's often best to consider mock-up materials as a separate investment, as they may have fastener holes, cut edges, or minor imperfections from the testing process. Plan for a small amount of waste.
Do I need a mock-up if I've seen samples of the thermally modified wood?
Yes, samples provide an initial impression, but a mock-up offers a comprehensive view. Small samples rarely convey the full effect of grain variation, shadow lines, or how the material will look when installed over a larger area and interacting with other building components. A mock-up allows you to test installation methods and see the material in real-world lighting, which is crucial for making informed decisions.
Ready to Plan Your Thermally Modified Wood Project?
Request a material quote today. Provide your project dimensions, desired profile, and ZIP code to confirm current availability and service options. Our team can assist with product selection and provide the information you need to move forward.
Request a material quote →