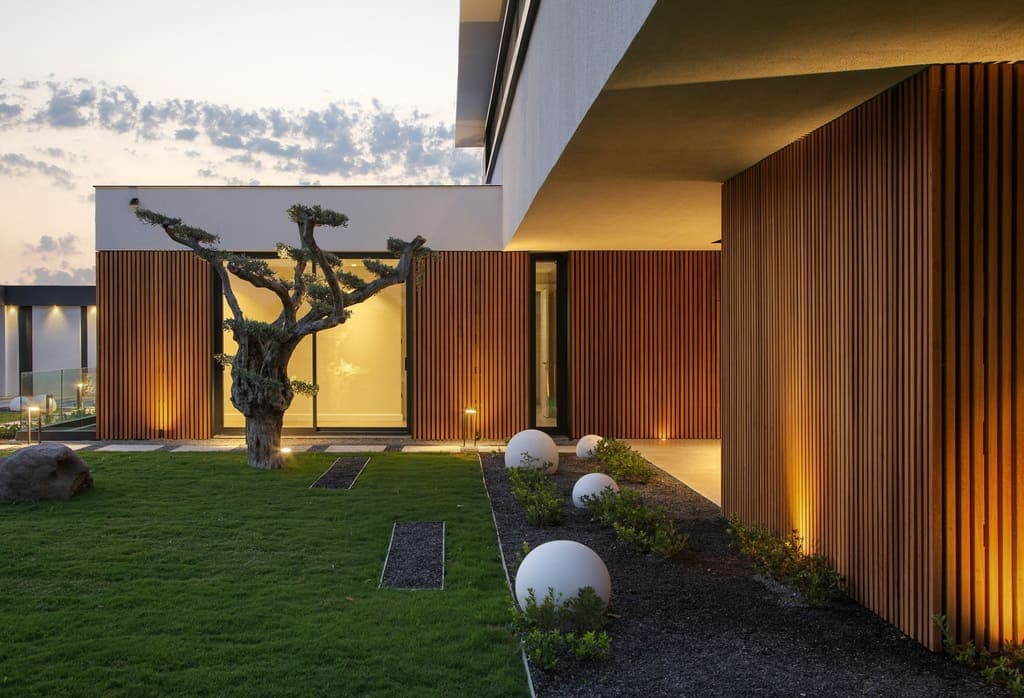
Understanding Thermally Modified Wood for Wall Applications
Thermally modified wood undergoes a high-heat treatment process that alters its cellular structure, enhancing its dimensional stability and resistance to decay. This makes it suitable for various exterior uses, including covered patio walls, where it can maintain its appearance and structural integrity over time.
For wall applications, the key advantage is its reduced tendency to warp, cup, or twist compared to untreated wood, which is particularly beneficial in fluctuating outdoor humidity. While covered walls offer some protection, they are still exposed to temperature changes and ambient moisture, making the stability of thermally modified wood a relevant factor.
Selecting the Right Profile and Species
Thermally modified wood is available in various profiles, each creating a distinct visual effect. Common options include tongue-and-groove, shiplap, and square-edge boards. For covered patio walls, the choice often comes down to the desired shadow lines and overall aesthetic.
Tongue-and-groove profiles offer a tight, interlocking fit, which can create a smooth, continuous surface. Shiplap provides a clean, overlapping joint with a defined shadow line. Square-edge boards can be installed with a visible gap for a more open, planked look, often requiring a backing material. Lumber Plus offers a range of thermally modified wood products, including options suitable for wall cladding.
Species like Thermally Modified Ash and Thermally Modified Spruce are frequently used. Thermally Modified Ash typically offers a darker, richer tone, while Thermally Modified Spruce often presents a lighter, more uniform appearance. The inherent color of the wood can influence the final aesthetic, especially if a clear finish is chosen.
Finishing Options for Covered Patio Walls
While thermally modified wood is inherently more durable, applying a finish can further enhance its appearance and offer additional protection. For covered patio walls, you have several finish choices:
Clear Finishes: These allow the natural color and grain of the wood to show through, often deepening its tone. They can provide UV protection and moisture resistance, helping to slow the natural graying process.
Stains: Stains can alter the color of the wood while still allowing the grain to be visible. They are available in a wide range of hues, from natural wood tones to more opaque colors, offering design flexibility.
Unfinished: Thermally modified wood can be left unfinished. Over time, it will naturally weather to a silver-gray patina. This low-maintenance option is suitable for those who appreciate the weathered aesthetic, but it's important to understand that the color change will be gradual and uneven depending on exposure.
Consider the level of sun exposure your covered patio walls receive. Even under a cover, some areas may get more indirect light than others, which can affect the rate of weathering or the performance of certain finishes.
Attachment Methods and Substructure
Proper attachment is crucial for the longevity and appearance of your thermally modified wood walls. The method chosen depends on the profile of the wood and the desired aesthetic.
For most wall applications, the thermally modified wood cladding is installed over a substructure, typically consisting of furring strips or battens. This creates an air gap behind the cladding, which can aid in ventilation and moisture management, especially important in climates with varying humidity.
Common fastening methods include:
Face Fastening: Boards are secured directly through their face into the substructure using screws or nails. This method is straightforward but leaves visible fasteners.
Hidden Fastening: Some profiles, like certain tongue-and-groove or shiplap designs, allow for fasteners to be driven through the tongue or the overlap, concealing them once the next board is installed. This creates a cleaner, uninterrupted surface.
Always use corrosion-resistant fasteners, such as stainless steel, to prevent staining and ensure long-term stability. Consult product-specific installation guidelines for recommended fastener types, sizes, and spacing.
The substructure itself must be securely attached to the primary structure of the patio. Ensure the substructure is level and plumb to provide a stable base for the cladding.
Worked Example: Covered Patio Wall in Boston, MA
Imagine a covered patio in a Boston backyard, featuring a main wall section that measures 12 feet long by 8 feet high. The homeowner desires a modern look with defined shadow lines and plans to use thermally modified Spruce shiplap siding, which is typically supplied in 6-inch wide (nominal) boards.
First, calculate the wall area: 12 feet * 8 feet = 96 square feet. To account for waste from cuts and potential material variations, a common practice is to add 10-15% to the total area. For this example, we'll use 15% waste: 96 sq ft * 1.15 = 110.4 sq ft.
Next, determine the number of boards needed. A 6-inch nominal shiplap board typically has an exposed face width of about 5.5 inches (0.458 feet) when installed. For an 8-foot high wall, you would need 8 feet / 0.458 feet/board = approximately 17.47 boards vertically. Since you cannot purchase partial boards, you would need 18 boards per vertical stack.
For the 12-foot length of the wall, if boards are supplied in 12-foot lengths, you would need 18 boards. If boards are supplied in 16-foot lengths, you could cut them to 12 feet, but you would still need 18 boards. The total linear footage would be 18 boards * 12 feet/board = 216 linear feet.
For the substructure, if vertical furring strips are spaced every 16 inches on center horizontally across the 12-foot wall, you would need 12 feet / (16/12 feet) = 9 furring strips. Each strip would be 8 feet long, totaling 9 * 8 = 72 linear feet of furring strips. These would be secured to the existing patio structure.
The homeowner chooses a semi-transparent stain to enhance the natural wood tone while offering UV protection. They plan to use hidden fasteners for a clean aesthetic. This example illustrates how to estimate material quantities, but always confirm exact board dimensions and coverage with your chosen product before ordering.
Before you order
- Confirm local building codes and any HOA restrictions for exterior wall materials.
- Measure the exact dimensions of your covered patio walls, accounting for any openings like windows or doors.
- Select the thermally modified wood species and profile that aligns with your design vision.
- Decide on a finish (clear, stain, or unfinished) and consider its maintenance requirements.
- Plan your attachment method (face-fastened or hidden) and select appropriate corrosion-resistant fasteners.
- Design the substructure (furring strips/battens) to ensure proper ventilation and secure attachment.
- Calculate material quantities, including waste factor, for both the cladding and substructure.
- Consider how corners, edges, and transitions to other materials will be detailed.
- Review product-specific installation guides for your chosen thermally modified wood.
Confirm installation details, approved uses and warranty terms in the current instructions for the exact product and profile. Your installer should verify the substrate, structure and applicable project requirements.
This is a planning guide for projects in Boston, MA. Ask our team to confirm availability, delivery to your ZIP code and which branch can support your order.
Questions to help you decide
Can thermally modified wood be used in fully exposed outdoor areas?
While thermally modified wood offers enhanced durability, its suitability for fully exposed areas depends on the specific product and species. For covered patio walls, it benefits from partial protection. For fully exposed applications like decking or open pergolas, it's important to verify the product's suitability and follow manufacturer guidelines for installation and finishing to maximize performance and longevity. Consult specific product documentation, such as for NORX thermally modified wood, for full exposure ratings.
Does thermally modified wood require regular maintenance?
The level of maintenance depends on the desired appearance and chosen finish. If left unfinished, thermally modified wood will naturally weather to a silver-gray patina over time. To maintain its original color or the color of a stain, periodic cleaning and reapplication of a finish may be necessary, typically every 1-3 years depending on exposure and product type. Regular cleaning to remove dirt, mold, or mildew is generally recommended for all exterior wood surfaces.
What are the common sizes for thermally modified wood siding?
Thermally modified wood siding is available in various dimensions, with common widths ranging from 4 inches to 8 inches (nominal) and lengths typically from 8 feet to 16 feet. Specific profiles like shiplap or tongue-and-groove will have different actual coverage widths due to the overlap or interlocking joint. Always check the exact dimensions and coverage area specified for the product you intend to use, such as those found in Maximo Accoya or other siding and cladding options.
Ready to Plan Your Thermally Modified Wood Patio Walls?
Request a material quote with your project dimensions, desired profile, and ZIP code to confirm current availability and service options for your Boston, MA project.
Request a material quote →