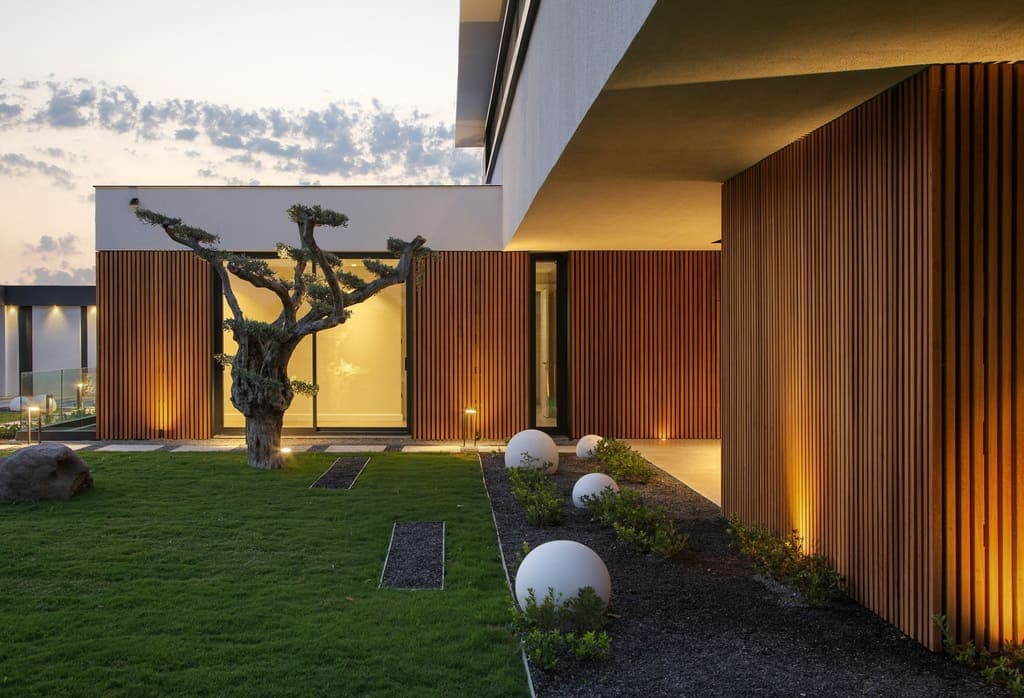
Understanding Covered vs. Exposed Outdoor Walls
The primary difference between a covered and an exposed outdoor wall lies in the degree of protection from the elements. A covered outdoor wall is typically shielded by an overhang, roof, or other structural element that significantly reduces direct exposure to rain, snow, and prolonged, intense UV radiation. This partial protection means the material will experience less dramatic moisture cycling and temperature fluctuations compared to a fully exposed facade.
For thermally modified wood, this translates to potentially less frequent maintenance or a slower rate of aesthetic change if left unfinished. While the wood's inherent stability from thermal modification is beneficial in any outdoor setting, the reduced environmental stress in a covered application can extend the period before refinishing might be considered, or allow for a more consistent appearance over time if a finish is applied and maintained. However, it is important to note that 'covered' does not mean 'indoor'; the material will still be subject to outdoor humidity and temperature changes, and appropriate installation practices are still necessary.
Why Choose Thermally Modified Wood for Covered Outdoor Walls?
Thermally modified wood undergoes a high-temperature treatment process that alters its cellular structure. This process enhances several key properties that make it suitable for covered outdoor walls.
One notable benefit is improved dimensional stability. The modification reduces the wood's tendency to absorb and release moisture, which in turn minimizes swelling, shrinking, and warping. This stability is advantageous for exterior applications where consistent appearance is desired, and it can simplify installation by reducing the likelihood of movement after the material is in place. For covered walls, this means a more consistent visual alignment over time.
Additionally, the thermal modification process can enhance the wood's resistance to certain biological factors. This makes it a durable choice for outdoor environments. The natural coloration, often a rich brown hue, can also be a significant aesthetic draw, offering a consistent color throughout the material that can be maintained with appropriate finishes or allowed to gradually weather to a silvery-gray patina.
Popular Profiles and Their Visual Impact
Thermally modified wood is available in various profiles, each offering a distinct visual effect for your covered outdoor wall. The choice of profile can significantly influence the overall aesthetic, from modern and sleek to traditional and rustic.
Common profiles include tongue-and-groove, shiplap, and square edge (often used in an open-joint rainscreen assembly). Tongue-and-groove profiles create a tight, interlocking fit, offering a smooth, continuous surface with minimal visible fasteners. This can be ideal for a clean, contemporary look. Shiplap profiles feature an overlapping joint that creates a distinct shadow line, adding depth and texture to the wall. This profile can offer a more traditional or rustic appeal, depending on the board width and reveal.
Square edge profiles, often used with a deliberate gap between boards, create a pronounced shadow line and a more modern, linear aesthetic. This approach requires careful planning for the substructure and potentially a dark backing material to ensure a consistent appearance through the gaps. The choice between these profiles will depend on your desired architectural style and the level of visual texture you wish to achieve. For example, a narrow board shiplap can create a sense of intricate detail, while wide square edge boards can contribute to a bolder, minimalist statement.
You can explore available profiles for thermally modified wood, such as those from the NORX brand, at our product page: [https://www.lumberplus.com/thermally-modified-wood](https://www.lumberplus.com/thermally-modified-wood).
Installation Considerations for Covered Outdoor Walls
Even in a covered setting, proper installation is crucial for the longevity and performance of thermally modified wood. While direct weather exposure is reduced, moisture management and proper ventilation remain important.
A key consideration is the substructure. Ensure the framing is sound, plumb, and adequately spaced to support the cladding. For most profiles, fastening directly to studs or furring strips is common. When using an open-joint profile, a rainscreen assembly is often recommended, even in covered areas, to allow for air circulation behind the cladding and to manage any incidental moisture. This typically involves vertical furring strips to create a continuous air gap.
Fastening methods should be selected to accommodate any minor movement of the wood and to ensure a secure attachment. Face fastening with appropriate exterior-grade screws or hidden fastening systems for tongue-and-groove or shiplap profiles are common options. Always pre-drill holes if specified by the manufacturer or if working with denser wood species to prevent splitting. Ensure adequate clearance from the ground or any horizontal surfaces to prevent moisture wicking and allow for air circulation, even if the wall is covered.
For complementary materials, consider using high-quality siding and cladding accessories. You can find options at: [https://www.lumberplus.com/siding-and-cladding](https://www.lumberplus.com/siding-and-cladding).
Worked Example: Covered Patio Wall
Let's consider a hypothetical covered patio wall project. Imagine a patio area measuring 12 feet wide by 8 feet tall, situated under a substantial roof overhang that protects it from direct rain. The homeowner desires a modern aesthetic with horizontal lines and a distinct shadow gap.
For this project, we might select a thermally modified wood, such as the NORX brand, in a square edge profile, measuring 5.5 inches wide (nominal) by 16 feet long. The plan is to install it horizontally with a 1/4-inch open joint. A dark, weather-resistant barrier will be installed behind the furring strips for visual consistency through the open joints.
To calculate the material needed, first determine the wall area: 12 feet * 8 feet = 96 square feet. For an 8-foot height, this is 8 / 0.479 = 16.7 boards. Rounding up, we need 17 boards high. Since the wall is 12 feet wide and the boards are 16 feet long, we can get one full 12-foot length from each 16-foot board, with a 4-foot offcut. These offcuts can be used for shorter sections or trim, but for simplicity, we'll assume full board purchase for each horizontal run. Thus, 17 boards are needed. It's prudent to add 10-15% for cuts, waste, and future repairs, bringing the total to approximately 19-20 boards.
This example demonstrates how profile, dimensions, and desired aesthetic inform material quantity and installation approach. Always verify specific product dimensions and installation guidelines with the manufacturer's documentation.
For other high-performance wood options, consider products like Maximo Accoya: [https://www.lumberplus.com/products/maximo-accoya](https://www.lumberplus.com/products/maximo-accoya).
Before you order
- Confirm the level of shelter: Is the wall truly covered from direct rain and prolonged sun?
- Select the desired aesthetic: Modern, traditional, rustic?
- Choose a profile: Tongue-and-groove, shiplap, square edge (open joint)?
- Determine orientation: Horizontal or vertical?
- Verify substructure: Is it sound, plumb, and adequately spaced for fastening?
- Plan for ventilation and drainage: Will a rainscreen gap be used?
- Select fasteners: Face fastened or hidden, appropriate for outdoor use?
- Calculate material quantities: Account for waste and cuts.
- Consider finishes: Will the wood be left to weather or finished for color retention?
- Review manufacturer guidelines: Always follow specific product installation instructions.
Confirm installation details, approved uses and warranty terms in the current instructions for the exact product and profile. Your installer should verify the substrate, structure and applicable project requirements.
Questions to help you decide
Can thermally modified wood be left unfinished on a covered outdoor wall?
Yes, thermally modified wood can be left unfinished. It will naturally weather to a silvery-gray patina over time due to UV exposure, even in covered areas, though the process might be slower than on fully exposed surfaces. Leaving it unfinished does not compromise its enhanced stability or resistance properties, but regular cleaning is still recommended to prevent dirt buildup.
Does thermally modified wood require a rainscreen assembly on a covered wall?
While a rainscreen assembly is highly recommended for all exterior wood cladding to promote ventilation and moisture management, its necessity on a fully covered wall might depend on the specific profile and local climate conditions. For open-joint profiles, a rainscreen is generally essential for both performance and aesthetics. For closed profiles like tongue-and-groove, a rainscreen still provides beneficial air circulation, which can help equalize moisture content and prolong the life of the cladding. Always consult manufacturer guidelines for the specific product and profile.
How do I clean thermally modified wood on a covered outdoor wall?
Cleaning thermally modified wood on a covered outdoor wall typically involves periodic washing with mild soap and water, using a soft brush or cloth. For stubborn dirt or mildew, specialized wood cleaners designed for exterior use can be applied, following the product instructions carefully. Avoid high-pressure washing, which can damage the wood fibers. Regular cleaning helps maintain the wood's appearance, whether it's finished or left to weather naturally.
Ready to Plan Your Covered Outdoor Wall Project?
Request a material quote today! Provide your project dimensions, desired thermally modified wood profile, and ZIP code to confirm current availability and service options. Our team can assist with product selection and quantity estimates.
Request a material quote →