Understanding Scandinavian Thermally Modified Wood for Exterior Applications
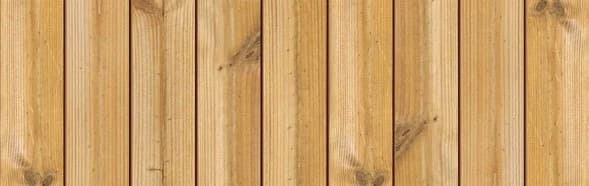
Scandinavian Thermally Modified Wood is a Nordic softwood that undergoes a heat and steam treatment process. This modification enhances dimensional stability without the use of chemical preservatives, making it suitable for both interior and exterior applications, including walls, ceilings, and soffits. Its natural character and warm Nordic grain offer an expressive surface.
The ability to use the same material across different planes (wall to soffit) helps create a unified architectural aesthetic.
Coordinating Profiles for Visual Continuity
One of the primary advantages of Scandinavian Thermally Modified Wood is its availability in profiles suitable for both vertical and horizontal surfaces. For a seamless transition from wall to soffit, consider using a consistent profile or complementary profiles that maintain a visual flow.
For example, a V-Joint/Nickel Gap profile on the wall can extend directly into the soffit, creating continuous lines. Alternatively, an S4S E4E profile might be used for a simpler, cleaner edge where the wall meets the soffit. The choice depends on the desired shadow lines and overall architectural style. Careful planning ensures that the transition appears intentional and integrated, rather than an abrupt change in material or pattern.
Integrating Ventilation at the Soffit
Adequate ventilation is crucial for the health of the roof and attic space, and the soffit is a primary location for intake vents. When incorporating Scandinavian Thermally Modified Wood into a soffit, it's essential to plan for ventilation without compromising the aesthetic or structural integrity.
Common approaches include using continuous soffit vents, individual vent blocks, or creating intentional gaps between wood boards for passive airflow. If using a profile like V-Joint or S4S, ensure that any ventilation strategy is integrated cleanly. For example, a continuous slot vent can be concealed behind the leading edge of the soffit boards, or individual perforated panels can be incorporated discretely within the wood pattern. Always verify that the chosen ventilation method meets local building codes and provides sufficient airflow for the roof system.
Detailing the Wall-to-Soffit Joint
The specific detailing of the wall-to-soffit joint can significantly impact both performance and appearance. There are several common methods:
**Flush Joint:** The wall cladding extends directly to meet the soffit boards, creating a continuous plane. This requires precise cutting and alignment. Expansion and contraction of the wood must be considered, and a small, consistent gap may be necessary.
**Reveal Joint:** A deliberate gap or channel is introduced at the transition. This reveal can be achieved with a trim piece, a backer channel, or by simply leaving a consistent space between the wall and soffit materials. Reveals can add visual interest and help manage slight irregularities in construction.
**Trimmed Joint:** A trim board or fascia board is used to cap the top edge of the wall cladding and provide a clean termination for the soffit. This can simplify installation and provide a robust edge detail, but it introduces an additional material or profile.
When planning, consider the direction of water runoff and ensure that details prevent water from collecting at the joint. A drip edge or slight slope can help direct water away from the wall and soffit intersection.
Worked Example: Designing a Reveal Joint for a Modern Home
Consider a hypothetical modern home where the exterior wall, clad in Scandinavian Thermally Modified Wood (V-Joint profile, 1x6 nominal size), transitions to a matching soffit. The design goal is a clean, minimalist aesthetic with a subtle reveal.
**Assumptions:** The wall cladding is installed horizontally. The soffit boards are also installed horizontally, perpendicular to the wall. A 1-inch reveal is desired at the wall-to-soffit intersection.
**Approach:**
1. **Wall Cladding Termination:** The top course of the wall cladding will terminate approximately 1 inch below the plane of the soffit's underside. A continuous flashing or drip edge should be installed over the top edge of the wall cladding to protect the wall assembly from water intrusion.
2. **Soffit Installation:** The soffit boards will be installed, extending from the fascia back towards the wall.
3. **Reveal Backing:** Behind this 1-inch reveal, a dark, weather-resistant material (e.g., a painted metal channel or a dark fiber cement board) can be installed. This backing will provide a finished appearance within the reveal and act as a secondary barrier against moisture and pests. Crucially, this backing can also incorporate a continuous slot vent to ensure attic ventilation.
This approach creates a crisp shadow line that defines the transition while allowing for integrated ventilation and robust weather protection.
Before you order
- Select a Scandinavian Thermally Modified Wood profile suitable for both wall and soffit applications.
- Determine the desired aesthetic for the joint: flush, reveal, or trimmed.
- Plan for adequate soffit ventilation, ensuring it integrates cleanly with the wood design.
- Detail how water will be managed at the transition point to prevent accumulation.
- Verify compatibility of fasteners and any trim or flashing materials with thermally modified wood.
- Consider the direction of the wood grain and board layout on both the wall and soffit.
- Consult local building codes regarding ventilation and exterior cladding requirements.
Confirm installation details, approved uses and warranty terms in the current instructions for the exact product and profile. Your installer should verify the substrate, structure and applicable project requirements.
Questions to help you decide
Can I use the same Scandinavian Thermally Modified Wood profile on both my wall and soffit?
Yes, Scandinavian Thermally Modified Wood is often available in profiles designed for both vertical (siding) and horizontal (ceiling/soffit) applications. Using a consistent profile, such as V-Joint/Nickel Gap or S4S E4E, can create a cohesive and continuous aesthetic from wall to soffit. Always confirm the specific profile's suitability for your intended application.
How do I ensure proper ventilation when using wood on a soffit?
Proper ventilation is essential for roof and attic health. You can integrate ventilation into a wood soffit using various methods. These include continuous slot vents that sit behind the wood, individual perforated metal or plastic vent panels integrated into the wood pattern, or by leaving small, intentional gaps between the wood boards if permitted by design and code. Ensure the chosen method provides adequate airflow and is protected from insect intrusion.
What are common challenges at the wall-to-soffit connection?
Key challenges include managing water runoff to prevent accumulation at the joint, accommodating the natural movement of wood due to changes in temperature and humidity, and ensuring a visually clean transition. Proper flashing, precise cuts, and thoughtful detailing of reveals or trim pieces are crucial for addressing these challenges effectively and maintaining the long-term performance and appearance of the wood.
Plan Your Scandinavian Thermally Modified Wood Project
Ready to specify Scandinavian Thermally Modified Wood for your exterior walls and soffits? Request a material quote with your project dimensions, desired profile, and ZIP code. Confirm current availability and service options to get started.
Request a material quote →