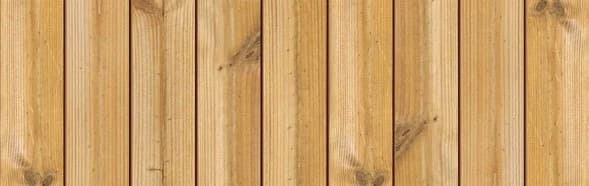
Why Choose a Vertical Layout?
A vertical layout for cladding can dramatically alter the perception of a building's height and scale. It draws the eye upwards, emphasizing architectural lines and creating a more contemporary or formal appearance compared to horizontal applications. Beyond aesthetics, vertical cladding can facilitate better water runoff, as gravity assists in shedding rain directly down the face of the boards and away from the substructure, potentially reducing moisture accumulation.
The continuous lines of these profiles, when oriented vertically, can create strong visual rhythms and shadow play that enhance the facade's texture and depth. For a more understated look, S4S E4E profiles offer clean, continuous lines.
Considering the natural character and warm Nordic grain of Scandinavian Thermally Modified Wood, a vertical orientation can highlight the wood's inherent beauty, making each board a distinct element within the overall design.
Substructure Requirements for Vertical Cladding
For vertical cladding, the substructure must be designed to support the boards securely and facilitate proper drainage and ventilation. This typically involves installing horizontal furring strips or battens over a weather-resistive barrier (WRB). These horizontal elements create the necessary air gap behind the cladding, allowing moisture to drain and air to circulate, which is crucial for the long-term performance of the wall system. The horizontal furring also provides a solid nailing surface for the vertical cladding.
The spacing of the horizontal furring strips depends on the cladding profile and local building practices, but generally, they should be spaced to adequately support the cladding and resist wind loads. Ensure that the furring strips are level and plumb to provide a consistent and stable substrate for the vertical boards. If using a rainscreen assembly, the design should integrate continuous drainage and ventilation paths from bottom to top.
It is important to confirm that the chosen fasteners are compatible with both the Scandinavian Thermally Modified Wood and the substructure material, providing adequate pull-out resistance for the vertical application.
Starting and Finishing Details for Vertical Installations
The base of a vertical cladding installation requires careful detailing to prevent moisture ingress and allow for proper drainage. A common approach involves using a starter strip or trim that provides a clear drip edge and maintains a sufficient clearance between the bottom of the cladding and the ground or adjacent horizontal surfaces. This clearance is vital to prevent moisture wicking into the wood and to allow for air circulation.
At the top of the wall, the vertical cladding should terminate beneath a coping, soffit, or flashing detail that sheds water away from the wall face. This protects the top edge of the cladding and the substructure from direct exposure to rain. Ensure that any finishing trim or molding used at the top allows for the natural expansion and contraction of the wood.
Around windows and doors, vertical cladding requires precise cuts and flashing details to maintain a weather-tight seal. Head flashings should extend over the top of the cladding to direct water away from the opening, while jambs and sills need to be detailed to prevent water from penetrating behind the vertical boards. Continuous vertical lines can be maintained by careful alignment and choice of trim details around these openings.
Worked Example: Vertical Cladding for a 10' x 12' Accent Wall
1. **Material Coverage:** The wall area is 10 ft * 12 ft = 120 square feet. Each 1x6 board, with an actual width of 5.5 inches, covers 0.458 feet of width. To cover 12 feet of width, you would need 12 ft / 0.458 ft/board = approximately 26.2 boards. Since boards are purchased in full lengths, assume 27 boards are needed for width. For a 10-foot height, if boards are available in 10-foot lengths, then 27 boards at 10 feet each would be 270 linear feet. If boards are only available in 12-foot lengths, then you would purchase 27 boards * 12 feet/board = 324 linear feet, with 2 feet of offcut per board.
2. **Substructure:** For a vertical cladding application, horizontal furring strips are required. The length of each row is 12 feet, so 5 rows * 12 feet/row = 60 linear feet of furring. Account for waste and cutting for any openings.
Fasteners should be corrosion-resistant and sized to penetrate the furring strips adequately.
This example provides an estimate. Actual quantities will depend on specific board lengths available, desired spacing, and detailing around any openings or corners.
Maintenance Considerations for Vertical Cladding
While vertical orientation can aid in water shedding, regular maintenance is still important for Scandinavian Thermally Modified Wood. The thermal modification process enhances dimensional stability, but like all wood, it will naturally weather over time, developing a silver-gray patina if left unfinished. If a consistent warm tone is desired, periodic application of a UV-protective finish is necessary.
Inspect the cladding periodically for any signs of wear, damage, or buildup of dirt and debris. Clean the surface as needed with a soft brush and mild soap and water solution. Ensure that the air gap behind the cladding remains clear of obstructions to maintain proper ventilation and drainage. Pay close attention to the base of the wall and around openings, where moisture or debris might accumulate.
Addressing any issues promptly can help preserve the appearance and performance of your vertical Scandinavian Thermally Modified Wood cladding for years to come. Consult manufacturer guidelines for specific cleaning and finishing recommendations.
Before you order
- Confirm the desired aesthetic: Do you want to emphasize height and clean lines?
- Verify substructure readiness: Are horizontal furring strips planned for drainage and ventilation?
- Review starting details: Is there a proper drip edge and clearance at the base of the wall?
- Plan finishing details: How will the top of the cladding terminate (soffit, coping, flashing)?
- Detail around openings: Are head flashings and jamb/sill treatments appropriate for vertical cladding?
- Select compatible fasteners: Are they corrosion-resistant and suitable for vertical application?
- Consider maintenance: Will a UV-protective finish be applied, or is a natural patina desired?
- Calculate material quantities: Have linear footage for cladding and furring, plus fasteners, been estimated?
Confirm installation details, approved uses and warranty terms in the current instructions for the exact product and profile. Your installer should verify the substrate, structure and applicable project requirements.
Questions to help you decide
Can Scandinavian Thermally Modified Wood be installed directly onto studs for a vertical layout?
No, for exterior vertical cladding, it is generally recommended to install horizontal furring strips over a weather-resistive barrier (WRB) before attaching the Scandinavian Thermally Modified Wood. This creates a critical air gap behind the cladding, allowing for proper drainage and ventilation, which is essential for the longevity of the wood and the wall assembly. Direct attachment can trap moisture and lead to issues.
Does vertical cladding require different fasteners than horizontal cladding?
While the type of fastener (e.g., stainless steel screws or nails) may be similar, the placement and frequency might differ slightly to ensure secure attachment against gravity and wind loads. Always ensure fasteners are corrosion-resistant and long enough to penetrate the cladding and adequately engage the substructure. Consult specific installation guidelines for your chosen profile and local building codes.
How do I handle corners with vertical Scandinavian Thermally Modified Wood cladding?
Corners can be finished in several ways. Mitered corners provide a clean, continuous look but require precise cuts. Alternatively, corner trim pieces can be used, which can simplify installation and offer a more defined edge. Ensure any corner detailing allows for proper water management and accommodates potential wood movement.
Ready to design your vertical facade?
Request a material quote for Scandinavian Thermally Modified Wood. Provide your project dimensions, exact profile preference, and ZIP code to confirm current availability and service options. Explore our full range of <a href="/thermally-modified-wood/scandinavian">Scandinavian Thermally Modified Wood profiles</a>, <a href="/siding-and-cladding">siding and cladding options</a>, <a href="/thermally-modified-wood">thermally modified wood products</a>, and <a href="/brands/norx">NORX brand materials</a>. Consider <a href="/products/maximo-accoya">Maximo Accoya</a> for complementary projects.
Request a material quote →