Understanding Scandinavian Thermally Modified Wood Characteristics
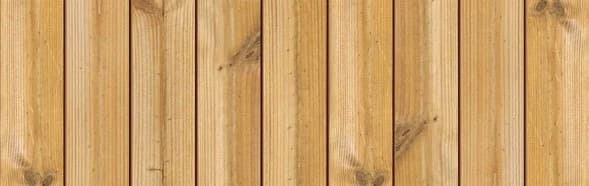
Scandinavian thermally modified wood is a Nordic softwood that undergoes a thermal modification process. This process uses heat and steam to alter the wood's cellular structure, enhancing its dimensional stability and resistance to moisture. The result is a material with a consistent structure and a warm, natural character with expressive grain.
The material is known for its chemical-free modification process, making it an option for projects where avoiding chemical preservatives is a priority. Understanding these inherent qualities is the first step in determining its fit for your renovation.
While suitable for both interior and exterior applications, the specific profile chosen will dictate its best use. S4S E4E offers broader utility for siding, ceilings, and decking. Always confirm the profile's intended application based on manufacturer specifications.
Assessing Existing Conditions: Structure and Substrate
Before considering any new material, a thorough assessment of the existing structure and substrate is crucial. For exterior renovations, evaluate the condition of the wall sheathing, framing, and any existing weather-resistive barrier. Look for signs of water damage, rot, or structural instability. Any deficiencies must be addressed and repaired before installing new cladding.
For interior renovations, examine the condition of existing drywall, plaster, or other wall/ceiling coverings. Ensure the substrate is sound, level, and capable of securely supporting the new wood material. Uneven surfaces can lead to installation challenges and an unsatisfactory finish. Verify that the existing framing can bear the weight of the new material, especially for ceiling applications.
Consider the existing ventilation and insulation. If the renovation involves exterior walls, assess the current rainscreen or drainage plane. Scandinavian thermally modified wood, like many wood claddings, performs best when installed with appropriate ventilation and drainage to prevent moisture accumulation behind the material. If these elements are lacking, the renovation plan should incorporate their addition.
Moisture Management and Exposure Evaluation
Even with its enhanced dimensional stability, Scandinavian thermally modified wood is a natural material and requires proper moisture management, particularly in exterior applications. Evaluate the existing site's exposure to rain, sun, and humidity. Are there areas prone to prolonged wetting? Is the existing roof overhang sufficient to protect the walls?
For exterior renovation, review the existing flashing around windows, doors, and at rooflines. Ensure all flashing is in good condition and correctly installed to prevent water intrusion behind the new cladding. If the existing flashing is inadequate or damaged, it must be replaced or upgraded as part of the renovation. Proper detailing at transitions and penetrations is essential for long-term performance.
In interior spaces, consider the potential for humidity fluctuations. While thermally modified wood is more stable, extreme changes can still affect it. Assess areas like bathrooms or kitchens where moisture levels might be higher and plan for adequate ventilation to manage humidity.
Aesthetic Goals and Compatibility with Existing Elements
Scandinavian thermally modified wood offers a distinct aesthetic with its warm Nordic grain. Consider how this natural character will integrate with other existing elements of your renovation, such as windows, doors, trim, and landscaping. Will the wood complement the overall architectural style, or will it introduce a new aesthetic that requires careful blending?
Think about the desired finish. Scandinavian thermally modified wood can be left to weather naturally, developing a silver-gray patina over time, or it can be finished with stains or oils to maintain its initial warm tones. Your aesthetic goal will influence material selection and ongoing maintenance planning.
For a renovation, consider the scale and proportion of the proposed wood application relative to the existing structure. A large expanse of wood cladding might be striking, but ensure it doesn't overwhelm the existing architecture. Similarly, for interior feature walls, ensure the chosen profile and layout enhance, rather than detract from, the room's overall design.
Worked Example: Renovating an Exterior Wall with V-Joint Siding
Imagine you are renovating a 10-foot wide by 8-foot high exterior wall on an existing detached garage. The current siding is deteriorated, and you wish to replace it with Scandinavian Thermally Modified Wood V-Joint siding (nominal size 1 × 6 inches).
**Step 1: Existing Condition Assessment.** You remove the old siding and discover the existing plywood sheathing is sound but the building wrap is torn in several places. The existing window flashing appears intact, but the base of the wall lacks a proper drainage plane.
**Step 2: Structural and Moisture Correction.** Before installing new siding, you would replace the damaged building wrap with a new weather-resistive barrier. You would also add furring strips (e.g., 3/4-inch thick) vertically over the studs to create a rainscreen cavity, ensuring proper drainage and ventilation behind the new siding. The window flashing would be inspected and resealed where necessary, and a starter strip or appropriate detail would be installed at the base for drainage.
**Step 3: Material Calculation.** The wall area is 10 feet * 8 feet = 80 square feet. Each 1x6 (nominal) board covers approximately 5.5 inches (0.458 feet) when installed, accounting for the V-joint profile. To cover a 10-foot width, you'd need approximately 10 feet / 0.458 feet/board = 21.8 boards per row. For an 8-foot height, assuming standard 8-foot length boards, you would need 22 boards per row. Since the boards are 8 feet long, you would need 22 boards of 8-foot length. This calculation is a basic area equivalent; always factor in waste for cuts and potential off-cuts. For this example, assuming no significant window or door openings for simplicity, you would purchase enough 8-foot boards to cover the width, factoring in 5-10% waste for cuts. For a 10-foot width, you would need 22 boards, and for the 8-foot height, you would need enough rows to cover. If using 8-foot lengths, you would need 22 boards for each 8-foot vertical section, totaling approximately 22 boards for this 8x10 wall.
For a natural look, you might let the wood weather. If a consistent warm tone is desired, a compatible penetrating oil finish would be applied after installation.
Before you order
- Have you thoroughly inspected the existing substrate (sheathing, framing, drywall) for soundness and levelness?
- Are there any signs of water damage, rot, or structural issues that need repair before new material installation?
- Is the existing weather-resistive barrier (for exterior walls) in good condition, or does it need replacement/upgrade?
- Will a rainscreen system be incorporated for exterior walls to ensure proper drainage and ventilation?
- Are all existing flashings around windows, doors, and rooflines adequate and properly installed?
- Have you considered the site's exposure to sun, rain, and humidity and how it might affect the wood?
- Does the natural character and potential weathering of Scandinavian thermally modified wood align with your aesthetic goals?
- What specific profile (e.g., V-Joint, Fluted #5, S4S E4E) is best suited for your application (wall, ceiling, decking)?
- Have you accounted for the weight of the new material and confirmed the existing structure can support it?
- What maintenance plan will you implement for the chosen finish (e.g., natural weathering, oil application)?
Confirm installation details, approved uses and warranty terms in the current instructions for the exact product and profile. Your installer should verify the substrate, structure and applicable project requirements.
Questions to help you decide
Can Scandinavian thermally modified wood be installed directly over existing siding or drywall?
For exterior applications, it is generally recommended to remove existing siding to properly assess the substrate, repair any damage, and install a new weather-resistive barrier and rainscreen system. For interior applications, it may be possible to install over existing drywall if the drywall is sound, flat, and securely attached. However, always confirm the specific installation requirements for your chosen profile and consult with a professional to ensure structural integrity and proper fastening.
Does Scandinavian thermally modified wood require a finish in renovation projects?
Scandinavian thermally modified wood does not require a finish for performance, as the thermal modification process enhances its stability and durability. If left unfinished, it will naturally weather to a silver-gray patina over time, especially in exterior applications. If you wish to maintain its original warm tones, a compatible UV-inhibiting oil or stain can be applied. Your aesthetic preference and maintenance commitment will guide this decision.
How do I calculate the quantity of Scandinavian thermally modified wood needed for my renovation?
To calculate the quantity, measure the total area (length x height) of the surface you intend to cover. Then, consider the coverage width of the specific profile you choose (e.g., a nominal 1x6 board may cover less than 6 inches due to overlap or profile design). Divide the total area by the coverage area of a single board to get an approximate number of boards. Always add 5-15% extra for waste due to cuts, mistakes, and future repairs. For complex areas with many windows or doors, it's advisable to create a detailed cut plan to optimize material use. Consult product specifications for exact coverage dimensions.
Ready to Plan Your Renovation with Scandinavian Thermally Modified Wood?
Request a material quote with your project dimensions, exact profile preference, and ZIP code. We can help you confirm current availability and service options for your renovation project. Explore our full range of <a href="/thermally-modified-wood/scandinavian">Scandinavian Thermally Modified Wood</a> profiles, and consider complementary materials like <a href="/siding-and-cladding">siding and cladding</a>, <a href="/thermally-modified-wood">other thermally modified wood options</a>, and <a href="/products/maximo-accoya">Maximo Accoya</a> for your renovation.
Request a material quote →