Why a Mock-Up is Essential for Scandinavian Thermally Modified Wood
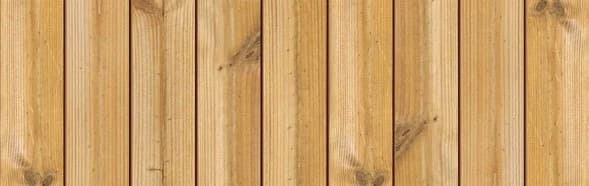
Scandinavian thermally modified wood, derived from a Nordic softwood selection, offers a distinct aesthetic with visible grain and warm color. Its character can shift under different lighting conditions and when viewed against various adjacent materials. A mock-up helps confirm these visual aspects in your specific project environment.
Beyond aesthetics, a mock-up allows you to test critical construction details. It helps visualize shadow lines and how the material’s natural tone integrates with your overall design palette. The thermal modification process enhances dimensional stability without chemical preservatives, making it suitable for both interior and exterior applications like walls, ceilings, soffits, and facades. Testing these applications in a small-scale mock-up can reveal practical considerations for installation and long-term appearance.
Selecting Materials for Your Mock-Up
To create an accurate mock-up, use the actual Scandinavian thermally modified wood profiles you intend for your project. Also include any trim pieces, corner boards, window casings, or other adjacent materials that will define the final aesthetic.
For instance, if your design incorporates metal flashing around windows or a specific paint color for adjacent stucco, include these elements. Even small details, like the type of fastener you plan to use, can be represented to understand their visual impact. The goal is to replicate a small section of your proposed wall assembly as faithfully as possible.
Designing Your Mock-Up Section
A useful mock-up should represent a typical or complex junction in your project. Common areas to focus on include an outside corner, an inside corner, or a section around a window or door opening. These areas often present the most challenges in terms of material integration and detailing.
Consider a mock-up that is at least 4 feet by 4 feet, allowing enough space to lay out several boards and demonstrate a joint detail. If possible, construct it freestanding or against a temporary frame so you can observe it from various angles and at different times of day to see how light plays on the surface. This also allows you to move it to different locations on your property to evaluate its appearance under varying site conditions.
Worked Example: Window Corner Mock-Up
The goal is to understand how the wood meets the window trim and how the corner detail will appear.
For this mock-up, you would need:
1.
2. Two sections of the actual window trim material (e.g., painted wood or metal), sized to represent a window corner junction.
3. A small section of the intended window frame material.
4. A backing material (e.g., plywood or OSB) to simulate the wall sheathing, approximately 4 feet by 4 feet.
5. Necessary fasteners (e.g., stainless steel screws or hidden clips, depending on your system).
Assemble the mock-up by attaching the backing material to a simple frame. Install the window frame and trim sections in one corner of the backing. Then, install the Scandinavian thermally modified wood planks, cutting them to fit around the window trim and forming a corner detail (e.g., mitered or butt joint with trim). Observe how the warm Nordic grain of the wood contrasts with the dark window frame, how the V-joint shadow lines align, and the precision of your corner detailing. This exercise helps confirm material selections and installation methods.
For complementary materials, consider pairing the Scandinavian thermally modified wood with durable siding options like those found at our [Siding and Cladding](/siding-and-cladding) page, or exploring other thermally modified options on the [Thermally Modified Wood](/thermally-modified-wood) page. If a specific brand is preferred, look into [NORX](/brands/norx) products, and for high-performance alternatives, investigate [Maximo Accoya](/products/maximo-accoya).
Evaluating Your Mock-Up
Once assembled, place your mock-up in the intended location or a similar environment on your property. Observe it at different times of day, under varying weather conditions if possible. Pay attention to:
1. **Color and Grain:** How does the natural character of the Scandinavian wood appear in direct sunlight, shade, and overcast conditions? Does its warm tone complement or clash with adjacent materials?
2. **Shadow Lines:** Are the shadow lines created by the profile (e.g., V-Joint or Fluted #5) as expected? Do they enhance the architectural rhythm of the facade?
3. **Detailing:** Are the joints around windows, at corners, or where the wood meets other materials clean and precise? Does the chosen trim work effectively?
4. **Overall Impression:** Does the mock-up convey the aesthetic and quality you envisioned for the project? This is your opportunity to make adjustments before full-scale installation.
Before you order
- Identify critical junctions (corners, windows, doors) for mock-up focus.
- Collect all adjacent materials: trim, flashing, window/door frames, paint samples.
- Determine a suitable size for the mock-up (minimum 4x4 feet suggested).
- Construct a stable frame or backing for the mock-up.
- Assemble the mock-up, replicating the intended installation details.
- Place the mock-up in the project environment for observation.
- Evaluate appearance under different lighting and weather conditions.
- Assess material interaction, shadow lines, and detailing.
- Document observations and make any necessary adjustments to your plan.
Confirm installation details, approved uses and warranty terms in the current instructions for the exact product and profile. Your installer should verify the substrate, structure and applicable project requirements.
Questions to help you decide
How large should my Scandinavian thermally modified wood mock-up be?
A mock-up should be large enough to represent typical details and allow for visual assessment. A section approximately 4 feet by 4 feet is often sufficient to show several boards and a key junction like a corner or window opening. This size allows you to observe how the V-joint or fluted profiles create shadow lines and how the natural grain appears across multiple pieces.
Can I use smaller samples instead of a full mock-up?
While small samples are useful for initial material selection and color matching, they typically do not provide enough context to evaluate complex architectural details or the overall visual impact of the material in situ. A mock-up, which involves assembling several pieces with intended trim and adjacent materials, offers a more comprehensive preview of the final installation.
What if my mock-up reveals issues with my design?
That's precisely the purpose of a mock-up! It's an opportunity to identify and resolve potential issues before they become costly problems during construction. If the mock-up highlights concerns with profile choice, trim integration, or overall aesthetic, you can adjust your design, select different materials, or refine installation methods. This proactive approach saves time and resources in the long run.
Ready to Plan Your Scandinavian Thermally Modified Wood Project?
Request a material quote with your project dimensions, desired profile, and ZIP code. Confirm current availability and service options to start bringing your vision to life.
Request a material quote →