Understanding Horizontal Layout Aesthetics
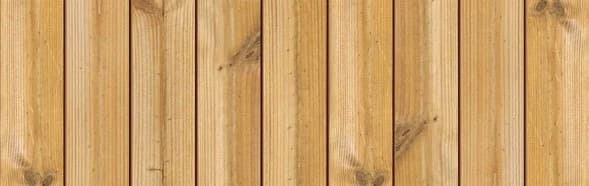
A horizontal cladding layout typically emphasizes the width of a wall, creating a visual flow that can make a structure appear longer or more expansive. This orientation can also provide a strong visual base for a building, grounding it within its surroundings. The repeating lines of horizontal boards offer a classic aesthetic that can be adapted for both traditional and contemporary designs.
The shadow lines created by horizontal profiles, such as V-Joint or Nickel Gap, play a significant role in the overall appearance. These lines create a subtle texture that shifts with the changing light throughout the day, adding depth and interest to the surface. When designing, consider how these shadow lines will interact with other architectural elements.
Selecting Profiles for Horizontal Applications
Scandinavian Thermally Modified Wood is available in several profiles suitable for horizontal installation. The choice of profile influences both the aesthetic and the installation method.
Its interlocking design creates a distinct shadow line that enhances the horizontal emphasis. The Nickel Gap variant offers a slightly more pronounced, consistent gap between boards. The Fluted #5 profile, also in a 1 × 6 nominal size, provides a textured surface with parallel grooves, ideal for architectural walls and ceilings where a unique visual pattern is desired. For a smooth, clean look, the S4S E4E (smooth four sides, eased four edges) profile, in a 5/4 × 6 nominal size, can be used for siding, ceilings, and decking, offering versatility for a coordinated design across different surfaces.
Coordinating Cladding Courses with Window and Door Openings
A critical aspect of horizontal layout design is how the cladding courses interact with window and door openings. The goal is to create a clean, intentional appearance, avoiding awkward cuts or misalignment.
Begin by establishing a baseline for your first course, typically at the bottom of the wall, ensuring it is level and properly spaced from the ground for drainage. From this baseline, plan your courses upward. When approaching a window or door, consider how the board will terminate at the opening. Ideally, boards should align cleanly with the top or bottom of the opening, or be cut precisely to frame it. For multiple windows or openings on the same elevation, aim to maintain consistent alignment of cladding courses across the entire facade. This may involve adjusting the starting height of the first course slightly to achieve a more harmonious visual flow around the openings. Consider using a ledger board or a story pole to mark the planned course heights around all openings before installation begins.
Fastening Details for Horizontal Cladding
Proper fastening is essential for the longevity and stability of horizontal cladding. The method of fastening depends on the chosen profile and the desired aesthetic. Hidden fastening systems are often preferred for a clean, uninterrupted look, while face fastening can add a subtle design element.
For profiles like V-Joint / Nickel Gap, blind fastening through the tongue or groove is common, concealing the fasteners. This method requires careful placement to ensure the boards are securely attached to the substructure. When face fastening, use corrosion-resistant fasteners, pre-drilling holes to prevent splitting, especially near board ends. Fasteners should penetrate adequately into the framing or furring strips behind the cladding. Always refer to manufacturer guidelines for specific fastener types, lengths, and spacing recommendations for your chosen profile and application. Ensure the substructure provides adequate support for the cladding, typically with furring strips installed vertically to create a rainscreen gap behind the horizontal boards, allowing for drainage and ventilation.
Worked Example: Horizontal Cladding Layout for a Window
Let's consider a hypothetical wall section with a window opening. Imagine a wall that is 10 feet wide and 8 feet high, with a window centered horizontally, measuring 4 feet wide by 3 feet high, with its bottom 3 feet from the floor.
The total height of the wall is 96 inches. Each board contributes 5.5 inches to the vertical height. If we start our first course 6 inches above the finished grade, the bottom of the first board will be at 6 inches. The window bottom is at 36 inches from the floor (or 30 inches above our starting course).
30 inches / 5.5 inches per board = approximately 5.45 boards. This means the 5th board will cover up to 5 courses * 5.5 inches = 27.5 inches. The 6th board will begin at 27.5 inches above the starting course, and its top will be at 33 inches. This places the bottom of the window (at 30 inches) within the height of the 6th board. To achieve a clean look, we might adjust the starting height of the first course. If we start the first course 3 inches lower (at 3 inches above grade), then the bottom of the window (36 inches from floor) would align precisely with the top of the 6th board (3 inches + 6 boards * 5.5 inches = 36 inches). This allows for a full board to terminate cleanly at the bottom of the window. Similar calculations would be performed for the top of the window and the overall wall height to ensure minimal, balanced cuts.
For the horizontal dimension, the 4-foot wide window (48 inches) will require precise cuts. Boards will run from the corner of the wall to the window jamb, and then resume on the other side. This example assumes a consistent board width and no specific reveal at the window trim, which would also need to be factored into the measurements.
Maintenance Considerations for Horizontal Cladding
While Scandinavian Thermally Modified Wood is known for its enhanced stability, proper maintenance is still important, especially for exterior horizontal applications. Horizontal surfaces can accumulate dust, pollen, and moisture more readily than vertical surfaces.
Regular cleaning to remove debris and prevent mildew growth is recommended. If left unfinished, the wood will naturally weather to a silver-gray patina. If a specific color or finish is desired, periodic reapplication of a suitable exterior finish will be necessary. Always follow the finish manufacturer's instructions for application and maintenance schedules. Proper detailing at the base of the wall and around openings to ensure adequate drainage and ventilation will also contribute to the long-term performance of the cladding.
Before you order
- Determine the overall aesthetic goal: broad and expansive, or detailed and textured?
- Select the appropriate Scandinavian Thermally Modified Wood profile (e.g., V-Joint, Fluted, S4S E4E).
- Plan the starting course height, considering grade clearance and alignment with openings.
- Map out cladding courses to coordinate with window and door sills and headers.
- Choose a suitable fastening method (blind or face) and specify appropriate fasteners.
- Confirm the substructure provides vertical furring for a rainscreen gap behind horizontal cladding.
- Consider how cut ends and field cuts will be detailed around openings and corners.
- Plan for long-term maintenance, including cleaning and finish reapplication if desired.
Confirm installation details, approved uses and warranty terms in the current instructions for the exact product and profile. Your installer should verify the substrate, structure and applicable project requirements.
Questions to help you decide
Can Scandinavian Thermally Modified Wood be used for both interior and exterior horizontal applications?
Yes, Scandinavian Thermally Modified Wood is suitable for both interior and exterior applications, including walls, ceilings, soffits, and facades. Its thermal modification process enhances dimensional stability, making it versatile. The specific profile chosen will influence its suitability for different environments. For exterior use, ensure proper rainscreen detailing and fastening.
How do I calculate the quantity of boards needed for a horizontal layout?
To calculate the quantity, first determine the total square footage of the area to be clad. Then, divide this by the square footage covered by a single board (nominal width multiplied by length). Remember to account for waste due to cuts, especially around windows, doors, and corners, typically adding 10-15% extra. For horizontal layouts, ensure you have enough long boards to minimize visible butt joints, or plan joints carefully over framing members. Consider the specific face width of the chosen profile.
What is the best way to handle corners with horizontal cladding?
For outside corners, common methods include mitered corners for a seamless look, or using corner trim boards (e.g., S4S E4E profile) for a more defined edge. Inside corners typically use a simple butt joint with a small reveal or are covered with an inside corner trim piece. The choice often depends on the desired aesthetic and the architectural style of the project. Ensure proper flashing and weather protection at all corners for exterior applications.
Ready to Plan Your Horizontal Scandinavian Thermally Modified Wood Project?
Request a material quote with your project dimensions, exact profile preferences, and ZIP code to confirm current availability and service options. Explore our full range of Scandinavian Thermally Modified Wood profiles and other siding and cladding options.
Request a material quote →