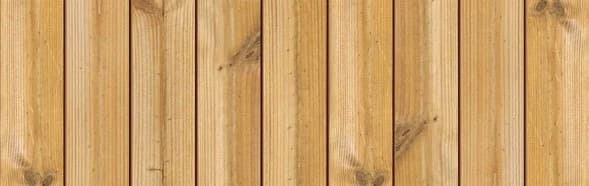
Understanding Scandinavian Thermally Modified Wood
Scandinavian Thermally Modified Wood is a Nordic softwood selection that undergoes a chemical-free modification process using controlled heat and steam. This treatment enhances the wood's dimensional stability, making it suitable for a range of interior and exterior applications, including walls, ceilings, soffits, facades, and selected decking. Its natural character and warm Nordic grain are often desired for modern architectural surfaces.
The stability imparted by thermal modification helps reduce movement at joints, which is particularly beneficial for corner details where precise alignment is essential for a clean finish. While the wood is more stable, it still experiences some natural expansion and contraction with changes in humidity and temperature, which must be accounted for in corner assemblies.
For more information on the material's general properties and available profiles, you can visit the product page for Scandinavian Thermally Modified Wood.
Option 1: Mitered Corners for a Seamless Look
Mitered corners are often chosen for their clean, continuous appearance, creating a visually seamless transition where two planes meet. This method involves cutting the ends of the Scandinavian Thermally Modified Wood boards at a 45-degree angle, allowing them to join together to form a 90-degree corner. When executed precisely, the mitered joint minimizes the visibility of end grain and creates a sophisticated aesthetic.
Achieving a perfect miter requires accurate cuts and careful alignment during installation. Any slight imperfections in the cuts or inconsistencies in the wall framing can become noticeable. Due to the natural movement of wood, even thermally modified wood, mitered joints can sometimes open slightly over time, particularly in areas with significant temperature and humidity fluctuations. For exterior applications, a mitered corner should be carefully sealed to prevent moisture intrusion, which can compromise the integrity of the joint.
Option 2: Butt Joints for Simplicity and Durability
A butt joint corner involves bringing the end of one board directly against the face of another board at the corner. This is a simpler and often more robust method than a mitered joint, as it relies less on perfect angular cuts and can be more forgiving of slight movement. Typically, the boards on one plane will extend to the corner, and the boards on the adjacent plane will butt directly into them.
While a butt joint is simpler to install, it exposes the end grain of the butting boards. For exterior applications, exposed end grain should be properly sealed to protect against moisture absorption. Visually, butt joints create a distinct edge, which can be a desired design element, especially in modern or industrial aesthetics. Consider which direction the boards will run and which end grain will be visible when planning your layout.
Option 3: Using Trim Boards for Defined Corners
Trim boards, also known as corner boards, provide a classic and protective way to finish exterior corners. This method involves installing a separate piece of wood, typically an S4S E4E profile of Scandinavian Thermally Modified Wood, over the raw edges of the cladding boards at the corner. The cladding boards are cut to meet the trim board, creating a clean and robust junction.
Using trim boards offers several advantages. They protect the vulnerable end grain of the cladding from weather and impact, simplify installation by not requiring precise miter cuts on every cladding board, and add a visual frame to the building's edges. The dimensions of the trim board can significantly influence the aesthetic; wider trim creates a more substantial, traditional look, while narrower trim can offer a more subtle definition. When selecting trim, ensure it is also Scandinavian Thermally Modified Wood for consistent appearance and performance, such as the 5/4 × 6 S4S E4E profile.
Worked Example: Planning Trimmed Corners for a Small Facade
Consider a small facade section, 10 feet wide by 8 feet high, with a single exterior corner. We aim for a clean, defined look using trim boards with Scandinavian Thermally Modified Wood V-Joint / Nickel Gap cladding.
First, determine the cladding layout. For estimation, let's assume an effective coverage of 5.5 inches per board. For a 10-foot (120-inch) wall, you would need approximately 120 / 5.5 = 21.82 boards. Round up to 22 boards for each run. For an 8-foot (96-inch) height, boards typically come in various lengths, so you would order lengths suitable for 8-foot cuts, minimizing waste.
For the corner trim, we select a 5/4 × 6 S4S E4E Scandinavian Thermally Modified Wood board. This board has a nominal dimension of 5/4 inches thick by 6 inches wide, providing a substantial corner presence. We'll need two pieces for the 8-foot height of the corner. The cladding boards will be cut to butt against the edge of the trim board.
When installing, the first trim board would be secured to the corner framing. The cladding boards on the first wall would then be installed, cut to meet the edge of this trim board. The second trim board would then be installed over the raw edges of the cladding on the second wall, creating an overlapping, protective corner. This method ensures that the end grain of the cladding is largely covered and protected from direct weather exposure, contributing to a durable and visually appealing finish.
Complementary Products for Corner Assemblies
Beyond the primary cladding and trim, several other products can enhance the performance and appearance of your Scandinavian Thermally Modified Wood corners:
Weather-Resistive Barrier (WRB): Essential for exterior applications, a WRB installed behind the cladding provides an additional layer of moisture protection, especially critical at corners where water can accumulate.
Fasteners: Choose appropriate fasteners (e.g., stainless steel screws or nails) that are compatible with thermally modified wood and suitable for the exposure conditions. Fasteners should be long enough to penetrate adequately into the structural framing.
Sealants: For mitered corners or any gaps where moisture might penetrate, use high-quality, paintable, exterior-grade sealants that are compatible with wood. Ensure proper application to maintain the integrity of the joint.
Ventilation Materials: If using a rainscreen system, ensure that corner details do not impede airflow, which is vital for moisture management behind the cladding. Consider compatible furring strips or rainscreen mats.
You can find suitable siding and cladding materials, and other thermally modified wood options, on our Siding and Cladding page and Thermally Modified Wood page.
Before you order
- Desired Aesthetic: Do you prefer a seamless, continuous look (mitered), a distinct edge (butt), or a framed appearance (trim)?
- Installation Skill Level: Is precise cutting and alignment achievable, or is a more forgiving method preferred?
- Exposure Conditions: For exterior projects, how exposed is the corner to rain, sun, and other elements? What level of moisture protection is needed?
- Maintenance Expectations: How will the chosen corner detail impact long-term maintenance, such as sealing or re-finishing?
- Material Availability: Are the necessary profiles (e.g., S4S E4E for trim) readily available in Scandinavian Thermally Modified Wood?
- Budget: What are the material and labor costs associated with each corner method?
- Compatibility: Will the chosen corner detail work with the overall wall assembly, including rainscreen systems or insulation?
Confirm installation details, approved uses and warranty terms in the current instructions for the exact product and profile. Your installer should verify the substrate, structure and applicable project requirements.
Questions to help you decide
Can I mix different corner finishing methods on the same project?
While technically possible, it is generally recommended to maintain a consistent corner finishing method throughout a single project or facade for a cohesive and professional appearance. In some specific architectural designs, intentional variation might be used, but this should be carefully planned and detailed to avoid a mismatched look.
How do I protect exposed end grain at butt joints on exterior corners?
For exterior butt joints where end grain is exposed, it's crucial to apply a high-quality end-grain sealer or primer before installation. This helps to minimize moisture absorption, which can lead to swelling, cracking, or premature deterioration. Regular maintenance, including re-sealing as needed, will further protect these vulnerable areas.
Are there specific fasteners recommended for corner trim with Scandinavian Thermally Modified Wood?
Yes, when installing corner trim, use fasteners that are suitable for exterior exposure and compatible with thermally modified wood. Stainless steel screws are generally recommended for their corrosion resistance and strong holding power. Ensure the fasteners are long enough to securely anchor the trim to the underlying framing, and follow manufacturer guidelines for spacing and penetration.
Ready to Plan Your Scandinavian Thermally Modified Wood Project?
Request a material quote with your project dimensions, exact profile, and ZIP code to confirm current availability and service options for Scandinavian Thermally Modified Wood.
Request a material quote →