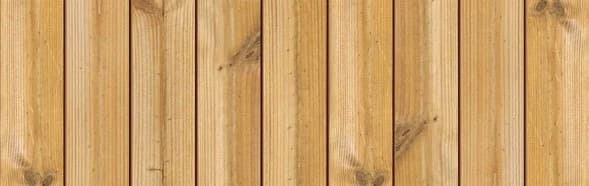
Understanding Scandinavian Thermally Modified Wood
Scandinavian Thermally Modified Wood is derived from a selection of Nordic softwoods. The thermal modification process uses controlled heat and steam to alter the wood's cellular structure, enhancing its dimensional stability and resistance to decay. This process imparts a consistent warm color and brings out the natural grain patterns, providing an expressive surface for architectural applications.
Unlike some other wood treatments, thermal modification is a chemical-free process, relying solely on heat and steam. This results in a material that retains the natural character of wood while offering improved performance attributes that are beneficial for exterior use.
The product is versatile, with profile options that support coordinated designs across walls, ceilings, soffits, and even selected decking applications. For coastal elevations, its enhanced stability can be a key advantage in environments prone to moisture fluctuations.
These profiles allow for diverse design expressions on a coastal facade.
Coastal Environment Considerations for Wood Siding
Coastal environments present unique challenges for exterior building materials, primarily due to salt exposure, high humidity, strong winds, and intense UV radiation. Salt spray can accelerate corrosion of metal fasteners and hardware, and may deposit on surfaces, potentially affecting finishes and requiring more frequent cleaning.
High humidity and fluctuating moisture levels can cause untreated wood to swell, shrink, and warp. While thermally modified wood offers enhanced dimensional stability, it is not impervious to all moisture-related movement. Proper installation techniques that account for drainage and ventilation are particularly critical in these conditions.
Strong winds common in coastal areas can exert significant pressure on siding materials. This necessitates robust fastening schedules and a well-engineered substructure. UV radiation can also lead to accelerated graying or degradation of wood surfaces if not adequately protected or maintained.
Therefore, selecting Scandinavian Thermally Modified Wood for a coastal elevation requires a holistic approach that considers not just the wood itself, but also the entire wall assembly, including fasteners, flashing, and the chosen finish.
Selecting Profiles and Finishes for Coastal Applications
The choice of profile can influence both the aesthetic and the performance of your coastal elevation. For siding applications, profiles like the V-Joint / Nickel Gap or S4S E4E offer distinct shadow lines and installation methods.
While Scandinavian Thermally Modified Wood has a natural warm Nordic grain, coastal exposure will lead to a natural silver-gray patina over time if left unfinished. If maintaining the original warm tone is desired, a UV-resistant finish or stain specifically formulated for exterior wood in marine environments should be considered. These finishes can offer a layer of protection against UV degradation and help shed moisture.
Regular inspection and reapplication of finishes may be necessary to preserve the desired appearance and performance in harsh coastal conditions. Always follow the finish manufacturer's instructions for application and maintenance.
For aesthetic consistency, consider coordinating the exterior siding with interior elements. Scandinavian Thermally Modified Wood is suitable for interior walls and ceilings, allowing for a seamless transition from the exterior facade to covered outdoor spaces and even indoor feature walls. This can be particularly impactful in homes designed to maximize views and connection to the coastal landscape.
Installation Planning and Hardware for Coastal Exposure
Proper installation is paramount for any exterior wood siding, and even more so in a coastal setting. A well-designed rainscreen assembly is highly recommended to promote drainage and ventilation behind the siding, mitigating moisture accumulation and extending the lifespan of the material.
Fastener selection is critical. In coastal areas, standard steel fasteners are highly susceptible to corrosion from salt spray. Confirm the appropriate grade and type of fasteners with your contractor and local building codes.
Ensure adequate clearance between the bottom edge of the siding and grade or impervious surfaces to prevent moisture wicking.
Consider the substructure carefully. For elevations exposed to strong winds, ensuring that the furring strips or sheathing provide a solid, continuous backing for the siding is important. The fastening schedule should be robust enough to withstand potential wind uplift and other forces.
When planning cut ends and field cuts, ensure that any exposed end grain is properly sealed, especially if a finish is applied. This helps to prevent moisture absorption at vulnerable points.
Worked Example: Siding a Coastal Gable End
Consider a hypothetical gable end on a coastal home, measuring 20 feet wide at the base and 12 feet high to the peak. The gable end will be fully clad.
First, calculate the area of the gable end: (Base x Height) / 2 = (20 ft x 12 ft) / 2 = 120 square feet. To account for waste due to cuts, angles, and potential defects, it's prudent to add a waste factor, typically 10-15% for complex cuts. Let's use 15% for this gable: 120 sq ft * 1.15 = 138 square feet of coverage needed.
Next, determine the coverage per linear foot of the 1x6 (5 inch coverage). A 12-foot board covers 12 ft * (5 inches / 12 inches/ft) = 5 square feet. To find the total linear footage required: 138 sq ft / (5 sq ft / board) = 27.6 boards. Assuming boards are available in 12-foot lengths, this means approximately 28 boards. However, for a gable end with many angled cuts, ordering slightly more to manage waste and miscuts is advisable. Let's round up to 30 boards, yielding 360 linear feet.
Given the coastal location, these must be stainless steel. This calculation is simplified; actual fastening patterns and spacing should adhere to manufacturer guidelines and local building codes.
The project also requires a UV-resistant clear finish. Round up to 2 gallons to ensure full coverage and account for potential touch-ups.
This example illustrates the need to calculate not just the square footage, but also the linear footage, fastener quantity, and finish requirements, with a buffer for waste, especially in projects with complex geometries or demanding environmental conditions.
Before you order
- Assess specific coastal exposure: direct salt spray, wind loads, sun intensity.
- Confirm desired aesthetic: natural weathering or maintained finish.
- Plan for a rainscreen assembly to ensure proper drainage and ventilation.
- Ensure adequate clearance from grade and impervious surfaces.
- Consider UV-resistant finishes if maintaining the original wood tone is desired.
- Budget for increased waste factor for complex cuts (e.g., gable ends).
- Review local building codes and manufacturer installation guidelines.
- Plan for ongoing maintenance, including cleaning and finish reapplication.
Confirm installation details, approved uses and warranty terms in the current instructions for the exact product and profile. Your installer should verify the substrate, structure and applicable project requirements.
Questions to help you decide
Does Scandinavian Thermally Modified Wood require a finish in coastal areas?
While Scandinavian Thermally Modified Wood is dimensionally stable and resistant to decay, it will naturally weather to a silver-gray patina when exposed to UV radiation and moisture, especially in coastal environments. If you wish to maintain its original warm tone, a high-quality, UV-resistant exterior finish or stain is recommended. These finishes also offer an additional layer of protection against environmental elements. Regular maintenance and reapplication will be necessary to preserve the finish.
What type of fasteners should be used for Scandinavian Thermally Modified Wood in a coastal environment?
For coastal applications, it is crucial to use corrosion-resistant fasteners. Always consult local building codes and the manufacturer's installation guidelines for specific fastener type, size, and spacing requirements to ensure structural integrity and longevity.
Can Scandinavian Thermally Modified Wood withstand direct salt spray?
Scandinavian Thermally Modified Wood offers enhanced stability, which is beneficial in environments with fluctuating moisture. However, direct and continuous salt spray can still impact the surface appearance and potentially accelerate the degradation of any applied finishes.
Request a Material Quote for Your Coastal Project
Ready to specify Scandinavian Thermally Modified Wood for your coastal elevation? Provide your project dimensions, desired profile, and ZIP code to request a material quote. We can confirm current availability and service options for your area.
Request a material quote →