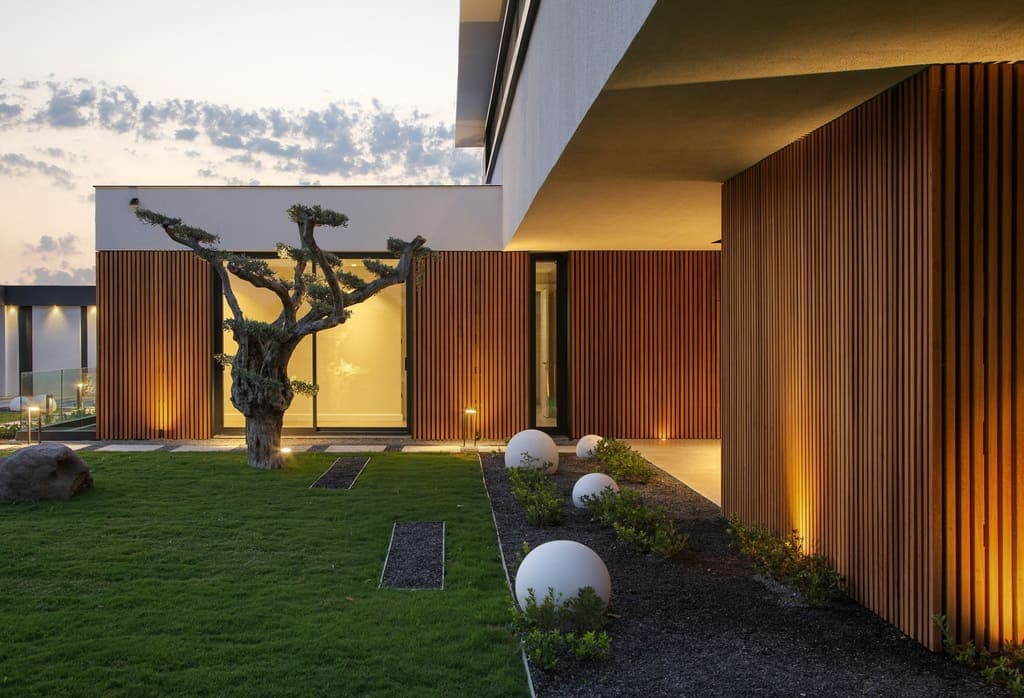
Understanding Thermally Modified Wood for Vertical Applications
Thermally modified wood undergoes a high-heat treatment process that alters its cellular structure. This modification generally results in increased dimensional stability, meaning the wood is less prone to expanding or contracting with changes in humidity. For covered patio walls, where the wood is still exposed to ambient moisture but shielded from direct precipitation, this stability can be a key advantage.
The thermal modification process also typically gives the wood a consistent, darker tone throughout, often resembling exotic hardwoods. This color can be maintained with a UV-protective finish or allowed to gradually weather to a silver-gray patina, depending on aesthetic preference and the level of direct sun exposure the covered area receives. Understanding these inherent qualities is crucial when selecting it for a vertical application like a patio wall.
Selecting the Right Thermally Modified Wood Profile
Thermally modified wood is available in various profiles, each offering a distinct aesthetic and installation method. For covered patio walls, common profiles include tongue-and-groove, shiplap, and square edge. The choice of profile influences the shadow lines, overall texture, and how seamlessly the boards fit together.
Tongue-and-groove profiles create a tight, interlocking fit, often preferred for a smooth, continuous surface. Shiplap offers a more defined shadow line with overlapping edges, adding visual depth. Square edge profiles, when installed with a consistent gap, can create a slatted or open-joint look, which may be desirable for specific design aesthetics. Consider the desired visual effect and the level of finish required when making your selection. For a uniform appearance, ensure all boards are from the same production batch.
Design Considerations for Covered Patio Walls
The design of your covered patio walls can significantly impact the overall feel of your outdoor living space. Consider the orientation of the wood — horizontal, vertical, or even diagonal — to create different visual effects. Horizontal installation can make a space feel wider, while vertical lines tend to make it appear taller. Mixing orientations or profiles can add architectural interest.
Think about how the thermally modified wood will interact with other materials present on your patio, such as stone, stucco, or metal accents. The natural tones of thermally modified wood often complement a wide range of materials. Also, factor in lighting; strategically placed up-lighting or down-lighting can highlight the texture and warmth of the wood, especially in the evening.
The covered nature of the patio means the walls are less exposed to extreme weather, allowing for more flexibility in finish choices. You can opt for a clear finish to enhance the natural color, a semi-transparent stain for a different hue, or allow it to weather naturally for a maintenance-reduced approach. However, even in covered areas, some UV exposure will occur, influencing the natural weathering process.
Installation Planning and Substructure
Proper installation is key to the longevity and appearance of your thermally modified wood patio walls. Ensure the substructure is sound, level, and provides adequate ventilation behind the wood. A rainscreen-like gap, even in a covered area, can help manage any incidental moisture and promote air circulation, which is beneficial for the wood's stability.
Fasteners should be chosen based on the wood species, profile, and exposure conditions. Stainless steel fasteners are often recommended to prevent staining and ensure long-term holding power. Consider hidden fastening systems for a cleaner aesthetic, or visible fasteners as part of the design. Always follow manufacturer guidelines for spacing and attachment to allow for natural movement of the wood.
It is important to account for expansion and contraction. While thermally modified wood is dimensionally stable, all wood will experience some movement. Leave appropriate gaps at corners, edges, and around openings to accommodate this. These gaps can be concealed with trim or left as a design feature.
Worked Example: Patio Wall Material Calculation
Let's consider a hypothetical covered patio in Indianapolis, IN, with two thermally modified wood accent walls. Wall A measures 10 feet wide by 8 feet high, and Wall B measures 6 feet wide by 8 feet high. We plan to use a thermally modified ash shiplap profile, with individual boards measuring 5.5 inches (0.458 feet) in face width and available in 8-foot lengths. We will install the boards horizontally.
First, calculate the total area: Wall A is 10 ft x 8 ft = 80 sq ft. Wall B is 6 ft x 8 ft = 48 sq ft. Total area = 80 + 48 = 128 sq ft.
Next, determine the number of board rows needed for each wall's height. Since the boards are 0.458 feet wide and the walls are 8 feet high, we need 8 ft / 0.458 ft per board = 17.47 rows. We must round up to 18 rows to ensure full coverage.
For Wall A (10 ft wide), each row requires one 8-foot board and a 2-foot cut. This means 18 rows * (1 full 8-foot board + 1 partial) will be needed if we assume no reusable offcuts. However, a more efficient approach is to consider how many 8-foot boards cover the 10-foot width. If we cut one 8-foot board and one 2-foot piece, we need 2 full boards for each row. So, 18 rows * 2 boards/row = 36 boards for Wall A. For Wall B (6 ft wide), each row requires one 8-foot board (with 2 feet of offcut). So, 18 rows * 1 board/row = 18 boards for Wall B.
Total boards needed: 36 + 18 = 54 boards. It is always prudent to add an additional 10-15% for waste, cuts, and potential future repairs. So, 54 boards * 1.15 (15% waste) = 62.1 boards. Round up to 63 boards.
This calculation provides a baseline. Always confirm specific board dimensions, available lengths, and waste factors with your supplier when requesting a quote. Consider how cuts can be optimized to minimize waste across multiple wall sections.
Before you order
- Verify product suitability for covered outdoor vertical applications.
- Choose a thermally modified wood species and profile that aligns with your design vision.
- Determine the desired finish: natural weathering, clear coat, or stain.
- Plan the substructure to ensure adequate support and ventilation.
- Select appropriate fasteners for the wood species and exposure.
- Calculate material quantities, including an allowance for waste and cuts.
- Consider how the wood will interact with other materials and lighting on your patio.
- Review local building practices or recommendations for outdoor wall cladding.
Confirm installation details, approved uses and warranty terms in the current instructions for the exact product and profile. Your installer should verify the substrate, structure and applicable project requirements.
This is a planning guide for projects in Indianapolis, IN. Ask our team to confirm availability, delivery to your ZIP code and which branch can support your order.
Questions to help you decide
Does thermally modified wood require a finish for covered patio walls?
While thermally modified wood is generally more stable than untreated wood, a finish is recommended for covered patio walls if you wish to maintain its original color. Unfinished thermally modified wood, even in a covered area, will gradually weather to a silver-gray patina over time due to UV exposure. A UV-protective oil or stain can help preserve its initial appearance.
Can thermally modified wood be painted?
Yes, thermally modified wood can be painted. However, its natural properties, including increased dimensional stability and typically darker tone, often lead designers to choose clear finishes, oils, or stains that highlight its inherent beauty. If painting, ensure the surface is clean and primed with a product compatible with thermally modified wood, and use an exterior-grade paint.
How do I clean thermally modified wood on covered patio walls?
Cleaning thermally modified wood on covered patio walls is relatively simple. For routine maintenance, a soft brush or cloth with mild soap and water is usually sufficient to remove dirt and dust. Avoid harsh chemicals or high-pressure washers, as these can damage the wood surface or finish. Regular cleaning can help prevent the buildup of grime and maintain its appearance.
Ready to Transform Your Indianapolis Patio Walls?
Request a material quote for thermally modified wood. Provide your project dimensions, desired profile, and ZIP code to confirm current availability and service options for your Indianapolis, IN project.
Request a material quote →