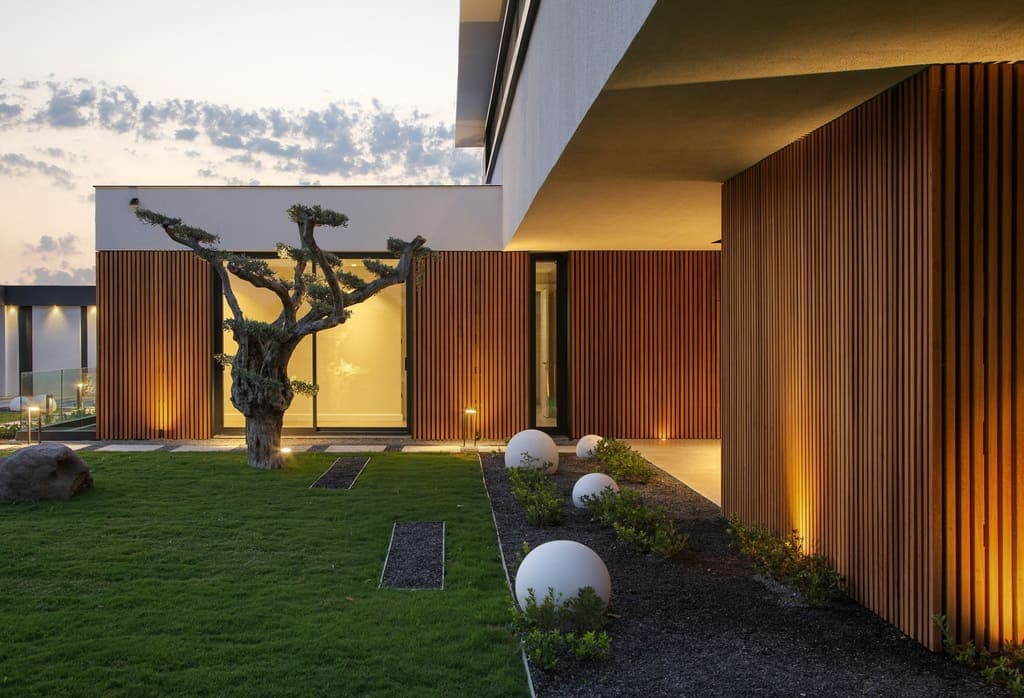
Understanding Thermally Modified Wood for Wall Applications
Thermally modified wood undergoes a high-heat treatment process that alters its cellular structure. This modification generally results in wood with reduced moisture absorption, which can contribute to greater dimensional stability compared to untreated wood. For covered patio walls, this means the material may be less prone to swelling, shrinking, or warping due to changes in humidity and temperature.
While thermally modified wood is enhanced for durability, it is important to distinguish between "covered patio walls" and fully exposed exterior cladding. Covered walls benefit from significant protection from direct rain and prolonged sun exposure, which can extend the life and appearance of the wood. However, they are still subject to ambient humidity and indirect weather influences, requiring careful material selection and finishing.
Common species used for thermal modification include spruce, pine, and ash. Each species, even after modification, retains some of its natural characteristics in terms of grain pattern and color. For example, thermally modified spruce and pine often present a warm, caramel to dark brown tone that can deepen over time, while thermally modified ash may offer a more pronounced grain. These natural variations contribute to the unique aesthetic of each installation.
Selecting the Right Profile and Finish
The profile of the thermally modified wood planks significantly impacts the visual texture and shadow lines of your covered patio walls. Common profiles include tongue-and-groove, shiplap, and square edge. Tongue-and-groove profiles create a tight, interlocking fit, offering a smooth surface with minimal gaps. Shiplap provides a distinct overlap, creating a channel that emphasizes horizontal or vertical lines.
For covered applications, where direct water ingress is less of a concern than with fully exposed siding, a range of profiles can be suitable. The choice often comes down to desired aesthetic and ease of installation. Consider how the profile will interact with ambient light and the overall architectural style of your home.
While thermally modified wood exhibits improved resistance to moisture, applying a finish is still a critical step for covered patio walls. A finish can protect the wood from UV degradation, which causes the wood to gray over time, and can also enhance its natural color. Clear sealers, oils, or semi-transparent stains are popular choices. Opaque paints are generally not recommended as they can mask the natural beauty of the wood and may require more frequent maintenance to prevent peeling in areas with humidity fluctuations. Always follow the finish manufacturer's instructions for application and reapplication schedules.
Planning for Substructure and Ventilation
Even for covered patio walls, proper substructure and ventilation are essential. The thermally modified wood planks should be installed over a stable and level substructure, typically consisting of furring strips or a plywood sheathing. This substructure provides the necessary attachment points and can create an air gap behind the cladding.
An air gap, often achieved by installing furring strips vertically or horizontally depending on the cladding orientation, allows for air circulation. This ventilation helps to manage any moisture that might accumulate behind the wood, preventing potential issues like mold or mildew. It also helps the wood to acclimate to ambient humidity, further contributing to dimensional stability.
The dimensions of the furring strips and their spacing should be determined by the chosen cladding profile and the manufacturer's recommendations. Ensure that any penetrations for electrical outlets or fixtures are properly flashed and sealed to prevent water intrusion into the wall cavity.
Installation Considerations and Fastening
For covered patio walls, thermally modified wood can typically be installed using standard woodworking tools. Cuts should be clean and precise, and any field cuts should be sealed with an appropriate end-grain sealer before installation, especially if the cut ends will be exposed or in areas with potential moisture.
Fastening methods depend on the chosen profile. For tongue-and-groove profiles, blind nailing through the tongue can create a clean, fastener-free appearance. For shiplap or square-edge profiles, face nailing or screwing is common. Use corrosion-resistant fasteners, such as stainless steel screws or nails, to prevent staining of the wood and ensure long-term holding power. Pre-drilling may be advisable to prevent splitting, especially near board ends or edges.
Allow for slight expansion and contraction of the wood by maintaining appropriate spacing at corners, around openings, and at the base and top of the wall. Consult the specific product documentation for recommended gaps. While thermally modified wood is more stable, it is not entirely static.
Example Project: Covered Patio Wall with Thermally Modified Spruce
Consider a covered patio with an existing concrete block wall that measures 12 feet long and 8 feet high. The homeowner desires to clad this wall with thermally modified spruce in a shiplap profile, with planks measuring 5.5 inches wide (nominal, actual coverage might be slightly less due to overlap).
First, a substructure of vertical furring strips, 3/4 inch thick, will be installed over the concrete block. These strips will be spaced 16 inches on center, starting from one end. This creates an air gap and provides solid nailing surfaces. For a 12-foot wall, this would require approximately 10 furring strips. A vapor-permeable house wrap might be considered between the concrete and furring strips, depending on local conditions and specific moisture management goals.
Next, calculate the number of thermally modified spruce planks needed. The wall is 8 feet (96 inches) high. If each shiplap plank provides 5 inches of exposed face coverage, then 96 inches / 5 inches/plank = 19.2 planks. Since you cannot use a fraction of a plank vertically, 20 planks will be needed for the height, assuming a minimal top trim. For the 12-foot (144-inch) length, and using 12-foot long planks, 20 planks are needed. If the planks are sold in 8-foot lengths, then for each 8-foot height section, 20 planks are needed, and the 12-foot length would require planks to be cut and staggered. Assuming 12-foot lengths are available, 20 planks of 12-foot length would be a starting estimate. Always add 10-15% for cuts, waste, and future repairs. In this case, 20 planks + 15% waste = 23 planks.
The finish will be a clear, UV-protective oil applied after installation, following the manufacturer's instructions for curing and recoating. This approach ensures a durable and visually appealing wall while accounting for the unique properties of thermally modified wood in a covered environment.
Before you order
- Verify local building codes and any HOA requirements for outdoor wall cladding.
- Assess the level of protection from direct weather (rain, sun) the patio cover provides.
- Choose a thermally modified wood species (e.g., spruce, pine, ash) based on desired grain and color.
- Select a plank profile (e.g., tongue-and-groove, shiplap, square edge) for aesthetic and installation preferences.
- Determine the desired finish (clear oil, semi-transparent stain) and plan for its application and maintenance.
- Plan the substructure (furring strips, sheathing) to ensure proper attachment and ventilation.
- Calculate material quantities, including planks, fasteners, and finish, adding waste factor.
- Confirm fastening methods and ensure corrosion-resistant fasteners are used.
- Account for end-grain sealing and proper spacing at joints and edges.
- Consider the long-term maintenance needs of the chosen finish and wood.
Confirm installation details, approved uses and warranty terms in the current instructions for the exact product and profile. Your installer should verify the substrate, structure and applicable project requirements.
This is a planning guide for projects in Charleston, SC. Ask our team to confirm availability, delivery to your ZIP code and which branch can support your order.
Questions to help you decide
Does thermally modified wood require a finish for covered patio walls?
While thermally modified wood has enhanced durability, applying a finish is highly recommended for covered patio walls. A finish helps protect the wood from UV radiation, which causes graying over time, and can also enhance its natural color. It can also provide an additional layer of moisture resistance, particularly at cut ends. Clear oils or semi-transparent stains are common choices.
Can I install thermally modified wood directly onto concrete block?
It is generally not recommended to install thermally modified wood directly onto concrete block. A substructure of furring strips should be installed first. This creates an air gap behind the wood, allowing for ventilation and managing any moisture that might accumulate. It also provides a stable and consistent surface for fastening the wood planks, ensuring a straighter and more secure installation.
How often do I need to reapply the finish on thermally modified wood for covered patio walls?
The frequency of finish reapplication depends on the specific product used, the degree of exposure to indirect sunlight and humidity, and the type of finish. Generally, a clear oil or semi-transparent stain on a covered patio wall might need reapplication every 1-3 years. It's crucial to follow the finish manufacturer's instructions for maintenance and to monitor the wood's appearance for signs of wear or fading, indicating it's time for a refresh.
Ready to Enhance Your Covered Patio Walls?
Request a material quote with your project dimensions, desired profile, and ZIP code to confirm current availability and service options for thermally modified wood. Explore our selection of <a href="/thermally-modified-wood">thermally modified wood</a>, <a href="/siding-and-cladding">siding and cladding</a>, and <a href="/brands/norx">NORX products</a> to find the perfect fit for your project. Consider <a href="/products/maximo-accoya">Maximo Accoya</a> for alternative high-performance wood options.
Request a material quote →