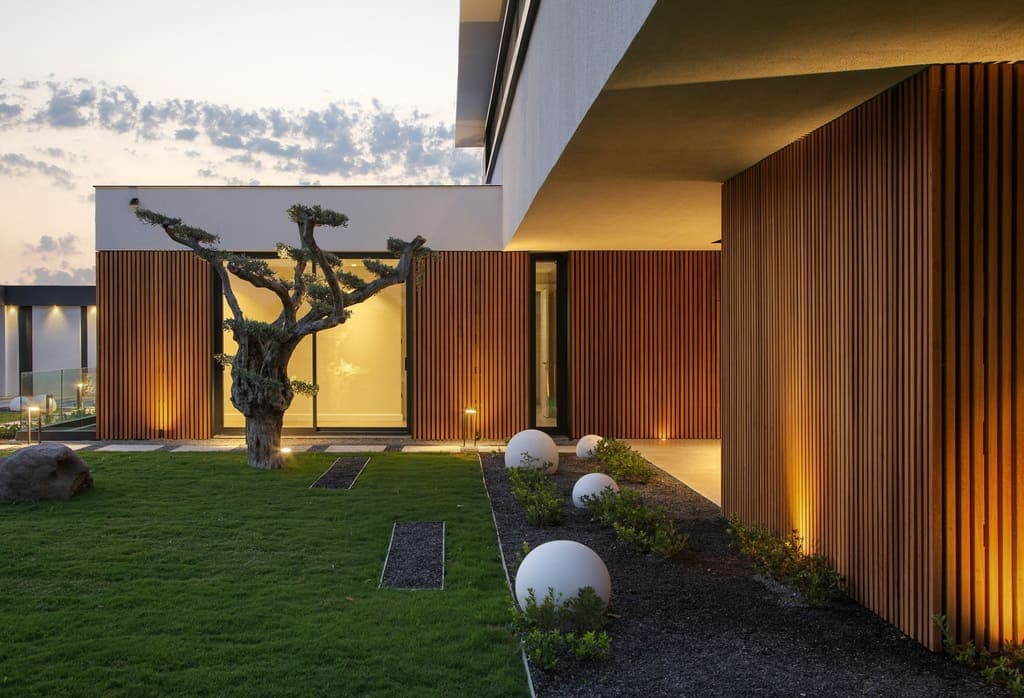
Understanding Thermally Modified Wood for Covered Applications
Thermally modified wood undergoes a high-heat treatment process that alters its cellular structure. This modification generally enhances its dimensional stability and can improve its resistance to decay. For covered patio walls, these properties are beneficial because they help the wood resist warping or cupping even with fluctuations in humidity and temperature.
While covered walls are shielded from direct rainfall and intense UV exposure, they still experience ambient humidity and temperature variations. The thermal modification process reduces the wood's ability to absorb moisture, which contributes to its stability in these environments. This can lead to a more consistent appearance over time compared to untreated wood, particularly when a consistent finish is desired.
Selecting Profiles and Species for Covered Walls
For covered patio walls, a range of thermally modified wood profiles can be considered. Common options include tongue-and-groove, shiplap, and square-edge profiles. Tongue-and-groove profiles create a tight, interlocking fit, offering a clean, continuous surface that can be installed horizontally or vertically. Shiplap profiles provide a distinctive shadow line, adding visual depth to the wall.
Square-edge profiles can be used for a more contemporary, minimalist look, often installed with a small gap to create a reveal. The choice of profile can significantly impact the final aesthetic. Thermally modified wood is available in various species, such as Ash or Pine. Each species may offer different grain patterns and natural coloration, which can be enhanced or altered with finishes. For specific profiles, refer to product lines like the NORX series, which offers thermally modified Ash and Pine options, or consider the Maximo Accoya line for enhanced durability. For other siding and cladding options, visit our selection at /siding-and-cladding.
Finishing and Appearance Options
One of the advantages of using thermally modified wood on covered patio walls is the flexibility it offers in finishing. While the wood can be left unfinished to gradually weather to a silver-gray patina, applying a finish can help preserve its initial color or introduce a desired hue. Since these walls are covered, the finish is less exposed to the harshest elements, potentially extending its lifespan.
Clear protective oils or stains can deepen the wood's natural tones, while semi-transparent or opaque stains offer color customization. It is important to choose finishes that are suitable for exterior wood applications and follow manufacturer recommendations for application and reapplication intervals. Regular cleaning and maintenance can help maintain the appearance of the finished surface.
Installation Considerations for Covered Patio Walls
Proper installation is crucial for the longevity and appearance of thermally modified wood on covered patio walls. While the wood is dimensionally stable, it still requires appropriate fastening and a suitable substrate. Ensure the underlying structure is sound, plumb, and level. Fasteners should be corrosion-resistant and sized correctly for the chosen profile and wood thickness. Hidden fastening systems are often preferred for a cleaner look, especially with tongue-and-groove or shiplap profiles.
Allow for adequate ventilation behind the cladding, even in covered areas, to prevent moisture buildup. A small air gap, often created with furring strips, can promote airflow and help manage any condensation. Always refer to the specific product's installation guidelines, as requirements can vary by profile and manufacturer. For comprehensive information on fastening and substructure, consult general siding and cladding resources.
Project Example: A Saint Paul Covered Patio Wall
Consider a Saint Paul homeowner planning to enclose a 12-foot wide by 8-foot high section of their existing covered patio with thermally modified wood walls. They desire a modern, clean aesthetic and choose a thermally modified Ash shiplap profile, with individual boards measuring 5.5 inches wide (nominal) by 12 feet long, with an effective coverage width of 5 inches per board once the overlap is accounted for.
To calculate the number of boards needed: The wall area is 12 feet (width) x 8 feet (height) = 96 square feet. The effective coverage of one 12-foot board is 5 inches / 12 inches/foot * 12 feet = 5 square feet. Therefore, 96 square feet / 5 square feet/board = 19.2 boards. Accounting for cuts and potential waste, it would be prudent to order 20-22 boards. This calculation does not include any specific waste factors for complex cuts or miscuts; a typical waste factor of 10-15% is often recommended for such projects. The homeowner plans to apply a clear, UV-resistant oil finish to highlight the natural grain of the Ash.
The installation will involve vertical furring strips attached to the existing framing, creating a small air gap behind the shiplap. Stainless steel fasteners will be used to secure the shiplap boards through the overlap, ensuring a concealed fastening method. This approach provides a durable, aesthetically pleasing wall that complements the outdoor living space, while the covered setting helps protect the finish from the most extreme Saint Paul weather.
Before you order
- Determine the exact dimensions of the covered patio walls requiring cladding.
- Select the desired thermally modified wood species (e.g., Ash, Pine) and profile (e.g., tongue-and-groove, shiplap, square-edge).
- Decide on the finish: unfinished for natural weathering, or a protective oil/stain for color retention or enhancement.
- Verify the existing substrate's condition and plan for any necessary furring strips or moisture management.
- Choose appropriate corrosion-resistant fasteners and fastening method (e.g., concealed, face-fastened).
- Calculate the material quantity, including a reasonable waste factor for cuts and adjustments.
- Review manufacturer-specific installation guidelines for the chosen product.
Confirm installation details, approved uses and warranty terms in the current instructions for the exact product and profile. Your installer should verify the substrate, structure and applicable project requirements.
This is a planning guide for projects in Saint Paul, MN. Ask our team to confirm availability, delivery to your ZIP code and which branch can support your order.
Questions to help you decide
Can thermally modified wood be painted for covered patio walls?
Yes, thermally modified wood can be painted. However, many users choose stains or clear finishes to highlight the wood's natural grain and color, which is often a key reason for selecting this material. If painting, ensure the paint is suitable for exterior wood and follow the manufacturer's recommendations for primer and application.
How does the Saint Paul climate affect thermally modified wood on a covered patio?
While covered patio walls offer protection from direct rain and snow, they are still exposed to Saint Paul's seasonal temperature swings and humidity. Thermally modified wood's enhanced dimensional stability helps it resist warping or cracking due to these changes. The covered nature of the application can also extend the lifespan of any applied finishes by reducing direct UV and moisture exposure.
Is thermally modified wood suitable for both horizontal and vertical installation on covered patio walls?
Yes, thermally modified wood profiles are typically suitable for both horizontal and vertical installation on covered patio walls. The choice often depends on the desired aesthetic and the specific profile. For instance, horizontal installation can make a space feel wider, while vertical installation can make it appear taller. Always ensure proper fastening and support for either orientation.
Ready to Plan Your Thermally Modified Wood Patio Walls?
Request a material quote today by providing your project dimensions, desired profile, and ZIP code. Confirm current availability and service options for your Saint Paul, MN project.
Request a material quote →