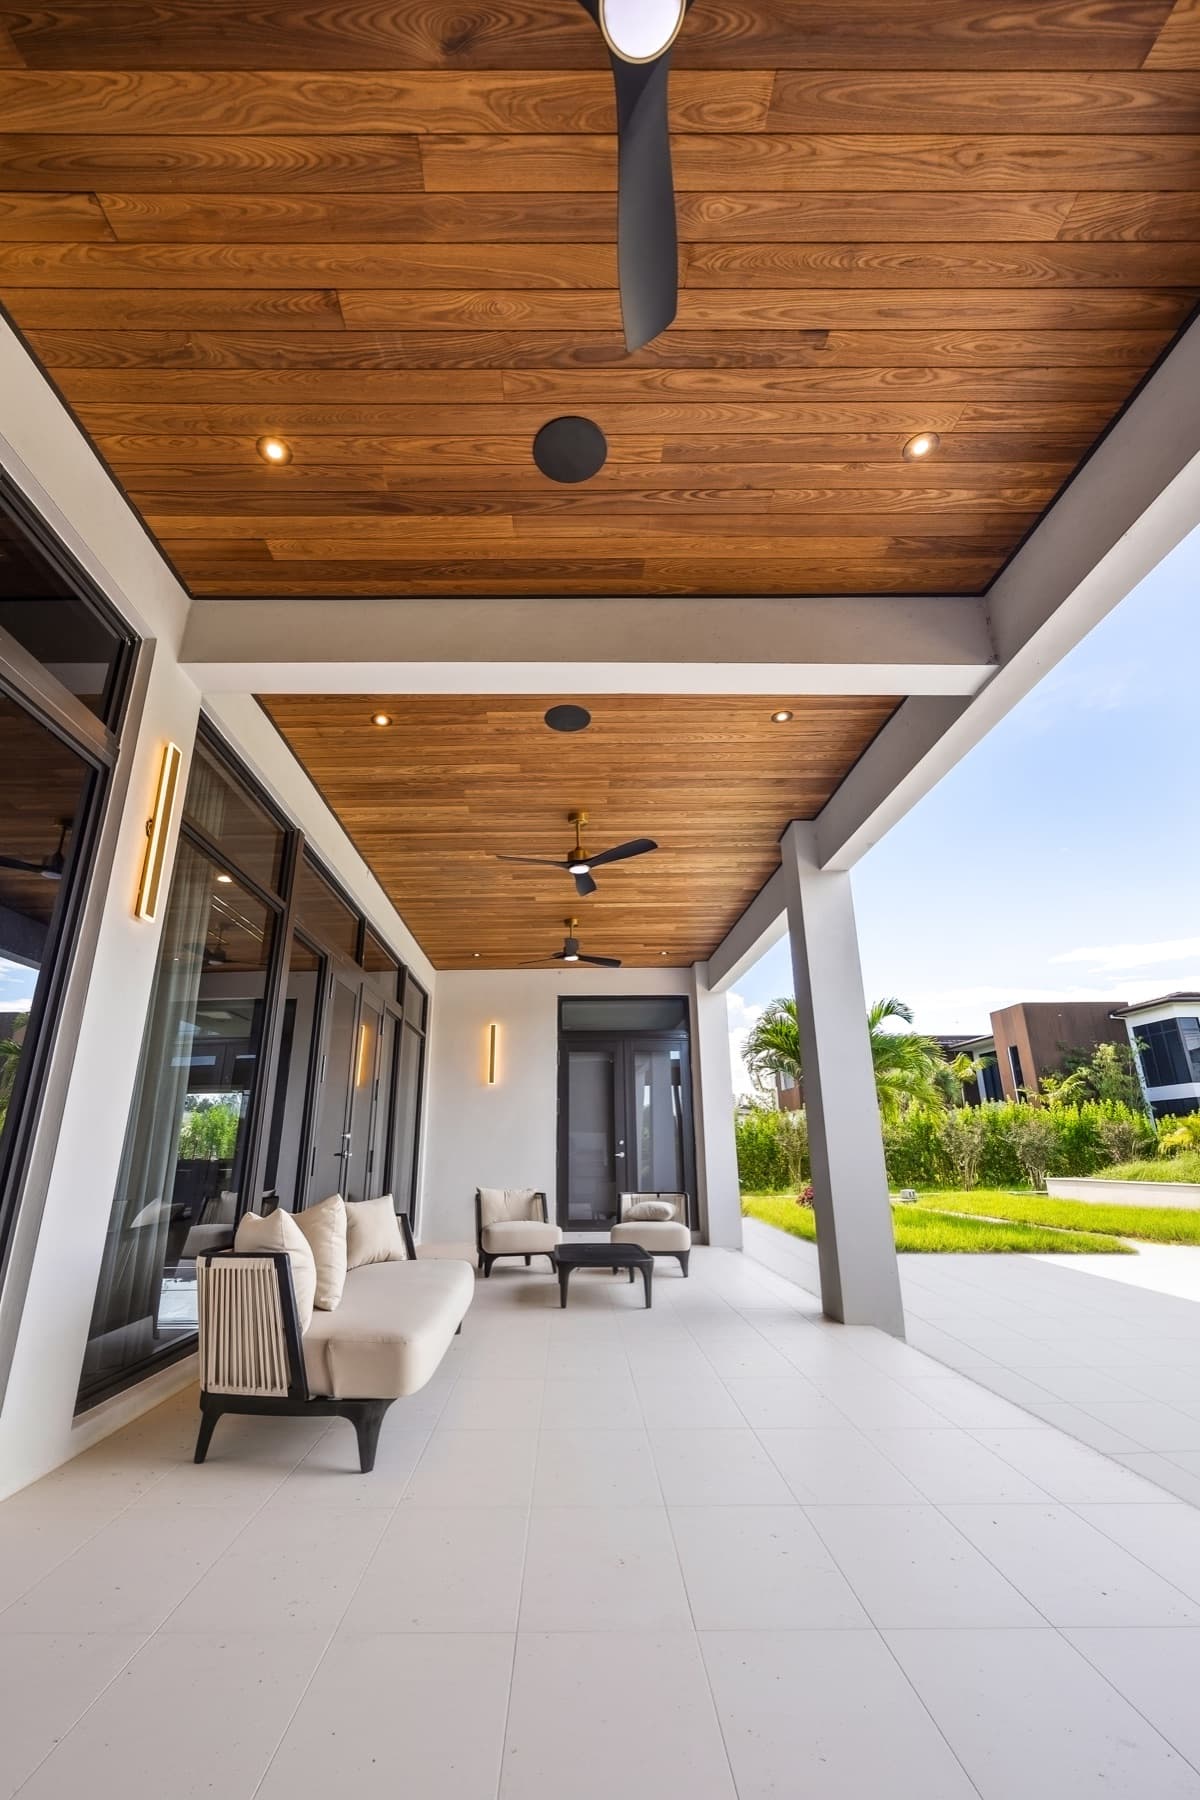
Why a Mock-Up is Essential for Ceiling and Soffit Materials
Imagine you've selected a beautiful thermally modified Ayous ceiling for a covered patio. You've seen samples, but they were small and viewed under showroom lights. When the full order arrives and is installed, the natural light filtering through your patio cover might make the wood appear different than anticipated. The grain might catch the light in an unexpected way, or the chosen finish might not harmonize with the surrounding elements as perfectly as you envisioned.
A mock-up addresses these uncertainties. It provides a real-world preview of how your chosen ceiling and soffit materials, such as Scandinavian thermally modified wood or Brazilian hardwoods, will look in situ. This is particularly important for areas like porches, lanais, and eaves where lighting conditions can vary significantly throughout the day and with different weather.
Beyond aesthetics, a mock-up helps verify practical aspects like board alignment, trim integration, and how seams will appear. It’s an opportunity to test installation techniques on a smaller scale, ensuring a smoother process for the full project. For instance, if you are considering a Maximo Accoya ceiling, a mock-up allows you to see how the acetylated wood responds to your chosen fasteners and how its unique character presents itself under actual conditions.
What to Include in Your Ceiling and Soffit Mock-Up
An effective mock-up should represent a small, yet complete, section of your planned ceiling or soffit. Aim for a size that is large enough to convey the overall impression but manageable enough to assemble and move. A section of approximately 3 feet by 3 feet is often sufficient for most residential applications.
Your mock-up should incorporate:
1. **Actual Ceiling/Soffit Boards:** Use the exact species and profile you intend to order, whether it's thermally modified Ash, Ipe, Cumaru, or Norx composite boards. Include enough boards to show typical grain variation and how they lay together.
2. **Planned Finish/Coating:** If you plan to apply a finish, stain, or paint, apply it to the mock-up boards exactly as you would for the final project. This is critical for assessing color and sheen under actual lighting.
3. **Trim and Edge Details:** Include any planned perimeter trims, fascia, or corner pieces. This helps visualize how the ceiling material transitions to adjacent surfaces or finishes at the edges.
4. **Lighting Fixtures (Optional but Recommended):** If you are integrating recessed lights, surface-mount fixtures, or ceiling fans, consider including a representation of these. Even a simple temporary light fixture can reveal how light interacts with the material's texture and color.
5. **Seam Treatment:** If your design requires boards to be joined end-to-end, simulate a typical seam to see how visible it will be and if it meets your aesthetic expectations.
6. **Substrate/Support (Optional):** While not always necessary, if your ceiling material will be installed over a specific type of substrate or support system, incorporating a small section can help confirm compatibility and appearance.
Evaluating Your Mock-Up: Key Considerations
Once assembled, place your mock-up in the actual location where the ceiling or soffit will be installed. Observe it at different times of day and under various lighting conditions. Here are the key aspects to evaluate:
**Aesthetic Appeal:** Does the material, color, and finish meet your visual expectations? Does it complement the surrounding architecture and other materials? For instance, a deep brown soffit intended to match a deck might appear differently in shaded areas versus direct light.
**Light Interaction:** How does natural and artificial light reflect off the surface? Does it create desired shadows or highlights? A clean grain material like thermally modified Ash might have a distinct appearance under various light sources compared to a more rustic option.
**Trim and Seam Integration:** Do the trim pieces provide a clean, finished look? Are the seams between boards acceptable in terms of visibility and alignment? This is crucial for achieving a polished final appearance.
**Scale and Proportion:** Does the board width and length feel appropriate for the space? A golden ceiling of Garapa boards might brighten a room, but the scale of the boards should also feel balanced.
**Material Compatibility:** If you're using different materials in conjunction (e.g., wood boards with composite trim), confirm they work well together visually and structurally.
Worked Example: Patio Ceiling Mock-Up
Consider a homeowner planning a 12-foot by 16-foot covered patio ceiling using thermally modified Ayous boards (available in 5.5-inch nominal width, 12-foot lengths). The design includes recessed lighting and a simple perimeter trim.
**Mock-Up Plan:** The homeowner decides on a 4-foot by 4-foot mock-up section. This will allow for 8 boards (48 inches / 5.5 inches per board = ~8.7 boards, so 9 boards for cuts) across the width and enough length to show a full board and a cut section.
**Materials for Mock-Up:**
* Ten 4-foot lengths of thermally modified Ayous (to allow for cuts and a small offcut reserve).
* One 4-foot length of the chosen perimeter trim.
* A small section of plywood or framing to simulate the underlying support.
* One recessed light fixture, temporarily wired for observation.
**Assembly and Evaluation:** The mock-up is assembled and placed on sawhorses under the actual patio cover. The homeowner observes it over several days, noting how the Ayous's character changes with morning, midday, and evening light. They confirm the trim provides the desired finish and that the recessed light creates an appealing glow without harsh reflections. They also test a small section of a planned stain on an offcut.
This process helps them confidently finalize their material selection and order the correct quantity of <a href="/ceiling-and-soffit">Ceiling and Soffit Materials</a>.
Beyond the Mock-Up: Complementary Products and Planning
While a mock-up focuses on visual and practical verification, consider these complementary products and planning steps for a complete project:
**Versatex Trim:** For durable, low-maintenance trim and fascia that complements various ceiling and soffit materials, explore <a href="/brands/versatex">Versatex</a> PVC trim. It can be painted to match or contrast with your chosen ceiling boards.
**Thermally Modified Wood:** If you're drawn to the stability and natural beauty of wood, delve deeper into <a href="/thermally-modified-wood">Thermally Modified Wood</a> options like Ash or Ayous for your ceiling and soffit applications.
**Fasteners:** Ensure you select fasteners compatible with your chosen material and installation method. Confirming proper fastening on your mock-up can prevent issues during the full installation.
**Ventilation:** For soffit applications, remember to integrate proper ventilation where required by local building practices. Your mock-up can help visualize how vented panels or grilles will integrate with the overall design.
Before you order
- Determine the mock-up size (e.g., 3'x3' or 4'x4') sufficient to represent the final look.
- Obtain samples of the exact ceiling/soffit boards, finish, and trim.
- Assemble the mock-up in the actual project location.
- Observe the mock-up at different times of day and under various lighting conditions.
- Evaluate the material's appearance, light interaction, trim integration, and seam visibility.
- Confirm the mock-up meets your aesthetic and functional expectations before ordering.
- Consider integrating a temporary lighting fixture into the mock-up if applicable.
Confirm installation details, approved uses and warranty terms in the current instructions for the exact product and profile. Your installer should verify the substrate, structure and applicable project requirements.
Questions to help you decide
How large should my mock-up be?
A mock-up of approximately 3 feet by 3 feet, or 4 feet by 4 feet, is often sufficient for most residential ceiling and soffit projects. The goal is to have enough material to see the pattern, grain variation, and how boards join, without being too cumbersome to handle.
Do I need to include lighting in my mock-up?
While optional, including a representation of your planned lighting (even a temporarily wired fixture) is highly recommended. Lighting significantly impacts how materials appear, and seeing this interaction firsthand can be invaluable for confirming your design choices.
What if my ceiling material requires a special installation system?
If your chosen ceiling or soffit material, such as specific composite panels or a unique wood profile, requires a particular installation system, try to incorporate a small section of that system into your mock-up. This helps confirm both the visual outcome and the practical aspects of assembly.
Ready to Plan Your Ceiling or Soffit Project?
Request a material quote with your project dimensions, exact profile, and ZIP code. Confirm current availability and service options to get started.
Request a material quote →