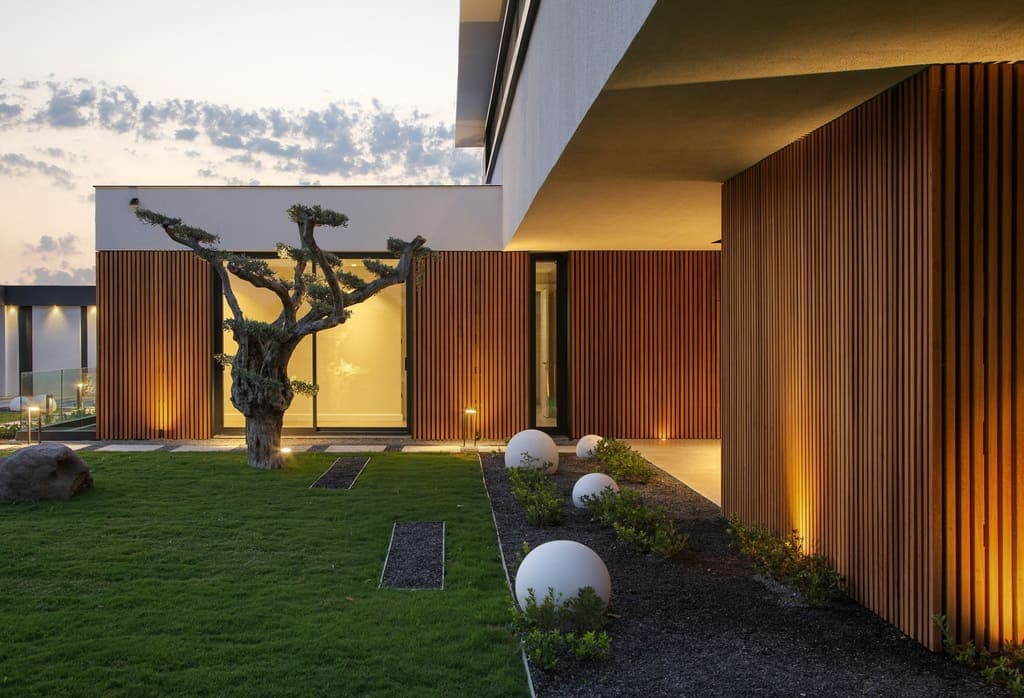
Understanding Thermally Modified Wood for Wall Applications
Thermally modified wood undergoes a high-heat treatment process that alters its cellular structure. This process aims to enhance the wood's stability and resistance to moisture absorption, making it less prone to warping, shrinking, or swelling compared to untreated wood. For covered patio walls, this increased dimensional stability is a significant advantage, helping to maintain a consistent appearance over time.
While thermally modified wood is often considered for fully exposed siding, its properties are also well-suited for more sheltered applications like covered patio walls. The reduced moisture movement contributes to the longevity of finishes and helps prevent issues such as cupping or bowing that can affect the visual continuity of a wall surface.
It's important to note that thermal modification changes the wood's color to a darker, more uniform tone, often resembling exotic hardwoods. This color can deepen further with an oil finish or naturally weather to a silver-gray if left unfinished and exposed to UV light, even in a covered setting.
Selecting Profiles for Covered Patio Walls
The choice of profile significantly impacts the aesthetic and installation of your covered patio walls. For this application, common profiles include tongue and groove, shiplap, and square-edge boards. Each offers a distinct look and installation method:
Tongue and Groove (T&G): This profile creates a tight, interlocking joint, often preferred for a smooth, continuous surface. The hidden fasteners possible with some T&G profiles contribute to a clean aesthetic. T&G boards are effective at minimizing visible gaps and can be installed horizontally, vertically, or diagonally.
Shiplap: Shiplap boards feature an overlapping rabbet joint that creates a distinct shadow line between boards. This profile offers a more traditional or rustic appearance and can also conceal fasteners. The overlap helps shed any incidental moisture.
Square Edge: Square-edge boards, sometimes referred to as 'nickel gap' when installed with a small, consistent space, offer a minimalist and modern look. This profile requires precise installation to maintain consistent spacing and typically uses visible fasteners. For covered applications, the absence of a direct rainscreen is less critical than for fully exposed walls.
When selecting a profile, consider the overall design of your patio and the desired visual effect. Wider boards can create a sense of scale, while narrower boards might offer a more intricate pattern. Lumber Plus offers various profiles, including our NORX Thermally Modified Wood, which can be specified in different dimensions for wall applications.
Link: "/siding-and-cladding"
Finishing and Appearance Options
While thermally modified wood can be left unfinished to weather naturally to a silver-gray patina, applying a finish can help preserve its initial color, enhance its appearance, and offer additional protection. For covered patio walls, the choice of finish often focuses on UV protection and aesthetic enhancement, as direct weather exposure is limited.
Oil-Based Finishes: Penetrating oil finishes are a popular choice for thermally modified wood. They nourish the wood, enhance its natural color, and provide UV protection. These finishes typically need reapplication every few years, depending on the product and exposure to indirect sunlight.
Water-Based Finishes: Some water-based stains and sealers are also suitable, offering various color options and levels of sheen. These can provide a durable surface layer and may require less frequent maintenance than oils, though their appearance can differ.
Unfinished: If you prefer the natural aging process, thermally modified wood will gradually develop a silver-gray patina. Even in covered areas, indirect UV light will contribute to this change. This option requires the least maintenance in terms of reapplication but will result in a color transformation.
Consider the desired aesthetic for your covered patio. Do you want to maintain a rich, warm tone, or embrace the weathered look? The level of maintenance you are willing to commit to will also influence this decision.
Attachment and Substructure for Covered Walls
Proper attachment and a sound substructure are crucial for the long-term performance of your thermally modified wood walls. Even in a covered environment, the wall cladding needs to be securely fastened to prevent movement and ensure structural integrity.
Substructure: The wall cladding should be installed over a stable substructure, typically consisting of wood studs or furring strips. For covered patio walls, ensure that the substructure is plumb, level, and adequately spaced to support the chosen profile. Standard framing practices apply, with studs typically spaced 16 or 24 inches on center.
Fasteners: The type of fastener depends on the profile and desired aesthetic. Hidden fasteners, such as clips or blind nailing, are often preferred for tongue and groove or shiplap profiles to create a clean, uninterrupted surface. For square-edge boards, face fastening with corrosion-resistant screws or nails is common. Always use fasteners made from stainless steel or other corrosion-resistant materials to prevent staining and ensure durability.
Ventilation: While a full rainscreen assembly might not be strictly necessary for covered patio walls, some air circulation behind the cladding is beneficial. This helps to equalize moisture content and prevent moisture buildup, especially in humid conditions. Using furring strips can naturally create a small air gap.
Ensure that all fasteners are installed according to manufacturer recommendations for the specific thermally modified wood product and profile you select. This includes considerations for expansion and contraction, though the enhanced stability of thermally modified wood reduces these movements compared to untreated timber.
Link: "/brands/norx"
Project Example: Covered Patio Wall in Milwaukee, WI
Let's consider a hypothetical covered patio in Milwaukee, WI, where the homeowners want to clad one interior wall of their patio with thermally modified wood. The wall measures 12 feet wide by 8 feet high. They choose a NORX Thermally Modified Spruce shiplap profile, 5.5 inches wide (nominal, with 5 inches of exposed face) and available in 12-foot lengths.
Wall Area Calculation: 12 feet (width) x 8 feet (height) = 96 square feet.
Board Coverage: Each 12-foot board has an exposed face of 5 inches (0.4167 feet). So, one board covers 12 feet x 0.4167 feet = 5 square feet.
Number of Boards Needed: 96 square feet / 5 square feet per board = 19.2 boards. Accounting for cuts, waste, and a small buffer, ordering 21-22 boards would be a reasonable estimate. This allows for trimming around potential windows or doors, or for any accidental damage during installation.
Substructure: The existing wall framing consists of vertical studs spaced 16 inches on center. The shiplap boards will be installed horizontally, fastened into each stud. Stainless steel trim head screws will be used to face-fasten the boards, ensuring they are driven into the overlap to minimize visibility.
Finish: The homeowners selected a transparent oil-based finish to enhance the wood's rich, darker tone and provide UV protection from indirect sunlight. This finish will be applied before installation and then a touch-up coat after installation if needed.
This example illustrates how to estimate material needs and plan for installation based on specific product dimensions and the project scope. Always confirm the exact exposed face width of your chosen profile for accurate calculations.
Link: "/products/maximo-accoya"
Before you order
- Confirm local building codes and any specific requirements for covered outdoor structures in Milwaukee, WI.
- Measure the precise dimensions (width and height) of all walls to be clad.
- Select a thermally modified wood profile (e.g., tongue and groove, shiplap, square edge) that suits your design aesthetic and installation preference.
- Determine the desired finish: natural weathering, oil-based, or water-based stain/sealer.
- Verify the existing substructure (studs/furring) is sound, plumb, and adequately spaced for the chosen cladding.
- Choose appropriate corrosion-resistant fasteners (stainless steel recommended) for your selected profile and installation method.
- Consider the need for any air gap or ventilation behind the cladding, even in a covered setting.
- Calculate the quantity of material needed, including an allowance for cuts and waste (typically 10-15%).
- Plan for delivery, storage, and handling of materials on site.
- Consult with a contractor or installer if you are not performing the installation yourself.
Confirm installation details, approved uses and warranty terms in the current instructions for the exact product and profile. Your installer should verify the substrate, structure and applicable project requirements.
This is a planning guide for projects in Milwaukee, WI. Ask our team to confirm availability, delivery to your ZIP code and which branch can support your order.
Questions to help you decide
Can thermally modified wood be used for exterior walls that are not covered?
Yes, thermally modified wood is commonly used for fully exposed exterior siding and cladding due to its enhanced dimensional stability and resistance to moisture. The thermal modification process makes it suitable for demanding outdoor conditions, though a rainscreen assembly is often recommended for full exposure.
Does thermally modified wood require maintenance?
The level of maintenance depends on whether you apply a finish. If left unfinished, thermally modified wood will naturally weather to a silver-gray patina and requires minimal maintenance beyond occasional cleaning. If a finish (like an oil or stain) is applied, it will require periodic reapplication to maintain its color and protective qualities, typically every 1-3 years depending on the product and exposure.
What is the typical lifespan of thermally modified wood for covered patio walls?
While we cannot provide specific lifespan claims, the thermal modification process enhances the wood's durability and resistance to decay, which can contribute to a longer service life compared to untreated wood in similar applications. For covered patio walls, protected from the harshest elements, it is expected to perform well over many years, especially with proper installation and chosen finish.
Ready to Plan Your Covered Patio Walls?
Request a material quote with your project dimensions, desired profile, and ZIP code to confirm current availability and service options for thermally modified wood. Our team can assist you in selecting the right products for your Milwaukee, WI project. Link: "/contact-us"
Request a material quote →