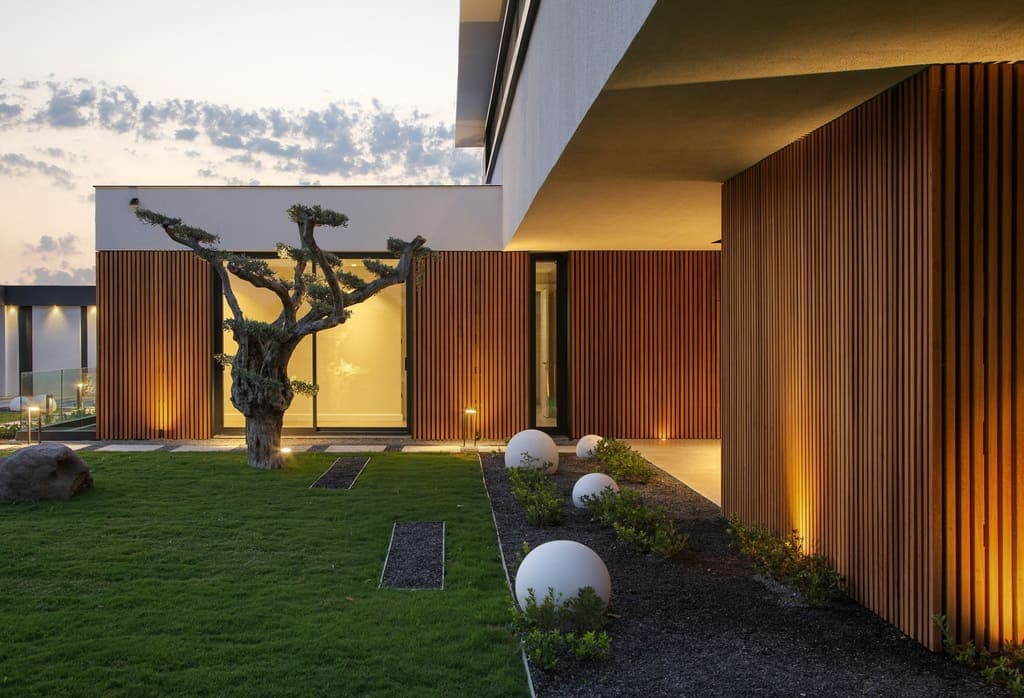
Understanding Thermally Modified Wood for Walls
Thermally modified wood undergoes a high-heat treatment process that alters its cellular structure. This modification can enhance the wood's stability and resistance to certain environmental factors, making it a suitable material for various applications, including covered patio walls. Unlike fully exposed siding, covered patio walls typically experience less direct precipitation and UV radiation, which can influence material selection and finishing choices.
The thermal modification process can result in a material that is less prone to expansion and contraction compared to untreated wood, which can be an advantage in wall applications where dimensional stability is valued. This stability can contribute to maintaining the appearance of the wall over time, reducing the likelihood of significant gaps or warping when properly installed. The wood also develops a distinct, often darker, color tone throughout the modification process, which can be a desirable aesthetic for many outdoor designs.
Profiles and Aesthetics for Covered Patio Walls
Thermally modified wood is available in various profiles, each offering a different visual effect. Common options include tongue-and-groove, shiplap, and square-edge boards. The choice of profile impacts the shadow lines, overall texture, and design aesthetic of your covered patio walls.
Tongue-and-groove profiles create a tight, interlocking fit, often resulting in a smooth, continuous surface. Shiplap profiles typically feature an overlapping joint, creating a distinct shadow line that can add depth and character. Square-edge boards, when installed with a gap, can create a more open, slatted appearance. Consider the desired architectural style of your patio and home when selecting a profile. The natural color variations and grain patterns of thermally modified wood can also contribute to the wall's overall visual appeal, offering a warm and inviting atmosphere.
For a contemporary look, a clean-lined shiplap or a narrow tongue-and-groove profile might be preferred. If a more rustic or traditional feel is desired, wider boards or a profile with a more pronounced shadow line could be suitable. The direction of installation (horizontal or vertical) also plays a significant role in the final aesthetic. Vertical installation can emphasize height, while horizontal installation can make a space feel wider.
Finishing and Maintenance for Protected Environments
While thermally modified wood is often chosen for its enhanced stability, finishing is still a crucial consideration, even for covered patio walls. A finish can protect the wood from UV degradation, help maintain its color, and provide an additional layer of defense against moisture and dirt. Without a finish, thermally modified wood will naturally weather to a silvery-gray patina over time, a process that can occur even in covered areas due to ambient light.
For covered patio walls, a clear sealant or a semi-transparent stain can be applied. A clear finish allows the natural color and grain of the wood to show through, while a stain can introduce a specific color tone. When selecting a finish, consider its compatibility with thermally modified wood and its suitability for outdoor, semi-protected use. Always follow the manufacturer's recommendations for application and reapplication.
Maintenance for covered patio walls typically involves periodic cleaning to remove dust, pollen, and any mildew that might form in humid conditions. A mild soap and water solution with a soft brush or cloth is often sufficient. Regular inspection for any signs of wear on the finish or wood can help address issues proactively and extend the life of your wall.
Installation Considerations for Covered Patio Walls
Proper installation is essential for the longevity and appearance of thermally modified wood walls. The substructure must be sound, level, and provide adequate fastening points. Typically, furring strips or a similar strapping system are installed over the existing wall structure to create a flat plane and allow for air circulation behind the wood. This air gap can help manage moisture and promote drying.
Fastening methods should be chosen based on the profile of the wood and the desired aesthetic. Face fastening, where fasteners are visible, is common and provides a strong hold. Hidden fastening systems, such as clips or specialized screws, can create a cleaner, fastener-free appearance. Always use corrosion-resistant fasteners, such as stainless steel, to prevent staining of the wood. Ensure that fasteners are properly sized and spaced according to product guidelines.
Adequate spacing between boards, even if small, is often recommended to allow for minor wood movement. Refer to the specific product's installation instructions for recommended gaps. For covered patio walls, consider how the wall meets adjacent surfaces like floors, ceilings, and other wall materials. Proper flashing and sealing at these junctions can help prevent water intrusion, even in a covered environment. Ensure that the bottom edge of the wall has sufficient clearance from the patio floor to prevent moisture wicking.
Project Planning: A Hypothetical Example
Consider a hypothetical covered patio with two walls designated for thermally modified wood cladding. Wall A measures 12 feet long by 8 feet high, and Wall B measures 10 feet long by 8 feet high. The chosen material is a 1x6 (nominal size, actual coverage approximately 5.5 inches) thermally modified wood shiplap profile, installed horizontally.
First, calculate the total area: Wall A: 12 ft * 8 ft = 96 sq ft. Wall B: 10 ft * 8 ft = 80 sq ft. Total area = 96 + 80 = 176 sq ft. Next, determine the coverage per linear foot for the 5.5-inch actual width boards. Each board covers 5.5 inches / 12 inches/foot = 0.4583 feet of height. To cover 8 feet of height, you would need 8 ft / 0.4583 ft/board = 17.45 boards. Round up to 18 boards per vertical stack.
For Wall A (12 ft long), you would need 18 boards * 12 linear feet = 216 linear feet. For Wall B (10 ft long), you would need 18 boards * 10 linear feet = 180 linear feet. Total linear feet needed = 216 + 180 = 396 linear feet. It is prudent to add a waste factor, typically 10-15%, for cuts and potential imperfections. For this project, a 15% waste factor would mean 396 * 1.15 = 455.4 linear feet. You would then purchase in full board lengths available, such as 8, 10, or 12-foot sections, optimizing cuts to minimize waste. Always confirm actual board dimensions and coverage with the product specification before ordering.
Before you order
- Confirm the specific thermally modified wood species and profile are approved for vertical wall applications.
- Evaluate the level of exposure on the covered patio walls (e.g., direct sun exposure, wind-driven rain potential).
- Choose a finish (or decide on natural weathering) appropriate for semi-protected outdoor use and desired aesthetic.
- Plan the substructure (furring strips) for proper ventilation and fastening.
- Select corrosion-resistant fasteners suitable for the chosen profile and installation method.
- Determine the desired board orientation (horizontal or vertical) and its impact on material quantity and appearance.
- Consider how corners, edges, and transitions to other materials will be detailed.
- Account for potential wood movement by specifying appropriate gaps between boards.
- Verify local building practices and any applicable codes for outdoor wall cladding.
Confirm installation details, approved uses and warranty terms in the current instructions for the exact product and profile. Your installer should verify the substrate, structure and applicable project requirements.
This is a planning guide for projects in Atlantic City, NJ. Ask our team to confirm availability, delivery to your ZIP code and which branch can support your order.
Questions to help you decide
Can thermally modified wood be left unfinished on covered patio walls?
Yes, thermally modified wood can be left unfinished. It will naturally weather to a silvery-gray patina over time, even in covered areas, due to UV exposure. Applying a finish can help maintain its original color and offer additional protection against dirt and moisture, but it is not strictly required for the wood's structural integrity in a covered application.
How does the thermal modification process affect the wood's color?
The thermal modification process typically darkens the wood, giving it a richer, more uniform brown tone throughout the material. The exact shade can vary depending on the wood species and the specific modification process. This color is inherent to the wood and extends through its thickness, rather than being a surface treatment.
Are special tools required to install thermally modified wood on covered patio walls?
Generally, standard woodworking tools are sufficient for cutting and installing thermally modified wood. However, as with any wood product, sharp blades are recommended for clean cuts. Using appropriate safety gear, such as eye protection and dust masks, is always advised. For fastening, standard drills and drivers are typically used with the recommended corrosion-resistant screws or nails.
Request a Material Quote for Your Covered Patio Walls
Ready to enhance your outdoor living space with thermally modified wood? Provide your project dimensions, desired profile, and ZIP code to request a material quote. We can help you confirm current availability and service options for your project.
Request a material quote →