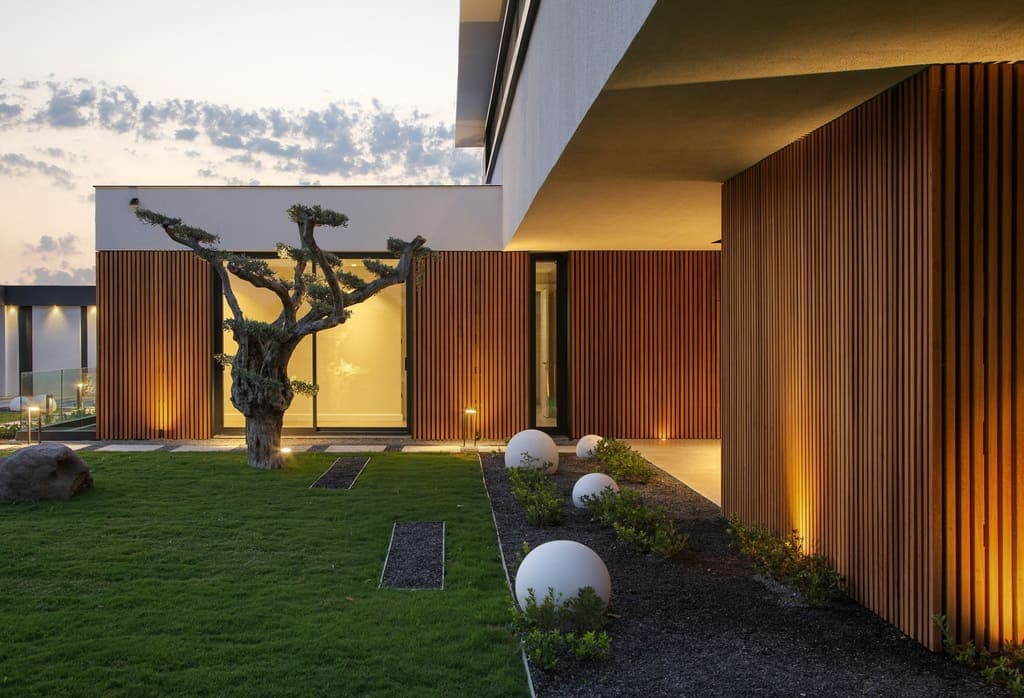
Understanding Thermally Modified Wood for Wall Applications
Thermally modified wood undergoes a high-temperature treatment process that fundamentally changes its properties. This process reduces the wood's moisture content, resulting in increased dimensional stability and a consistent color throughout the board. For covered patio walls, these characteristics are particularly beneficial.
The enhanced stability means the wood is less prone to expansion and contraction with changes in humidity, a common concern in climates with seasonal shifts like Grand Rapids. This can help maintain a consistent appearance and reduce stress on fasteners over time. The uniform color, often a rich brown, extends through the entire thickness of the board, meaning that minor scratches or cuts are less noticeable than with surface-treated materials.
While thermally modified wood is known for its improved resistance to decay and insects, its use on covered patio walls offers additional advantages. The sheltered location reduces direct exposure to rain and intense UV radiation, which can help preserve the wood's aesthetic over a longer period, especially if an initial finish is applied. This protection can also extend the maintenance cycle compared to fully exposed applications.
Selecting the Right Species and Profile
Thermally modified wood is available in various species, each offering unique grain patterns and characteristics. Popular options include Thermally Modified Pine and Thermally Modified Spruce. These species, once modified, share similar performance benefits but retain their distinct visual appeal.
Beyond species, the profile of the wood planks is a critical design decision. Common profiles suitable for covered patio walls include tongue-and-groove, shiplap, and square-edge. Tongue-and-groove profiles offer a tight, interlocking fit, creating a smooth, continuous surface with minimal gaps. Shiplap provides a distinctive shadow line, adding depth and texture to the wall. Square-edge boards can be installed with a visible gap for a more modern, open aesthetic, but careful consideration of the substructure and potential for moisture intrusion behind the boards is necessary for any outdoor application.
Consider the desired visual effect and the overall architectural style of your home and patio when choosing a profile. For a clean, contemporary look, a narrow tongue-and-groove or tight shiplap might be preferred. For a more rustic or textured feel, wider boards or a more pronounced shiplap reveal could be suitable. It is essential to confirm that the chosen profile is approved for vertical wall applications and compatible with the desired fastening method.
Design Considerations for Covered Patio Walls
When designing with thermally modified wood for covered patio walls, consider the orientation of the boards. Horizontal installation can make a space feel wider and more expansive, drawing the eye along the length of the patio. Vertical installation can create a sense of height, making the space feel taller and more formal. Diagonal patterns offer a dynamic, contemporary look but may require more complex cuts and increased material waste.
Lighting plays a significant role in highlighting the texture and color of the wood. Integrated LED strips or strategically placed uplighting can accentuate the grain and shadow lines of the chosen profile, especially during evening hours. Contrast with other materials, such as stone, stucco, or metal accents, can further enhance the design. A thermally modified wood wall can serve as a warm, natural counterpoint to cooler, harder surfaces.
Ventilation is also an important design factor, even for covered walls. While less exposed than exterior siding, ensuring adequate air circulation behind the wood can help prevent moisture buildup and promote longevity. This typically involves creating a rainscreen gap, even in a covered application, which allows air to move freely and any incidental moisture to drain away. Consult product-specific installation guidelines for recommended clearances and venting strategies.
Installation Planning and Fastening
Proper installation is crucial for the performance and appearance of thermally modified wood patio walls. Begin by ensuring the substructure is sound, level, and appropriately spaced to support the chosen profile. For vertical applications, horizontal furring strips are typically used, while vertical furring strips are needed for horizontal cladding. These furring strips also create the necessary air gap for ventilation.
Fastening methods depend on the chosen profile and desired aesthetic. Face fastening, where screws or nails are driven through the face of the board, offers a secure hold and a visible, often rustic, appearance. Hidden fastening systems, such as clips or fasteners designed for tongue-and-groove profiles, create a cleaner, uninterrupted surface. Always use stainless steel fasteners to prevent staining and corrosion, which can react with the wood over time. Pre-drilling pilot holes is often recommended to prevent splitting, especially near board ends.
Account for expansion and contraction. While thermally modified wood is more stable, it still experiences some movement. Leave appropriate expansion gaps at corners, around openings, and where the wood meets other materials. Follow manufacturer recommendations for spacing between boards and at ends to ensure proper performance and accommodate any natural movement.
Hypothetical Project Example: Covered Patio Wall in Grand Rapids
Consider a covered patio in Grand Rapids, MI, measuring 12 feet wide by 8 feet deep, with a back wall requiring thermally modified wood cladding. The wall section to be covered is 12 feet long and 8 feet high, totaling 96 square feet. The homeowner desires a modern aesthetic with horizontal lines and a hidden fastening system.
For this project, we select 5-inch wide (nominal) Thermally Modified Pine planks with a shiplap profile, designed for hidden fastening. Each plank is 16 feet long. To cover the 12-foot length, each plank will be cut once, yielding two 8-foot sections, minimizing waste.
Calculation: The wall area is 96 square feet. Assuming a net coverage of 4.5 inches per plank (after accounting for the shiplap overlap), each 8-foot section (96 inches) covers 4.5 inches * 96 inches = 432 square inches, or 3 square feet. To cover 96 square feet, approximately 32 planks are needed (96 sq ft / 3 sq ft per section = 32 sections). Since each 16-foot board yields two 8-foot sections, 16 full 16-foot planks would be purchased. This calculation assumes minimal waste and perfect cuts, and it's always prudent to order an additional 10-15% for cuts, waste, and future repairs. The substructure would consist of vertical furring strips spaced according to the plank width and local building practices, ensuring a rainscreen gap behind the cladding.
Finishing and Maintenance for Long-Term Appeal
Thermally modified wood naturally weathers to a silver-gray patina if left unfinished. For covered patio walls, where direct sun exposure is reduced, this weathering process may be slower and less uniform than on fully exposed surfaces. If maintaining the original rich brown color is desired, a UV-protective oil or stain specifically formulated for thermally modified wood should be applied. This finish will need periodic reapplication, with the frequency depending on the product used and the level of exposure, even in a covered setting.
Regular cleaning is generally straightforward. A soft brush or cloth with mild soap and water can remove dirt and grime. Avoid harsh chemicals or abrasive cleaners that could damage the wood or its finish. Inspect the walls periodically for any signs of wear, loose fasteners, or damage, and address them promptly.
Even in a covered environment, moisture can still be a factor. Ensure that gutters and downspouts effectively direct water away from the patio area. Proper drainage around the base of the wall is essential to prevent standing water. With thoughtful finishing and routine care, thermally modified wood covered patio walls can maintain their beauty and integrity for many years.
Before you order
- Confirm species and profile are approved for vertical wall applications.
- Determine desired board orientation (horizontal, vertical, diagonal).
- Plan for substructure and ventilation (rainscreen gap).
- Select appropriate stainless steel fasteners (face or hidden).
- Consider initial finish (oil, stain) or allow natural weathering.
- Account for expansion gaps at all edges and transitions.
- Verify compatibility with existing patio elements and materials.
- Calculate material quantities, adding 10-15% for waste and cuts.
Confirm installation details, approved uses and warranty terms in the current instructions for the exact product and profile. Your installer should verify the substrate, structure and applicable project requirements.
This is a planning guide for projects in Grand Rapids, MI. Ask our team to confirm availability, delivery to your ZIP code and which branch can support your order.
Questions to help you decide
Does thermally modified wood require a finish for covered patio walls?
No, a finish is not strictly required. Thermally modified wood will naturally weather to a silver-gray patina over time if left unfinished. However, applying a UV-protective oil or stain can help preserve its original rich brown color and provide an additional layer of protection against environmental factors, even in a covered setting.
Can I use thermally modified wood for structural support in my patio walls?
Thermally modified wood is typically used as a cladding or decorative surface material and is not designed for structural support. All structural elements of your patio walls should be constructed from appropriate load-bearing materials. The thermally modified wood is then attached to this structural substructure.
How do I clean thermally modified wood on covered patio walls?
For routine cleaning, use a soft brush or cloth with a solution of mild soap and water. Avoid using harsh chemicals, abrasive cleaners, or high-pressure washers, as these can damage the wood surface or its finish. Regular gentle cleaning helps maintain the wood's appearance.
Request a Material Quote for Your Grand Rapids Patio Project
Ready to enhance your covered patio walls with thermally modified wood? Provide your project dimensions, desired profile, and ZIP code to request a material quote. We can help confirm current availability and service options for your Grand Rapids, MI location. Visit our website to get started: /contact-us
Request a material quote →